Last Updated on March 4, 2024 by Tim Wells
Are you ready to step up your home entertainment game with Kodi and NVIDIA Shield, two giants of the media landscape?
Well, you’re in the right place! When Kodi’s powerful open-source media player merges with the muscle of NVIDIA Shield’s Android TV box, an array of mind-blowing media possibilities opens up.
Still, navigating setup and optimization can be a challenge, even if you’ve used them for years.
That’s where this guide comes in.
First, we’ll guide you step by step through installing Kodi onto your NVIDIA Shield.
Next, we’ll take a deep dive into the little tweaks and settings that unlock the full potential of Kodi on your NVIDIA Shield. We’ll discuss topics like color spaces, display modes, and the elusive advancedsettingsxml file.
Finally, we’ll arm you with a toolkit of troubleshooting solutions for common roadblocks.
So, are you ready to transform your Kodi and NVIDIA Shield from mere devices into a home entertainment powerhouse?
Let’s dive right in!
Kodi on NVIDIA Shield: Pros
The first thing you need to know is that there are a lot of benefits to using Kodi on your NVIDIA Shield. If you’re looking for high-quality streaming and 4K HDR content playback, this combo is a dream come true.
With Kodi on my NVIDIA Shield Pro, I always get smooth frame rates and zero judders.
If you want to run Plex or Emby servers, you can directly integrate them with Kodi on the same device. You don’t have to use a NAS or Windows PC on your network if you don’t want to.
My favorite feature of all is NVIDIA’s AI upscaling capability. With this, you can enhance the quality of lower-resolution content, giving new life to your old movies and TV shows.
Like most devices, the NVIDIA Shield allows you to use a VPN with Kodi. This gives you privacy protection and the ability to bypass those pesky geo-restrictions.
For better audio quality, you can connect your NVIDIA Shield to your sound bar or receiver. While Kodi’s native refresh rate switching and deinterlacing will ensure your content always looks its best.
Even if you don’t have an HDR display, you can still enjoy HDR content thanks to Kodi’s native HDR tone mapping.
Kodi on NVIDIA Shield: Potential Issues
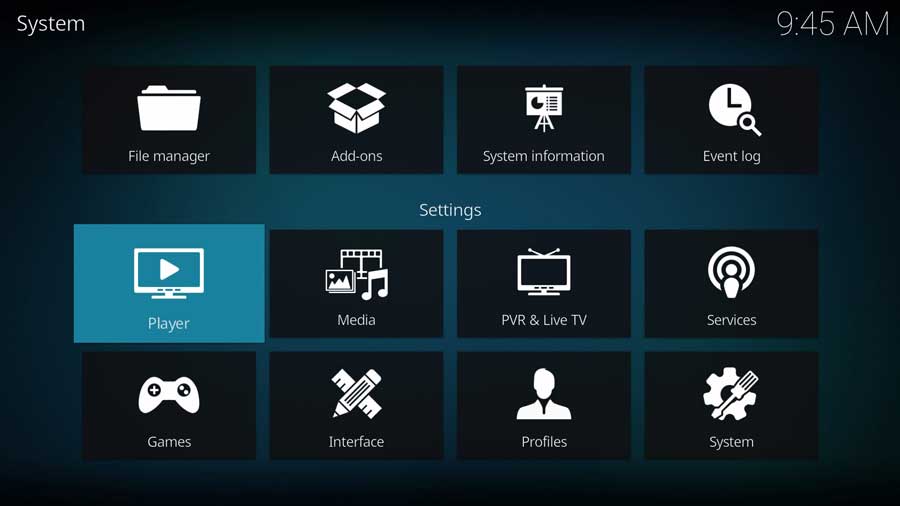
Unfortunately, it’s not always smooth sailing. Let’s discuss some of the challenges of using Kodi on the NVIDIA Shield.
Like many people, I’ve experienced audio and video issues with DTS-HD, TrueHD, Dolby Vision, HDR10+, or 3D formats.
Other users have encountered occasional lag and unresponsiveness with the stock remote using CEC. Others have network connectivity or buffering problems, especially wireless or VPN connections.
Finally, setting up advanced features like Plex integration or Emby server can be tricky, often requiring additional steps or apps.
A few features are found on other platforms, like DVD menus, PVR, or game emulators, that the NVIDIA Shield doesn’t support. However, this shouldn’t be a deal-breaker, given its versatility and performance.
Finally, finding the best whitelist settings for Kodi to match your content and display without changing the resolution can be a bit of a hassle.
But I’ll be honest. It’s worth it when you finally hit that sweet spot.
How to Install Kodi on Your NVIDIA Shield TV
In this section, we’ll cover how to get Kodi on your NVIDIA Shield.
There are two ways to install Kodi: from the Google Play Store and Sideloading from the official Kodi website.
Installing Kodi from the Google Play Store
Without a doubt, the easiest method to install Kodi is from the Google Play Store. Even though it’s a simple process, we’ll briefly cover the steps here:
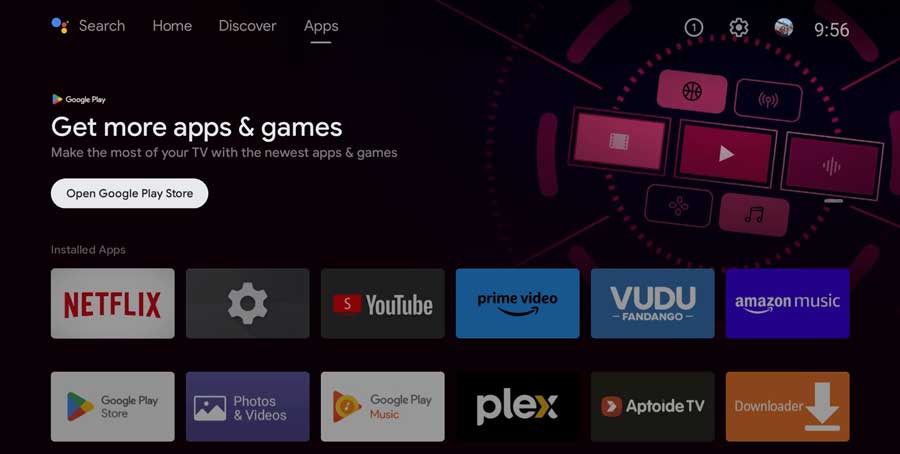
Turn on your NVIDIA Shield and navigate to the Apps Tab.
Under “Get More Apps & Games,” click the button to Open the Google Play Store. Alternatively, you can also click on the icon under Installed Apps. You’ll need to sign in to your Google account if you haven’t done so already.
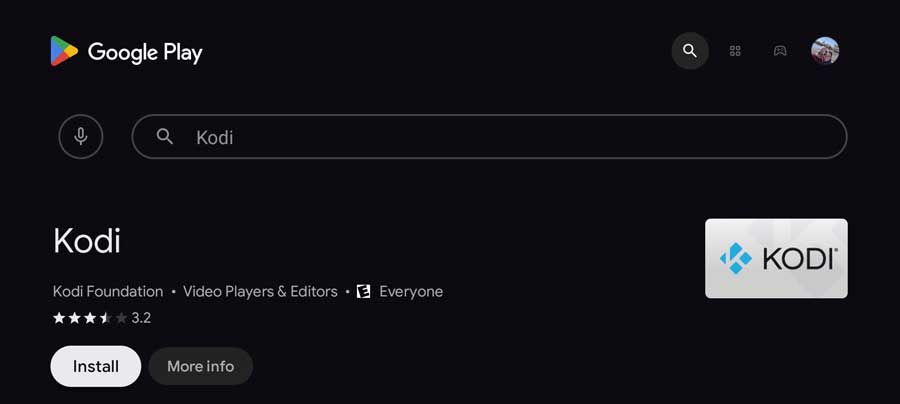
Use the search bar to search for “Kodi.”
Once you’ve found it, click on the “Install” button.
Wait for the installation process to finish. This may take a few minutes.
You can open Kodi directly from this screen, or you’ll find it in your NVIDIA Shield’s list of apps when the installation is complete.

When you launch Kodi for the first time, you’ll need to give it certain permissions so it has access to your device.
Click Continue.
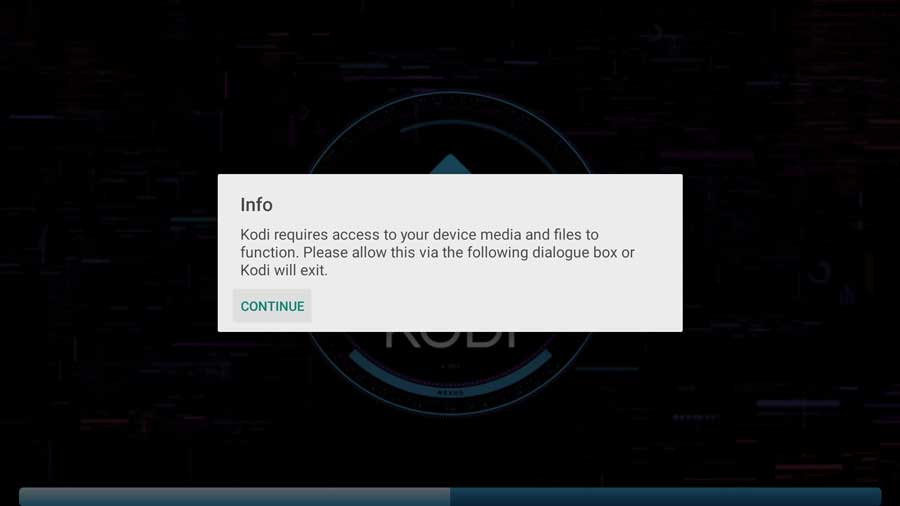
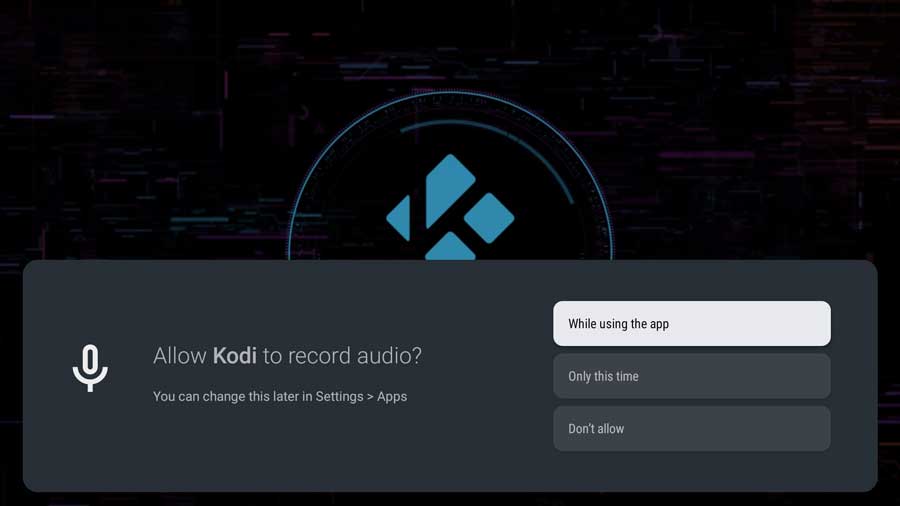
The first permission request is for Kodi to record audio. By giving Kodi this permission, you can enable voice commands like searching for content, play\pause, and volume controls.
Click While Using the App to continue.
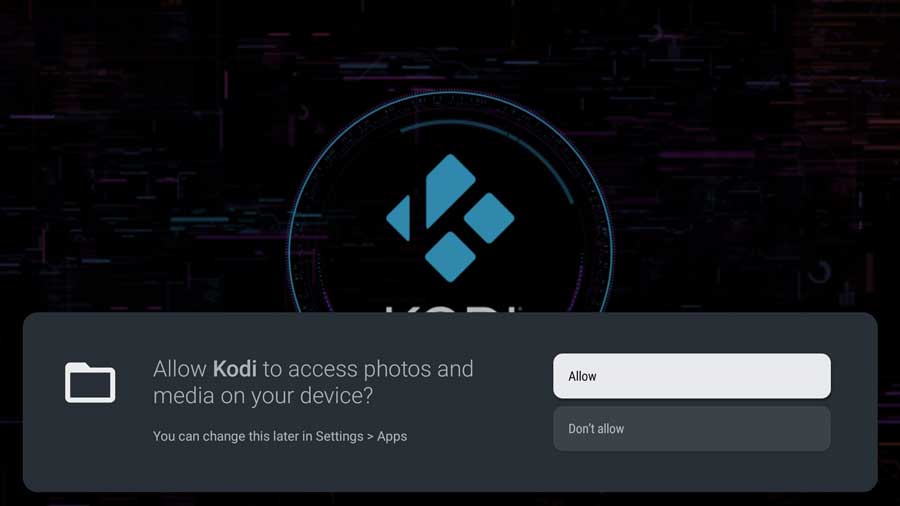
Next, Kodi requests access to photos and media on your device. Kodi is a media player, so it needs this to find TV shows and movies on your device and play them.
Click Allow to continue.
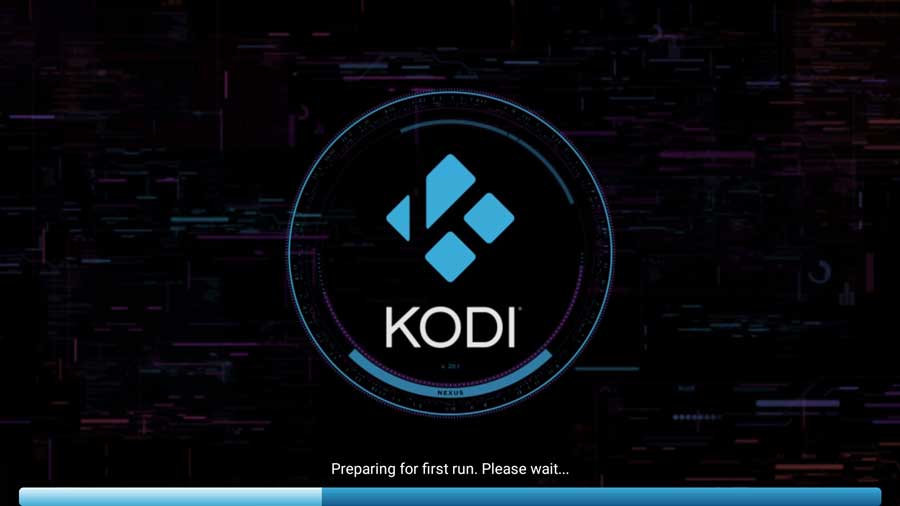
Next, Kodi displays a message telling you its Preparing for first run. Please wait…
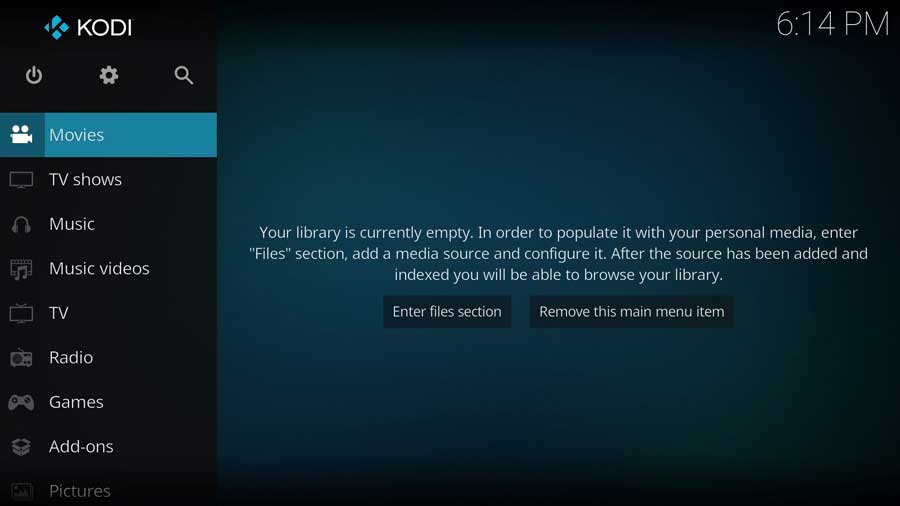
After a few seconds, you’re taken to the main menu.
Sideloading Kodi from the Official Website
While the Google Play method is incredibly straightforward, there are instances when you might need to sideload Kodi from their official website.
The most common is to get the latest and greatest version of Kodi as soon as it’s available. Often, new versions are available immediately on Kodi’s website but take a few days to filter down into the Google Play Store.
You can find a detailed guide in my article on how to sideload Kodi.
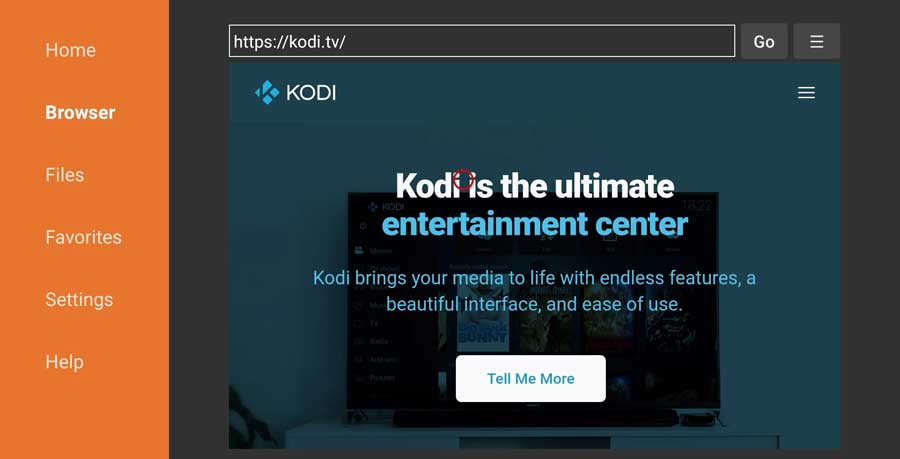
Maintaining Kodi on your NVIDIA Shield is just as important as installing it. Keeping your Kodi app updated ensures you always get the best streaming experience. Need some help with that? Check out my article on how to update Kodi.
Finally, if you decide to part ways with Kodi (or any other app, for that matter), I’ve got you covered. My guide on uninstalling Android TV apps will walk you through the process.
Setting Up Kodi on NVIDIA Shield: Settings & Hacks
Okay, now that we’ve got Kodi installed on your NVIDIA Shield, it’s time to optimize your setup for the best performance.
I’ll assume you’re already familiar with Kodi’s basic features. This section will focus on the specific NVIDIA Shield tweaks and hacks that will make your streaming experience the best it can be.
Tweaking the Audio and Video Settings
First, you’ll want to adjust your audio and video settings to match your TV and sound system to achieve the best possible audio-visual performance with your Kodi setup.
Here’s how you do it:
Go to Settings > Player > Videos and scroll down to the Playback section.
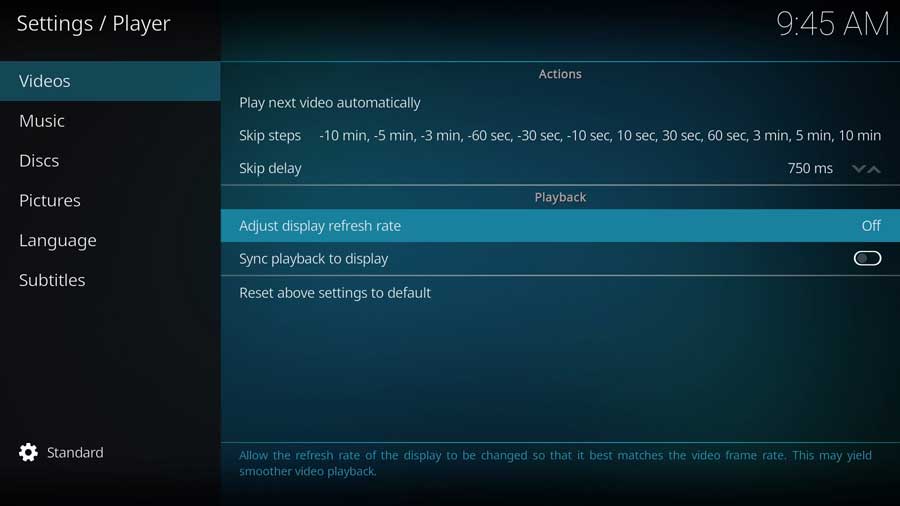
Click on the Adjust display refresh rate option and select On start/stop from the drop-down menu. This will make Kodi switch to the best refresh rate for your content, like 24Hz for movies or 60Hz for sports.
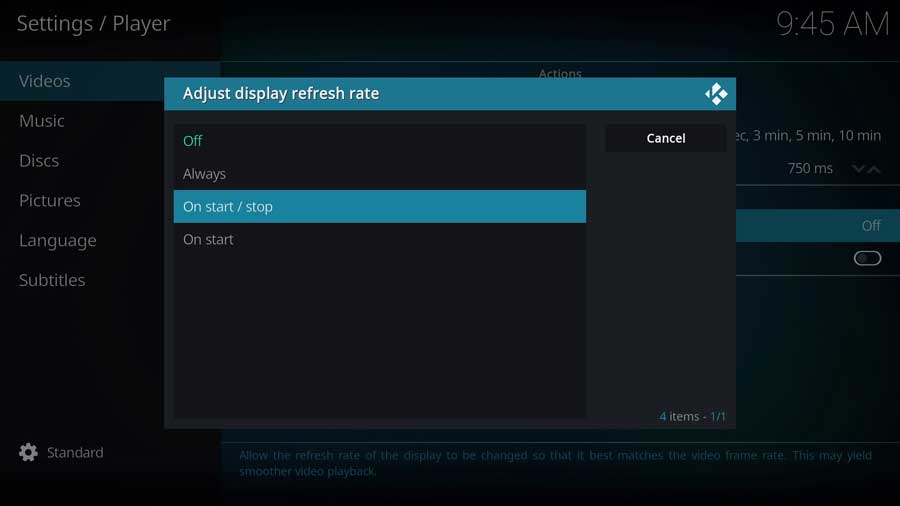
Next, you’ll have to change the Settings level from Standard (as you see above) to Expert.

Scroll down to the Processing section and ensure the Allow hardware acceleration – MediaCodec and Allow hardware acceleration – MediaCodec (Surface) options are both enabled. This leverages your Shield’s video decoding and rendering hardware, resulting in superior performance and playback quality.
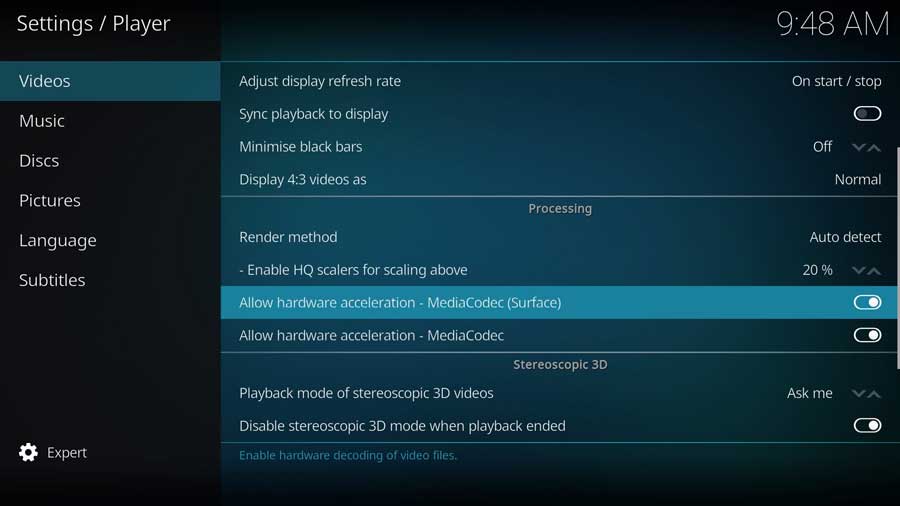
Next, navigate to Settings > System > Audio and scroll down to the Audio output device option.
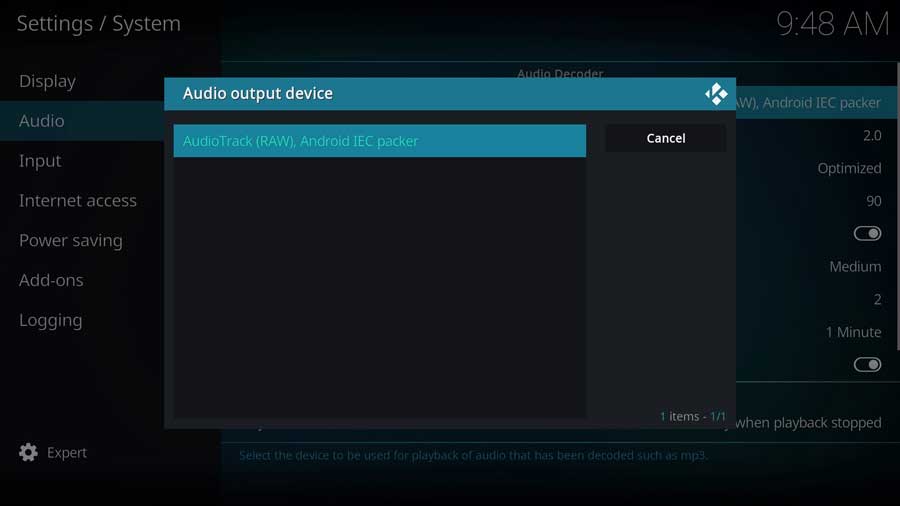
Click on it and select your sound system (your soundbar or receiver, for example) from the list.
Scroll down to the Passthrough output device option and click on it, selecting the same device as your audio output device from the list.
Enable the Allow passthrough option. This ensures that Kodi sends the original audio stream to your sound system without decoding it, providing you with high-quality audio formats, such as DTS-HD, TrueHD, or Dolby Atmos.
Whitelisting Resolutions and Refresh Rates
Next, we focus on whitelisting the appropriate resolutions and refresh rates. This helps Kodi match your content and display without affecting the AI upscaling or changing the resolution.
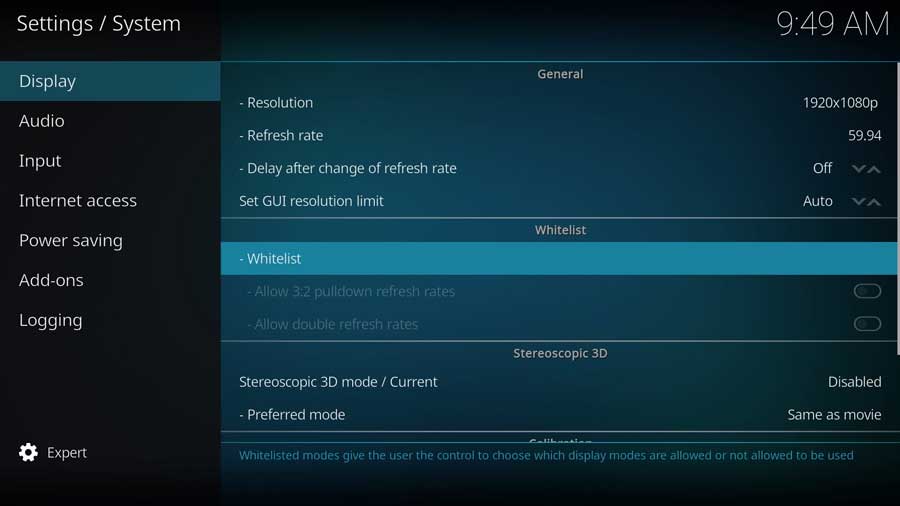
Follow these steps:
- Head to Settings > System > Display and scroll down to the Whitelist option.
- Click on it and select the resolutions and refresh rates supported by your TV and Shield. This could include 4K, 1080p, 720p, 60Hz, 50Hz, 24Hz, and so on.
- You can also use the Detect option to automatically select the supported modes.
- This not only makes Kodi switch to the optimal refresh rate for your content (like 24Hz for movies or 60Hz for sports) but also prevents Kodi from altering the resolution when playing lower resolution content (such as 1080p or 720p), which might cause a black screen or a delay.
- More importantly, these settings allow the Shield to employ the AI upscaling feature to enhance the quality of lower-resolution content.
Opting for the Match Content Color Space
This option lets your Shield TV automatically switch between SDR and HDR modes based on the content. This helps you get the best picture quality on every streaming app you use – not just Kodi.
Let’s enable it:
Navigate to Settings > Device Preferences > Display & Sound > Advanced display settings on your Shield.
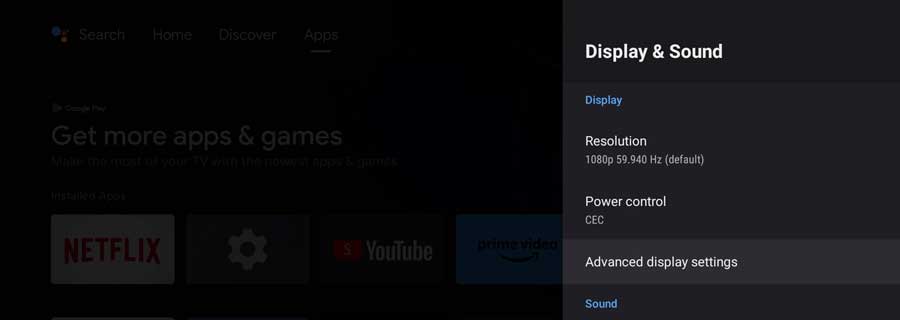
Scroll down to the Match content color space option and turn it on.
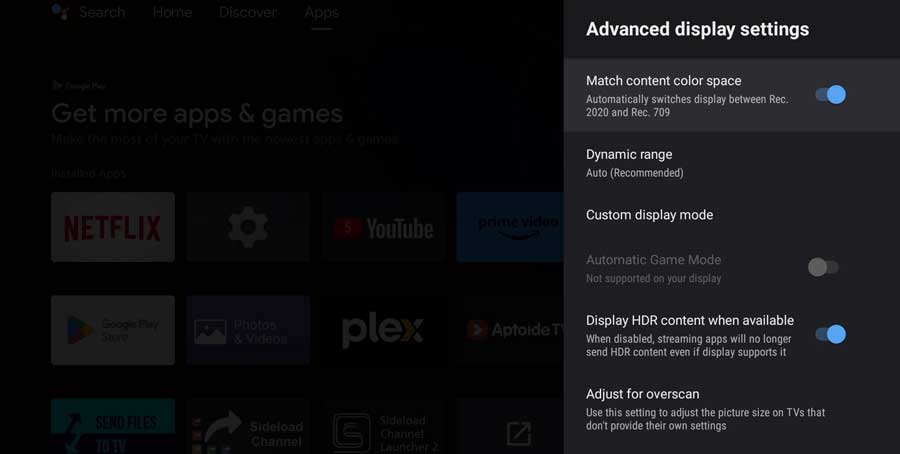
This makes the Shield switch to the correct color space for your content (such as SDR, HDR10, or Dolby Vision), preventing color inaccuracies. Note that this option works best when you have enabled passthrough audio and hardware acceleration in the Kodi settings.
Modifying the Advancedsettings.xml File
Tweaking some parameters for buffering, caching, or database optimization in the advancedsettings.xml file can improve your Kodi experience.
Follow these steps:
- Navigate to Settings > System > Logging and enable the Show hidden files and directories option.
- Return to the Kodi home screen and click on the File Manager icon.
- Navigate to the Android/data/org.xbmc.kodi/files/.kodi/userdata folder.
- Locate the advancedsettings.xml file and open it with a text editor (if the file does not exist, you can create it).
- Edit the file according to your needs and preferences. For instance, you could add a <cache> tag to adjust the buffer size for streaming or local media files, a <network> tag for network connection settings, or a <videodatabase> tag for video file database settings.
- Save the file and restart Kodi for the changes to take effect. More information and examples on the advancedsettings.xml file can be found here.
I’ll admit, I don’t bother to adjust the advancedsettings.xml as much as I used to. Once you make the other tweaks I’ve listed above, the performance on the Shield TV will be outstanding.
Still…if you need a little extra oomph, here’s a tweak I recommend for the Kodi cache settings:
<advancedsettings>
  <cache>
    <buffermode>1</buffermode>
    <memorysize>139460608</memorysize>
    <readfactor>20</readfactor>
  </cache>
</advancedsettings>
Setting Up Network Shares or External Storage Devices
Finally, you might want to set up network shares or external storage devices for accessing media files using protocols like SMB, NFS, or connect USB devices.
You can refer to this guide for more detailed instructions on how to do this.
Why You Need a VPN for Kodi
A Virtual Private Network (VPN) is essential for maximizing your Kodi experience on NVIDIA Shield. It ensures online privacy and unrestricted access to international content, enhancing your streaming experience in several ways.
A VPN is a service that establishes a secure, encrypted connection between your device and a remote server. Here’s how it can enhance your Kodi experience:
- Privacy and Security: A VPN shields your online activities and data from third parties such as your Internet Service Provider (ISP), hackers, trackers, or government agencies. This encryption can thwart “Man in the Middle” attacks, where someone intercepts or alters your data in transit.
- Preventing ISP Throttling: Some ISPs might throttle your bandwidth based on your online activity. With a VPN, they can’t see or limit what you’re streaming or downloading, which can enhance your streaming speeds.
- Bypassing Geo-Restrictions: A VPN allows you to appear in a different country by changing your IP address and unlocking geo-restricted content and add-ons from other regions. This opens up more sources, channels, and libraries that may not be available in your location.
What Your ISP isn’t telling you…
Your ISP knows more about you than you think!
Your IP address is your online fingerprint. It logs everything you do online and is visible to your Internet Service Provider, the apps & addons you use, and even the government.
Kodi Builds & Addons offer unlimited free streaming content, but there are risks.
Stream safely with Surfshark.
The Best VPN hides your identity and bypasses geo-blocked content and government surveillance while letting you stream your favorite movies buffer-free.
I’ve tested all the major VPNs on Android TV boxes and recommend Surfshark. It’s the fastest VPN for streaming and gives you access to the most geo-blocked content!
SAVE 81% ON Surfshark!!!
Try it risk-free for 30-days on unlimited devices at the same time.
Optimizing Your VPN Settings
To make the most out of your VPN, here are some tips on optimizing settings and troubleshooting any issues:
- Choosing the Best Server Location: Your desired content or add-on should dictate your server choice. For example, a server in the US would be best if you want to access Netflix, while BBC iPlayer would need a server in the UK.
- Enabling Kill Switch: The kill switch feature will automatically disconnect your device from the internet if your VPN connection drops, preventing any data leaks.
- Clear Cache and Cookies: If you encounter errors or buffering, try clearing the cache and cookies of Kodi and the VPN app. This step removes any temporary files that could be causing problems.
Using a VPN with Kodi on your NVIDIA Shield gives you the freedom to explore more content while protecting your online privacy. Enjoy an enhanced, unrestricted streaming experience.
Troubleshooting Kodi on NVIDIA Shield
Using Kodi on your NVIDIA Shield could have a handful of potential issues. Still, most of these can be resolved with some straightforward troubleshooting steps. Here are the most common problems users face and how to address them:
Audio or Video Issues
Issues with specific audio or video formats, such as DTS-HD, TrueHD, Dolby Atmos, 4K, HDR, or 3D, can cause problems like distorted or absent sound, stuttering video, and incorrect colors or brightness. Here’s how to fix or prevent these issues:
- Check your Settings: Make sure the audio and video settings on both Kodi and your Shield are compatible with your TV and sound system.
- Passthrough Audio and Hardware Acceleration: Depending on your audio output device and video codec, you might need to enable or disable Kodi’s passthrough audio and hardware acceleration options.
- Color Space and HDR Modes: Enable the ‘Match content color space’ option on your Shield and the ‘Allow HDR tone mapping’ option in Kodi to automatically switch between SDR and HDR modes.
- Update Firmware and Software: Ensure your devices are updated to the latest firmware or software versions, and install any patches or fixes available.
- Try a Different HDMI Cable or Port: If a connection issue is suspected, try using a different HDMI cable or port.
Remote Control Issues
Lag or unresponsiveness, particularly with the stock remote or CEC, can be frustrating. Here’s how to tackle it:
- Check Battery Level: Replace the batteries or recharge the remote if it’s low on power.
- Re-pair Remote: If the remote isn’t working correctly, try re-pairing it with the Shield.
- Clean Remote and IR Sensor: Ensure the remote and the IR sensor on the Shield aren’t dirty or blocked.
- Adjust Remote Settings: In the Shield settings, adjust the sensitivity and feedback settings of the remote.
- CEC Option: Depending on your TV and sound system, you might need to disable or enable the CEC option in the Shield and Kodi settings.
- Use a Different Remote Control App or Device: The Shield Controller, the Kore app, or a Bluetooth keyboard can be good alternatives.
Network Connectivity Issues
Problems with network connectivity, particularly over wireless or VPN connections, can lead to buffering and slow speeds. Here’s how to fix or prevent these problems:
- Check Internet Connection: Ensure your internet connection’s speed and signal strength are sufficient for streaming or downloading.
- Wired Connection: Move your Shield closer to your router or use a wired connection.
- Restart Devices: If you encounter connection issues, restart your router, modem, NVIDIA Shield, and Kodi.
- Change DNS Settings: To a faster or more reliable service like Google DNS or Cloudflare DNS.
- Update Firmware or Software: Ensure your router, Shield, VPN, and Kodi are updated to the latest firmware or software versions.
- Choose a Different VPN Server: If you experience slow speeds or buffering with a VPN, try choosing a different VPN server location or protocol.
- Edit Advanced Settings: Adjust the buffer size and mode for streaming or local media files in the advancedsettings.xml file in Kodi.
Hopefully, these steps will help you resolve any issues you face with Kodi on your NVIDIA Shield, enhancing your viewing experience.
Wrapping It Up
From installation and configuration to VPN usage and troubleshooting, we’ve looked at optimizing your Kodi experience on NVIDIA Shield. They offer an unparalleled media viewing experience and enough various customization options for most audiophiles and videophiles.
By properly configuring Kodi on your NVIDIA Shield, you can seamlessly integrate audio and video settings, unlock geo-restricted content, and ensure smooth playback for various formats.
Still…you might occasionally run into some issues. However, most can be quickly resolved with straightforward troubleshooting steps. Whether you’re dealing with audio or video glitches, remote control issues, or network connectivity problems, a solution is typically just a few steps away.
Ultimately, taking the time to properly set up and configure Kodi on your NVIDIA Shield can significantly elevate your home entertainment experience.
- How to Install Kodi Diggz Xenon Plus & Free99 Build [March 2024] - March 3, 2024
- How to Enable Unknown Sources on Chromecast with Google TV [2024] - October 30, 2023
- How to Install the Seren Kodi Addon [2024] - October 29, 2023

