Last Updated on January 29, 2024 by Tim Wells
If you have a Real-Debrid subscription, you need to have the Seren addon for Kodi.
Seren is an addon specifically designed to work with premium unrestricted downloaders, like Real-Debrid, so you can get buffer-free streaming from Kodi. Unlike many popular Kodi addons, it works with Kodi 18 Leia and Kodi 19 Matrix.
Additionally, its integration with Trak.tv, allows you to keep track of your favorite video content for a more premium streaming experience.
In this guide, we’ll discuss the features of Seren 2.0, the process of installing the add-on, how to add a premium provider package, and how to link your Real Debrid account.
Seren is one of the best Kodi addons I’ve found in 2023. Check out the rest of the list after you’re finished here!
What’s New in Seren 2.0?
Seren was rebuilt from the ground up in early 2021 to make it compatible with Kodi 19.
Thanks to the update, you get a range of new features, including:
- Metadata and Trakt handling and synching, which is completely rewritten
- New Download Manager
- More cached TV show and movie metadata to speed up streaming
- Python 3 support (required for Kodi 19)
- OMDB API implemented
- Zip manager implemented to handle zip files
Arguably, the most outstanding feature of Seren 2.0 is speed. The add-on’s menu is extremely fast since it uses scraped information cached to ensure faster streaming. Furthermore, unlike the previous add-on version, every line of code is written from scratch.
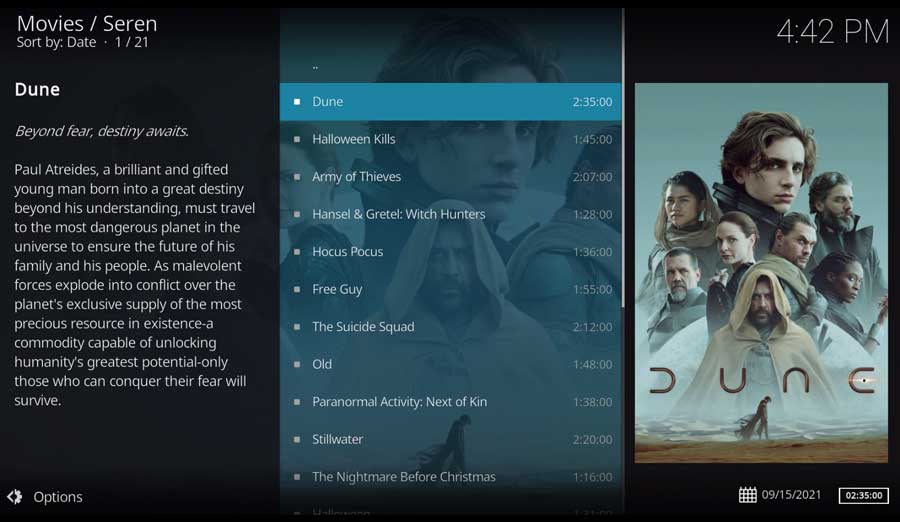
The Seren Kodi addon also has a Netflix-like behavior since it automatically creates playlists of content you select. Therefore, if you stop watching a show in the middle, you can always resume it afterward.
Linking Your Real Debrid Account to Seren
You won’t be able to stream your favorite shows after installing Seren on Kodi until you link your Real Debrid account. If you don’t know what Real Debrid is, check out my detailed guide on how Real Debrid works.
Essentially, Real-Debrid offers unrestricted access to cached torrents and hosters. With Real-Debrid, your devices won’t connect to the p2p network directly. Instead, Real Debrid will locate the file for you before allowing you to access it as a regular download.
If you don’t have an account for Real Debrid yet, simply sign up an account here. You won’t be able to stream content from Seren without a Real Debrid or Premiumize account.
Also, you need to install providers used in the scraping sources to enable you to find sources.
Is Seren Kodi Addon Safe and Legal?
Seren isn’t available on the official Kodi repository, which may leave you wondering, “Is the add-on legal and safe to use?”
Seren is legal and safe since it’s only accessible to those with Premiumize or Real-Debrid accounts.
Anyone who has never used a streaming add-on or app and is concerned about the safety of the Seren Kodi addon should rest easy. A quick scan of the add-on’s repository URL doesn’t yield any malware or suspicious files.
That said, protecting yourself online is always a good idea, including when streaming with Kodi.
What Your ISP isn’t telling you…
Your ISP knows more about you than you think!
Your IP address is your online fingerprint. It logs everything you do online and is visible to your Internet Service Provider, the apps & addons you use, and even the government.
Kodi Builds & Addons offer unlimited free streaming content, but there are risks.
Stream safely with Surfshark.
The Best VPN hides your identity and bypasses geo-blocked content and government surveillance while letting you stream your favorite movies buffer-free.
I’ve tested all the major VPNs on Android TV boxes and recommend Surfshark. It’s the fastest VPN for streaming and gives you access to the most geo-blocked content!
SAVE 81% ON Surfshark!!!
Try it risk-free for 30-days on unlimited devices at the same time.
How to Install The Seren Addon for Kodi
This tutorial will teach you how to install the Seren addon to a clean installation of Kodi 19 Matri.
I like using a clean installation of Kodi for my walkthroughs because it gives you an easy-to-follow way to get up and running with any addon. You don’t need to worry if I’ve got something crazy installed on my Kodi box that makes it look different than it does for you.
That means I haven’t installed any other addons on this device or even set up my media library. Even if Seren is the only thing you want to install on your Kodi box, this will get you up and running in only a few minutes.
Step 1: Enable Addons from Unknown Sources
The only repository installed by default is the official Kodi repository. It includes hundreds of different addons to change the look & feel, add new video sources, backgrounds, and some handy utilities.
Unfortunately, it doesn’t have many of the most popular addons.
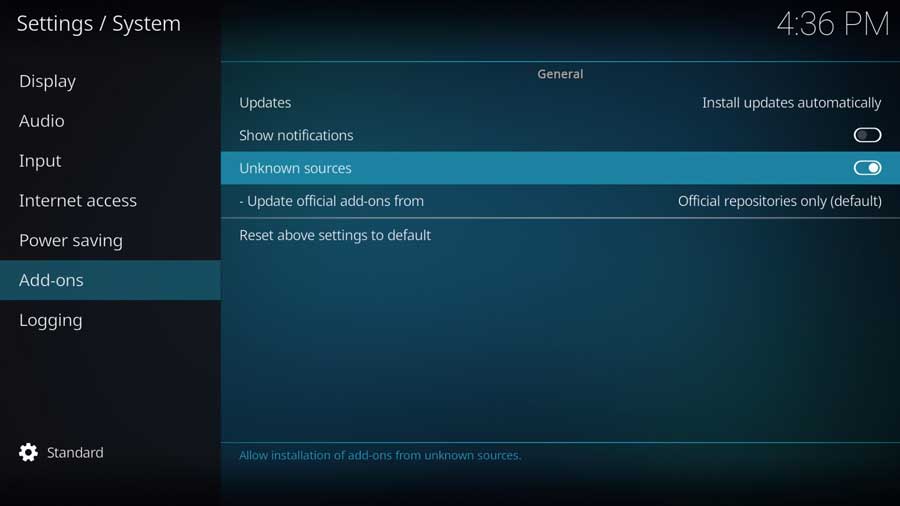
To install anything not found in the official Kodi repository, you need to change a setting to allow addons from unknown sources.
First, go to the Settings menu. You can get there from the gear icon on the left-hand menu or the Add-ons tab. Then click on Settings.
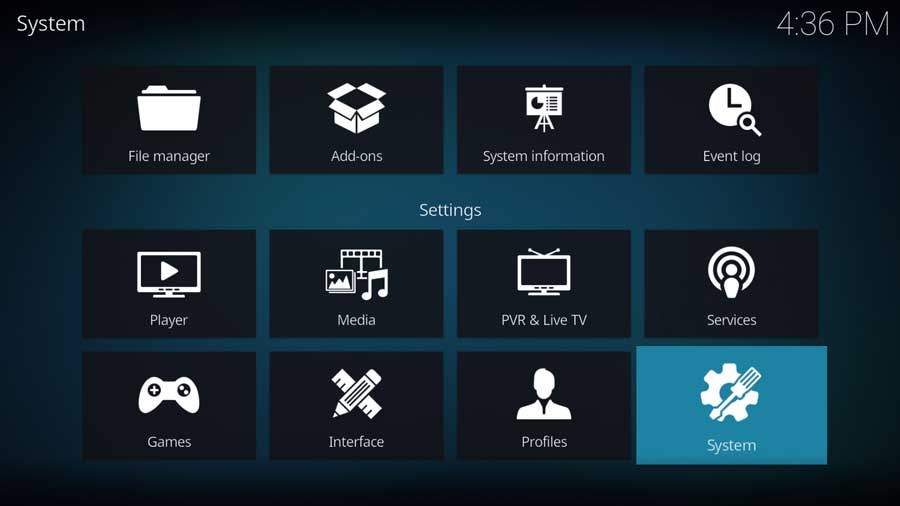
Then, on the Settings/System menu, scroll down to the Add-ons section.
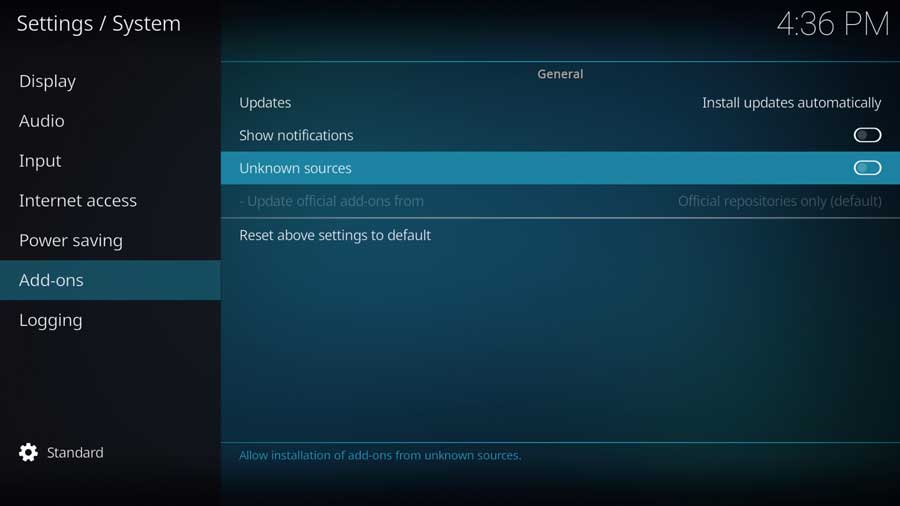
A menu box will appear as soon as you click on the Unknown Sources toggle switch.
Any addon you install on your Kodi device inherits the same rights to your files as Kodi itself. That includes access to your device’s files and network connections.
With that in mind, never install an add-on that you don’t trust, even if you don’t store personal data on your Kodi box.
Click Yes to continue.
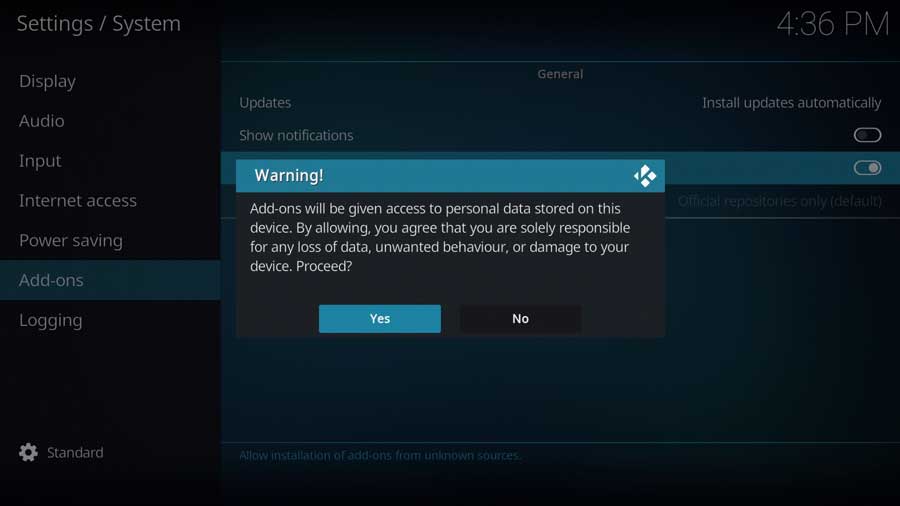
Once you do, the toggle switch turns white, and you’ll be able to install Seren and any other unofficial Kodi addon.
Step 2: Add The Nixgates Repo File Source
Our first step is to create a custom file location for the Nixgates repository that houses the Seren addon.
First, go to the Settings/System menu and click on the File Manager icon.
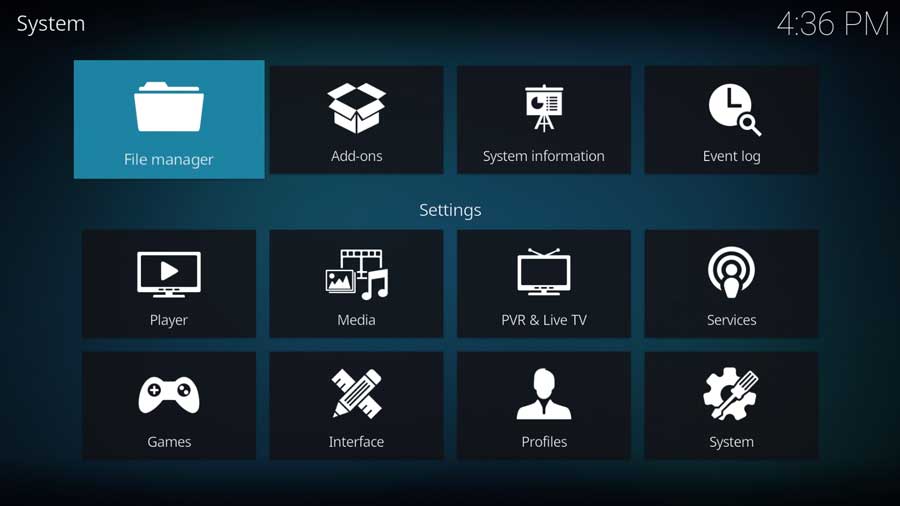
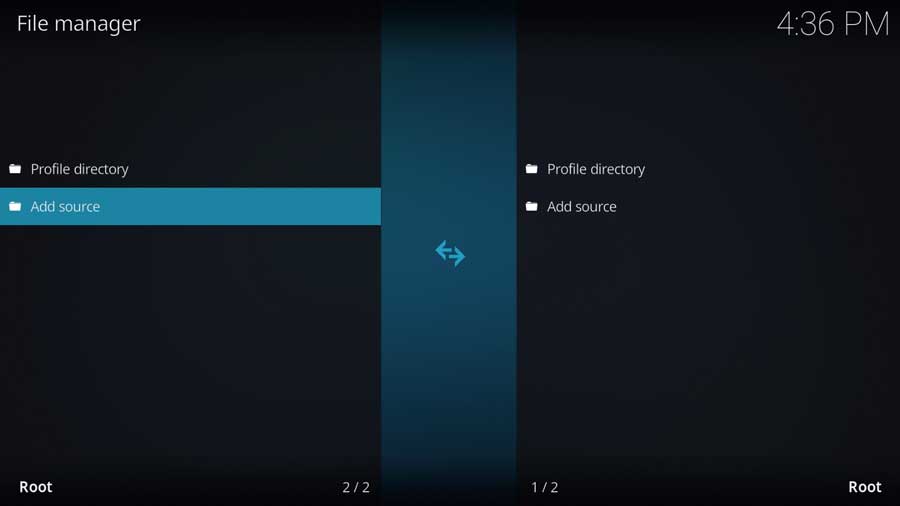
Most of the time, we use the File Manager screen to point Kodi to the locations of our media library. This time, we’ll tell it where the repository file is located.
Click on Add Source to continue.
Highlight <None> and click on it to add a custom source.
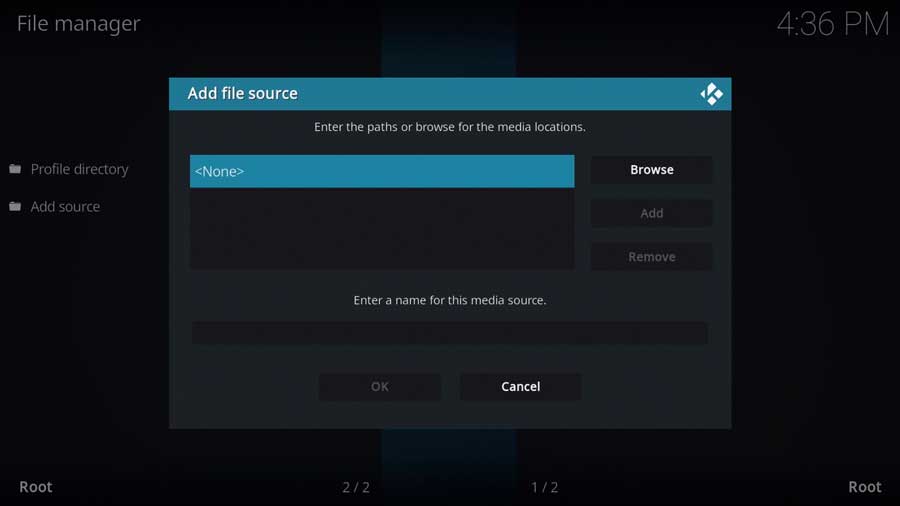
We usually enter a location either on your Kodi device itself or a place on your local network. The location can either be a specific file path or URL for the new source.
We will use the network URL for Nixgate’s official GitHub page in this case.
Type in the following URL and click OK:
https://nixgates.github.io/packages
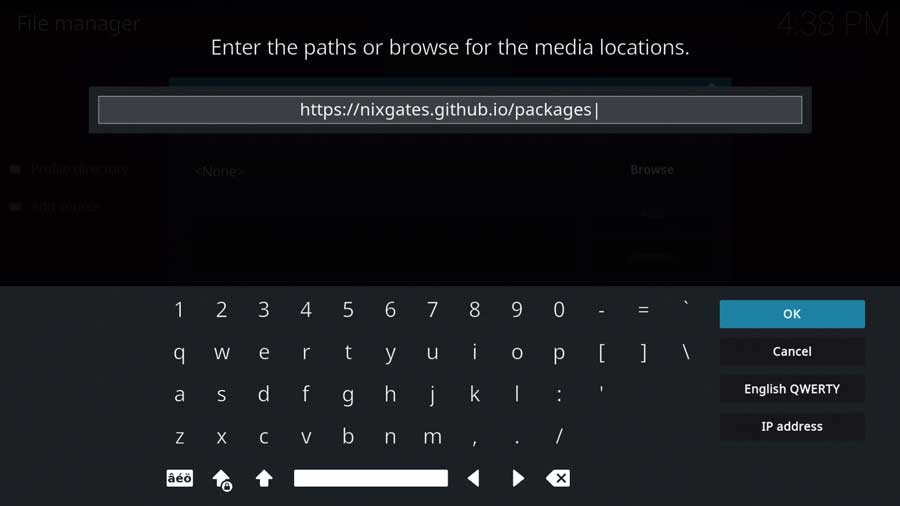
Because this file location includes a sub-folder, the name for this media source is already populated. Kodi automatically uses the name of the folder.
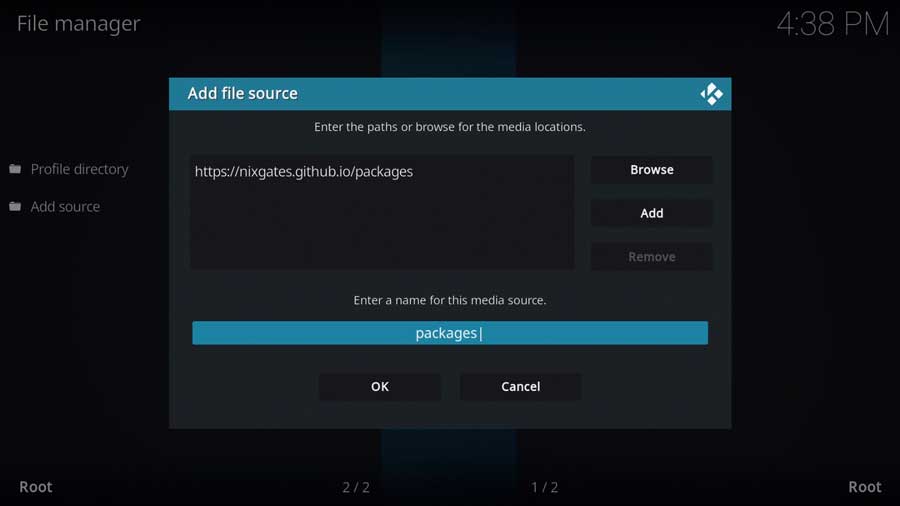
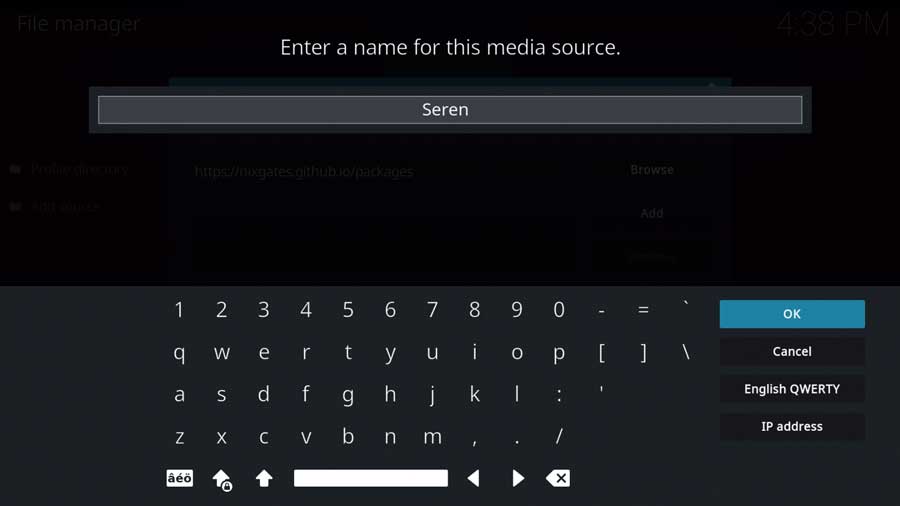
You can keep the name if you like. However, I prefer to name my file sources something that makes sense, so I can quickly identify them later. In this case, I’m going to call it Seren.
Once you’ve entered a name, click OK to continue.
Once you have the URL location and source name, click OK to finish this step.
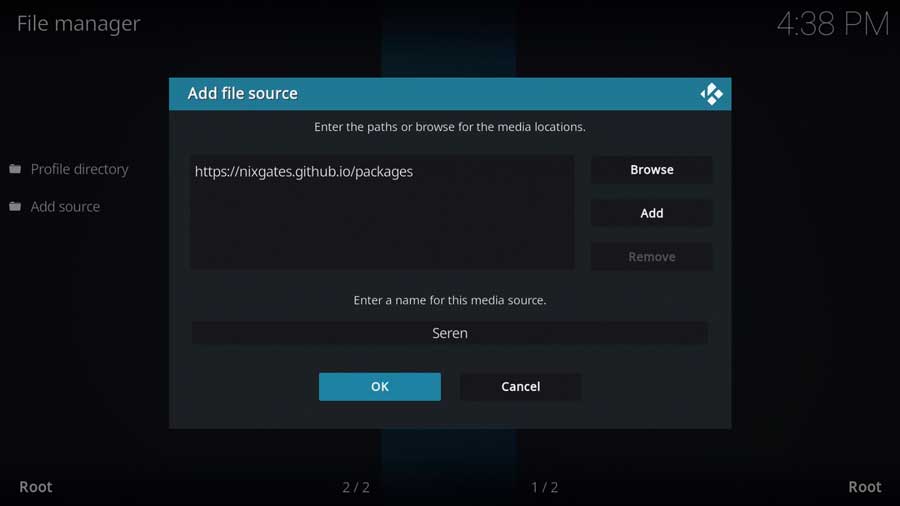
Kodi does a quick check to verify that it can reach that URL.
If everything goes well, it’ll pop you back to the File Manager screen, and your new custom file source will appear in the list on the left.
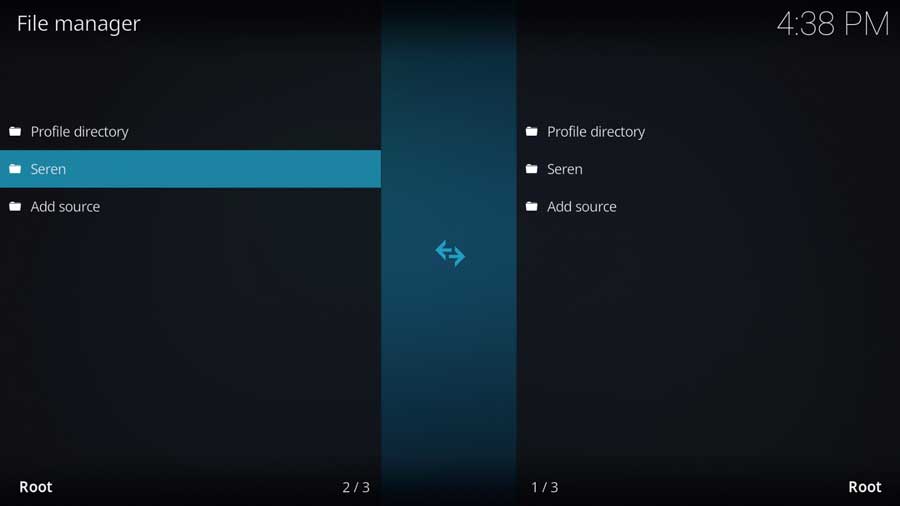
Step 3: Install The Nixgates Repository from Zip File
Now that we’ve told Kodi where to find the Nixgates repository file let’s go ahead and install it.
Go back to the System menu and click on the Add-ons icon.
Next, click Install From Zip File.
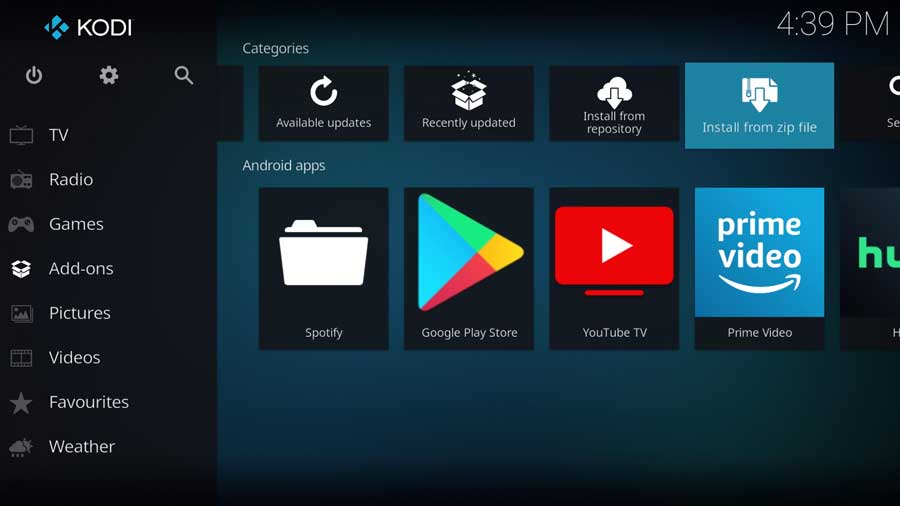
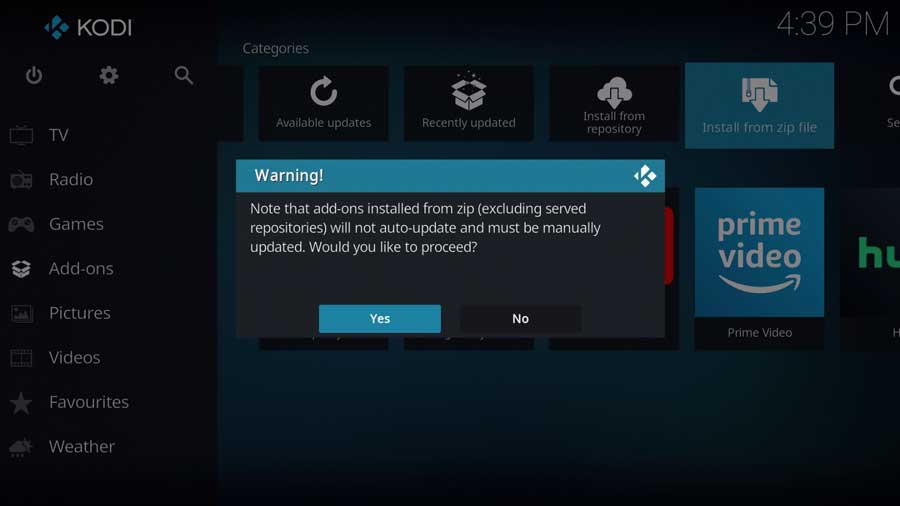
A popup window will appear, reminding you that any add-ons installed from a zip file will not auto-update. This means you will need to manually update them from time to time.
Click Yes to close that popup box.
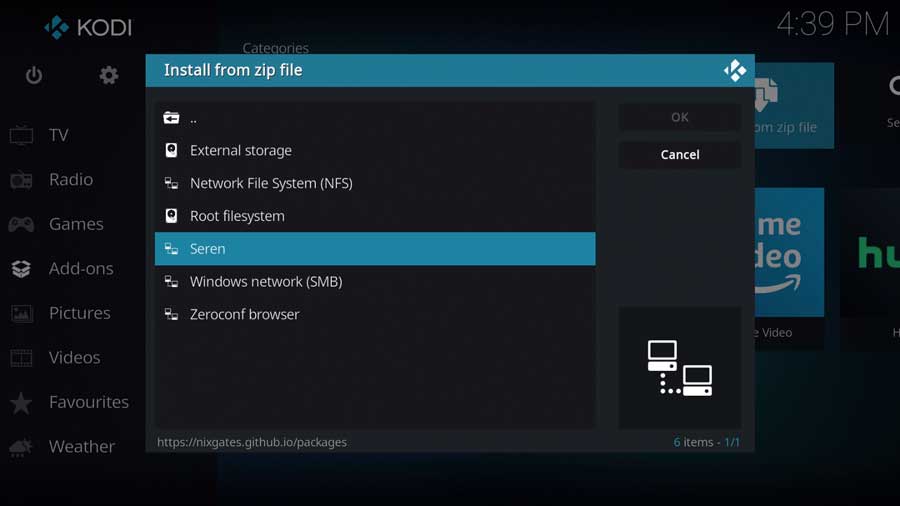
Next, a window appears with all of the standard Kodi locations and any custom file locations you’ve specified on that particular device. For example, if you have a network file share, it will be listed here.
Scroll down until you see the source name you entered in the previous section. If you didn’t name it anything different, you should be looking for Seren.
Click on it to continue.
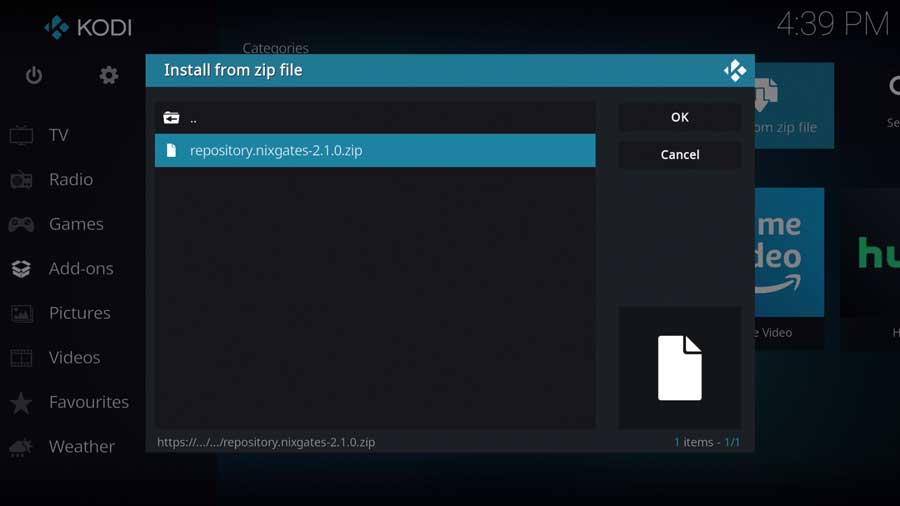
Then click on the repository.nixgates zip file.
Don’t worry if the version number appears slightly different than what you see below. Kodi will automatically pull the latest version from their website for you.
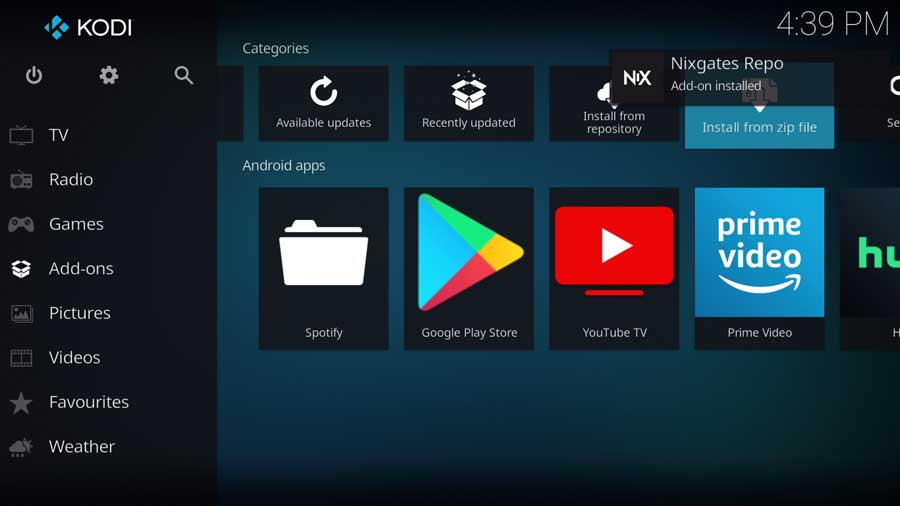
Kodi will take you back to the main Add-ons menu.
After a few seconds, you’ll get a message box that the Nixgates Repository add-on has been installed.
Step 4: Install The Seren Addon from the Repository
Now that the repository has been installed, all that’s left is to install the Seren addon.
Click Install From Repository to continue.
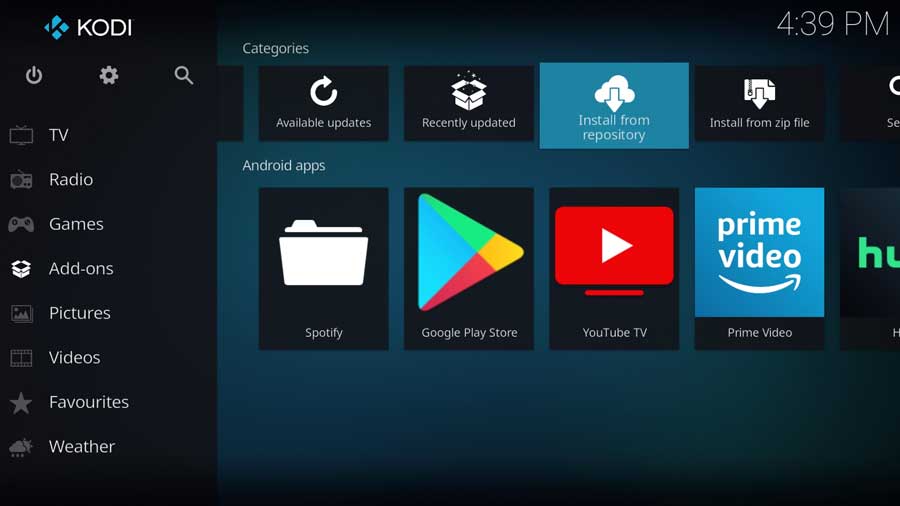
As I mentioned at the start, I’m installing Seren on a fresh installation of Kodi 19. The only repositories I have on this device are the official Kodi repository and the Nixgates repository we just installed.
You may have a lot more repositories on your system.
Scroll down until you see Nixgates Repository and click on it.
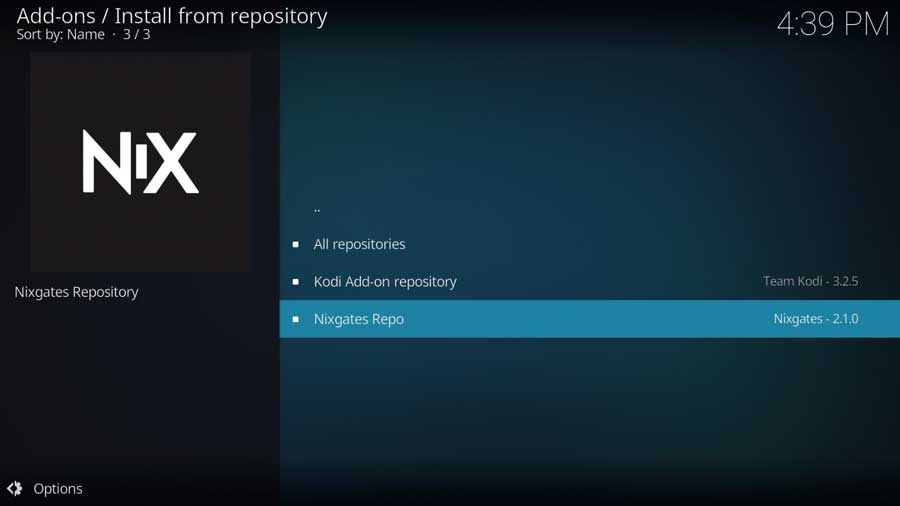
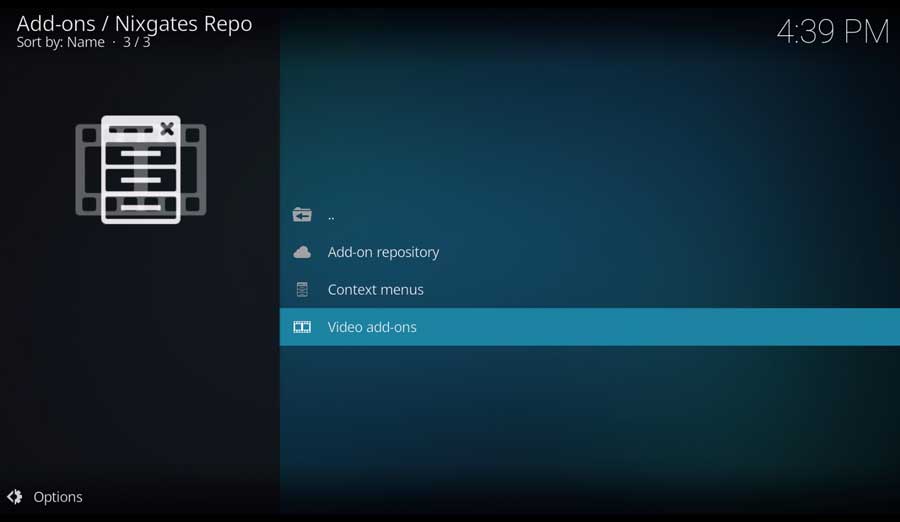
Kodi breaks the add-ons into sub-categories to make it easier to browse.
Seren is a Video Add-on, so you will find it in that section.
Click on it to continue.
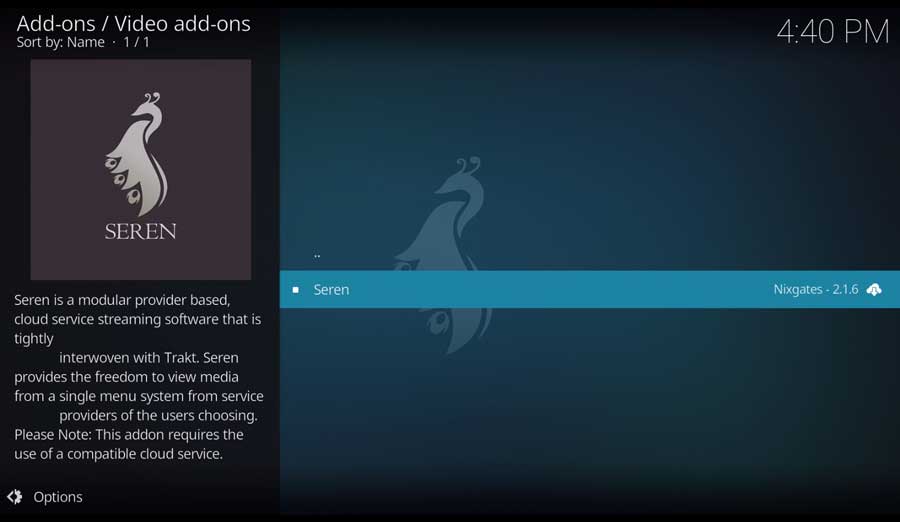
Scroll down until you see Seren, and click on it to continue.
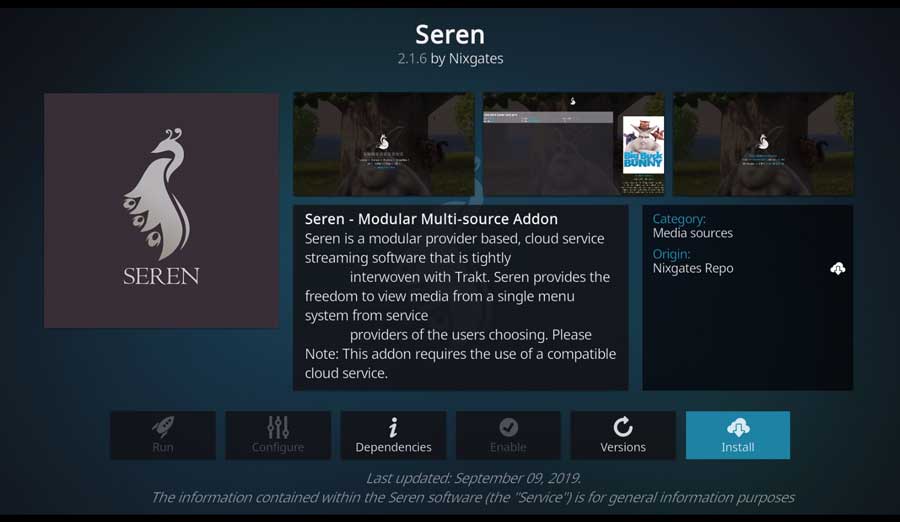
This opens up the addon detail page. If you’ve installed an app from the Google Play Store, this will look very familiar.
Here, you’ll see details like different versions of the available addon and any dependencies that will be installed along with the addon.
Click Install to continue.
After a few seconds, you’ll see a popup message saying the Seren Add-on has been installed.
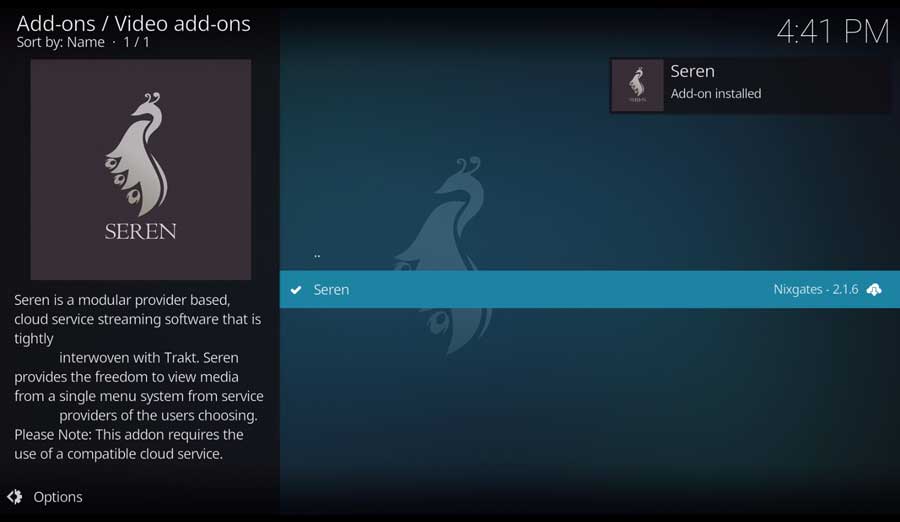
That’s it!
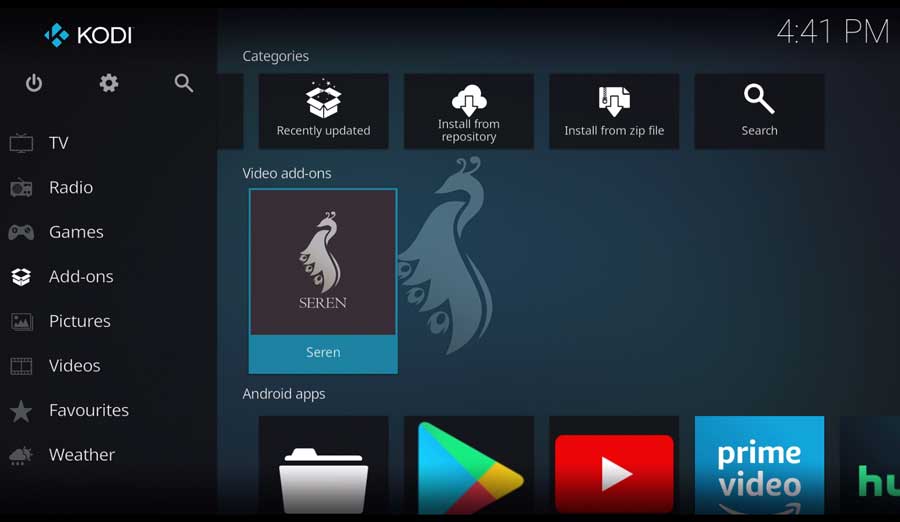
To launch Seren, go to the Add-ons tab on the left-side menu and click on its icon.
- How to Install Kodi Diggz Xenon Plus & Free99 Build [March 2024] - March 3, 2024
- How to Enable Unknown Sources on Chromecast with Google TV [2024] - October 30, 2023
- How to Install the Seren Kodi Addon [2024] - October 29, 2023

