Last Updated on January 29, 2024 by Tim Wells
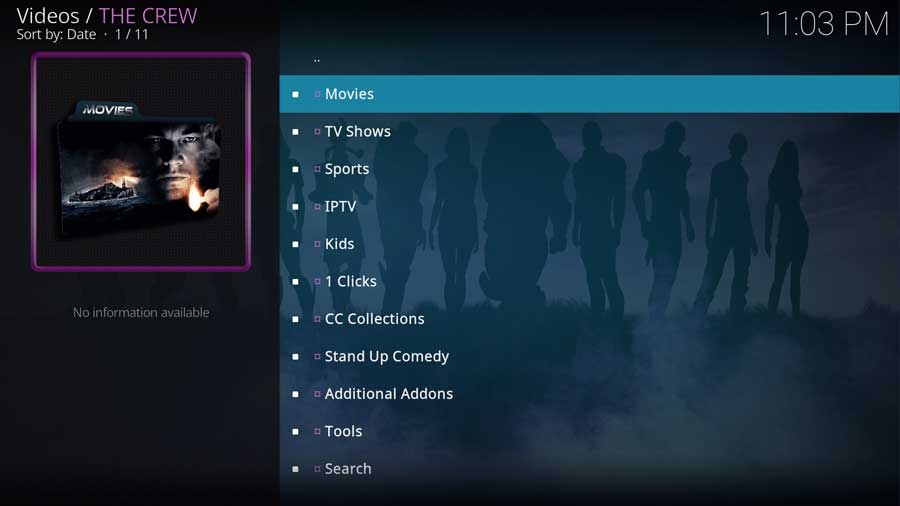
The Crew is one of Kodi’s most popular 3rd-party add-ons that allows you to stream movies, TV shows, and live sports. It works with Kodi 20 Nexus, 19 Matrix, as well as older versions of Kodi.
In this how-to-guide, I’ll cover some of the more popular questions you might have, then walk you through step-by-step how to install The Crew to a fresh installation of Kodi 20.
Finally, I’ll cover how to uninstall The Crew if you want to remove it from your system.
The Crew is one of the best Kodi addons I’ve found in 2023, but definitely check out the rest of the list!
Ready?
Let’s get started.
FAQ
Do I Need a Build for The Crew on Kodi?
No. Even if your first exposure to The Crew addon for Kodi was in a dedicated build, you could install it by itself. In fact, the process I will detail below will walk you through installing The Crew on a fresh installation of Kodi.
Is The Crew Compatible with Kodi 19 (Matrix) and 20 (Nexus)?
Yes! Kodi version 19 (and later) use a different version of the Python programming language than Kodi 18 did. This broke a lot of 3rd-party addons. However, The Crew addon has been updated to work perfectly with later Kodi versions.
Can You Use Real-Debrid with The Crew?
Yes. The Crew addon is capable of leveraging the Real-Debrid servers. The use of Real Debrid is recommended for maximum content availability as well as safety. You can easily signup an account of Real Debrid here. If you are wondering what Real Debrid is, I have written a detailed guide of it.
What is The Crew’s Password?
There is a certain…shall we say…optional area for The Crew’s addon that is password protected to keep it safe from younger audiences. The password to enable that content is “lol” (case sensitive).
How to Fix the “Check Log for More Information” Error
Occasionally you will see a popup box with the message “Check Log For More Information.” While that’s not terribly helpful, viewing the Kodi Log File will often give you an idea of the fix. I have a tutorial showing how to view the Kodi Log File that can walk you through the process.
What Your ISP isn’t telling you…
Your ISP knows more about you than you think!
Your IP address is your online fingerprint. It logs everything you do online and is visible to your Internet Service Provider, the apps & addons you use, and even the government.
Kodi Builds & Addons offer unlimited free streaming content, but there are risks.
Stream safely with Surfshark.
The Best VPN hides your identity and bypasses geo-blocked content and government surveillance while letting you stream your favorite movies buffer-free.
I’ve tested all the major VPNs on Android TV boxes and recommend Surfshark. It’s the fastest VPN for streaming and gives you access to the most geo-blocked content!
SAVE 81% ON Surfshark!!!
Try it risk-free for 30-days on unlimited devices at the same time.
How to Install The Crew Addon on Kodi
This tutorial will start with a clean installation of Kodi 20 Nexus and install The Crew addon.
I haven’t installed any other addons on this particular device or even set up my media library.
So even if this is the only thing you want to use Kodi for, follow these instructions, and you’ll be up and running with The Crew in only a few minutes.
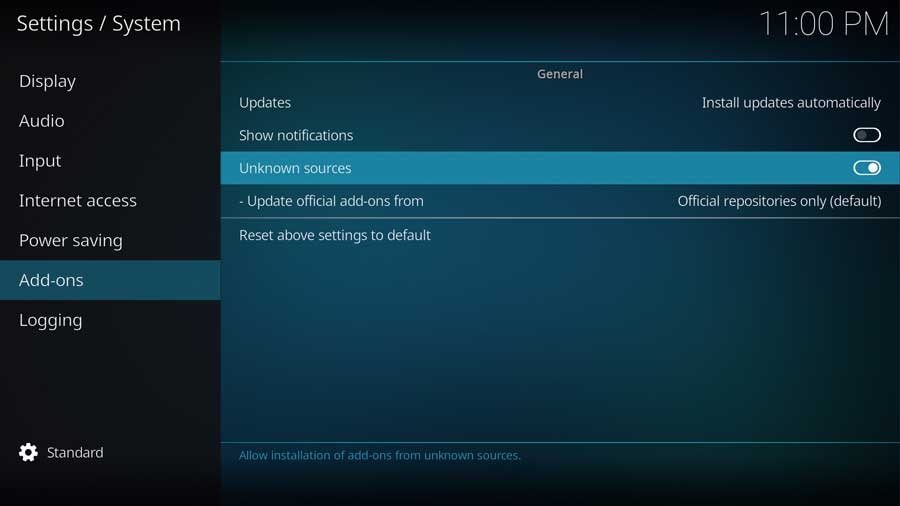
Step 1: Enable Addons from Unknown Sources
With every new installation, Team Kodi includes their official repository, which contains hundreds of different addons to change the look & feel, add new video sources, backgrounds, or utilities like checking the Kodi log files.
It’s enough to give you a good start. Still, many popular addons aren’t in the official Kodi repository. To install addons from other repositories, you first need to enable addons from unknown sources.
First, go to the Settings menu. You can get there from the gear icon on the left-hand menu or the Add-ons tab. Click on Settings, as shown below.
Then, on the Settings/System menu, scroll down to the Add-ons section.
I’m in the Standard menu settings, as seen in the image below. But even the Basic level of settings will allow you to enable unknown sources, so you don’t need to change anything.
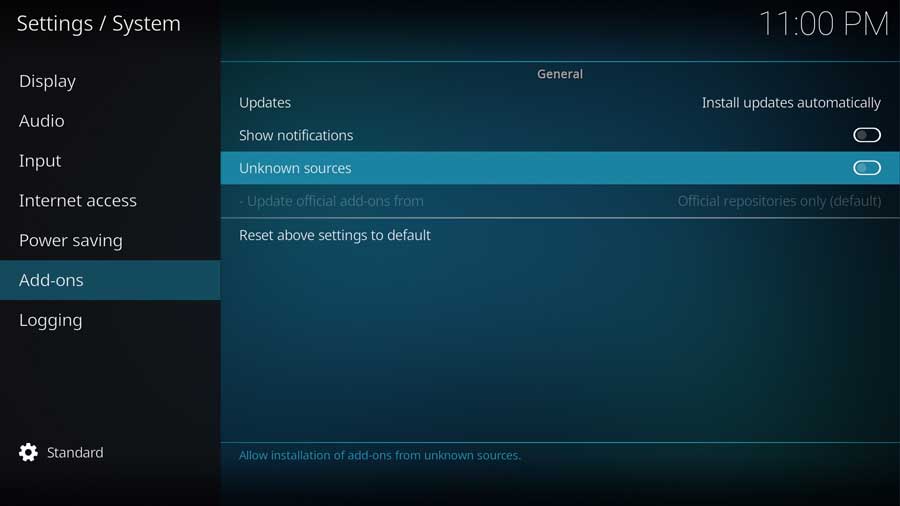
A menu box will appear as soon as you click on the Unknown Sources toggle switch.
By their nature, Kodi add-ons have the same rights as Kodi itself, which includes access to your device’s files and network connections.
Even if you don’t store personal data on your Kodi box, never install an add-on you don’t trust.
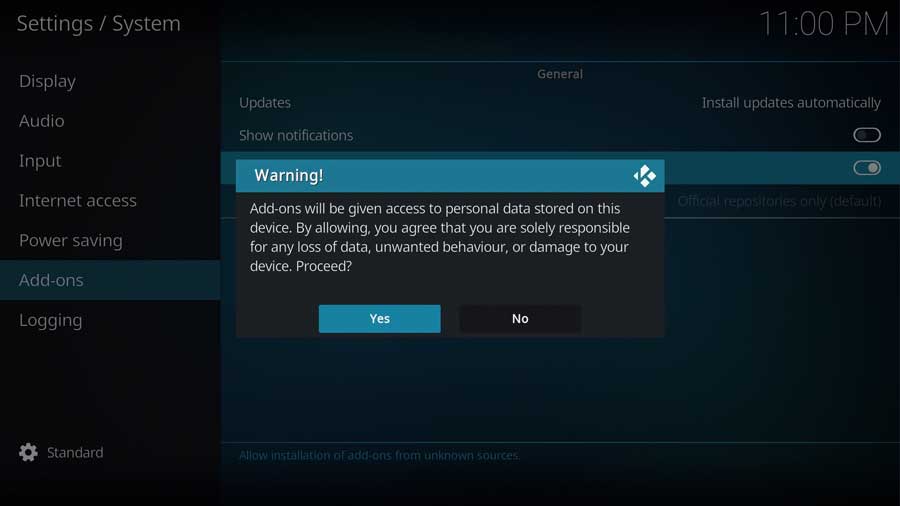
Once you click Yes on that message box, the toggle switch turns white, and you can install The Crew addon and any other unofficial Kodi addon.
Step 2: Add The Crew File Source
Installing The Crew addon is a three-part process.
First, we need to add the location of The Crew’s repository file before we can install The Crew addon.
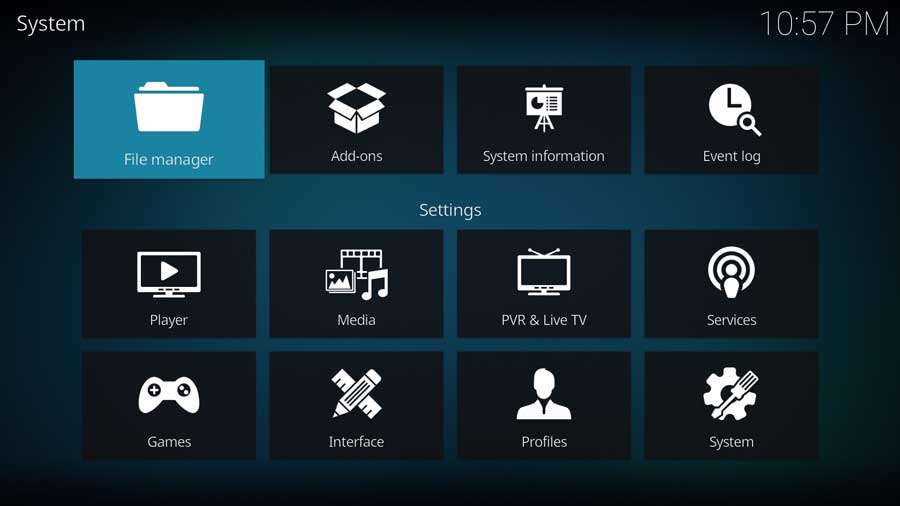
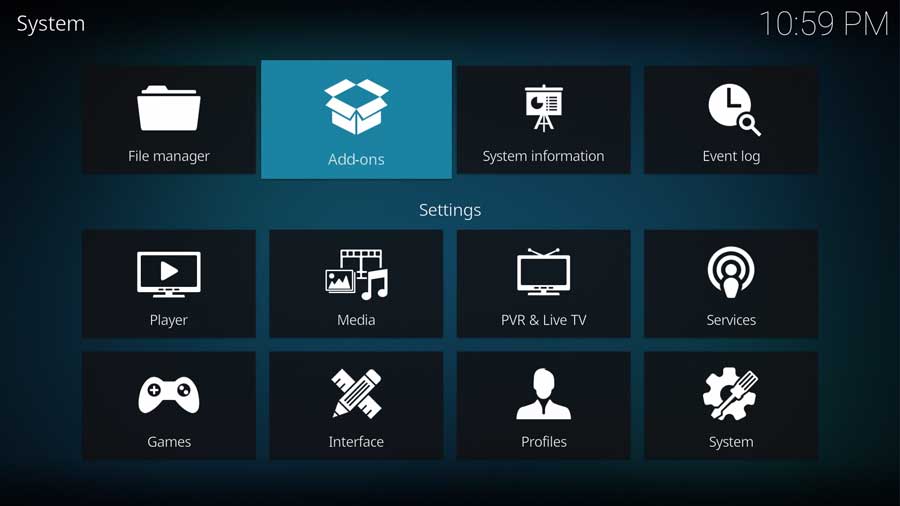
First, go to the Settings/System menu and click the File Manager icon.
Most of the time, we use the File Manager screen to point Kodi to the locations of our media library.
This time, we will tell it where the repository file is located.
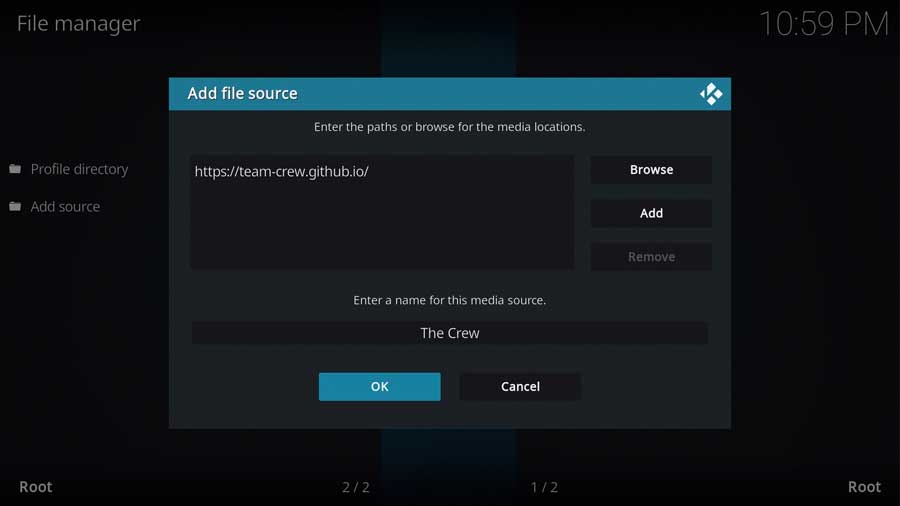
Click on Add Source to continue.
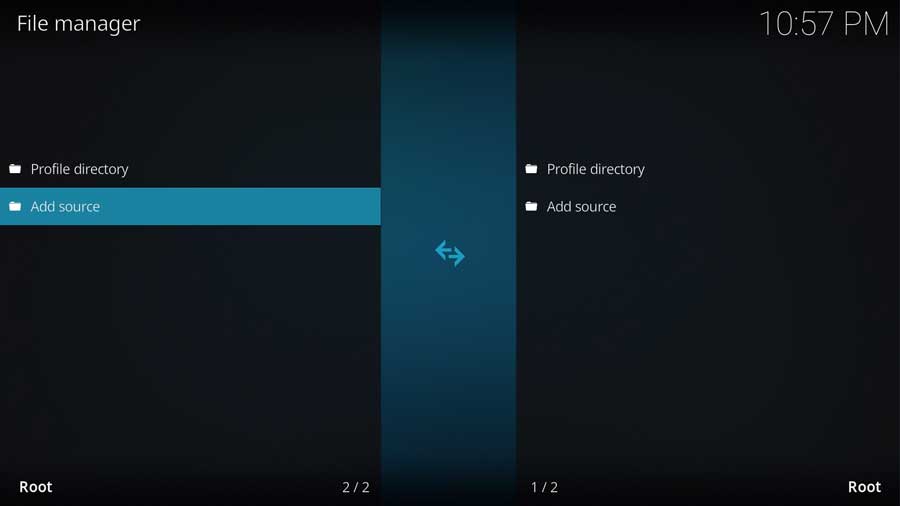
Highlight <None> and click on it to add a custom source.

This screen lets you input a specific file path on your device or a network.
We will use the network URL for The Crew’s GitHub page in this case.
GitHub is a website where a team of developers can store the code they’re working on so that everyone can access the most up-to-date source code, no matter where they’re working.
Type in the following URL and click OK:
https://team-crew.github.io

Next, create a name for this media source. This can be anything you want, so I named mine The Crew.
Click OK to continue.
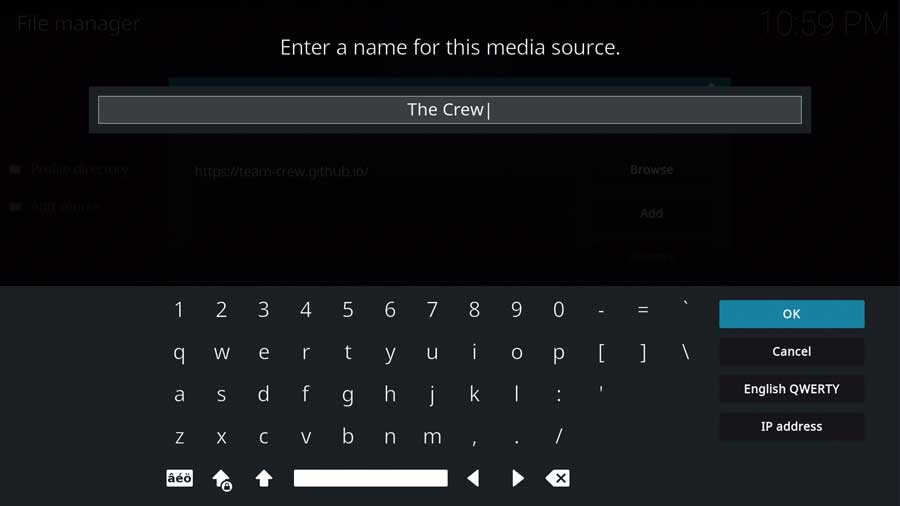
Once you type in the URL location and source name, click OK to finish this step.
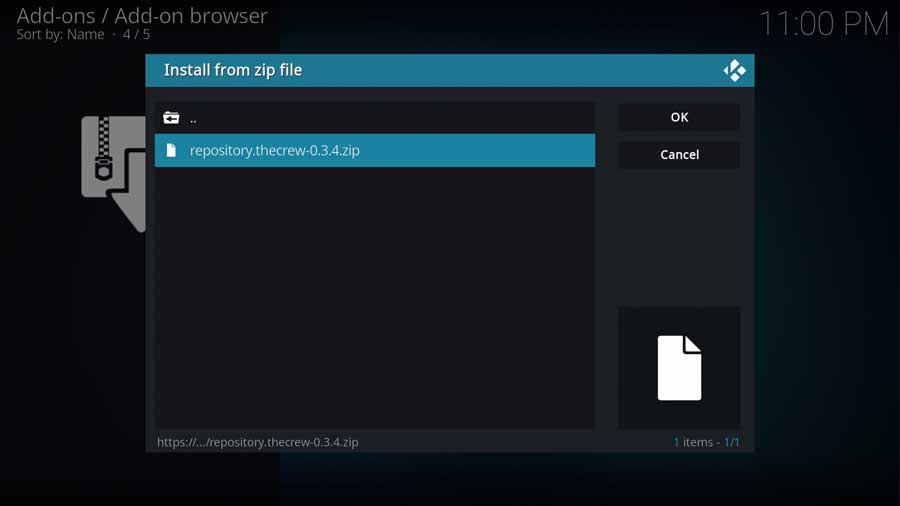
Step 3: Install The Crew Repository from Zip File
Now that we’ve told Kodi where to find The Crew’s repository file let’s go ahead and install it.
Go back to the System menu and click on the Add-ons icon.
Next, click Install From Zip File.
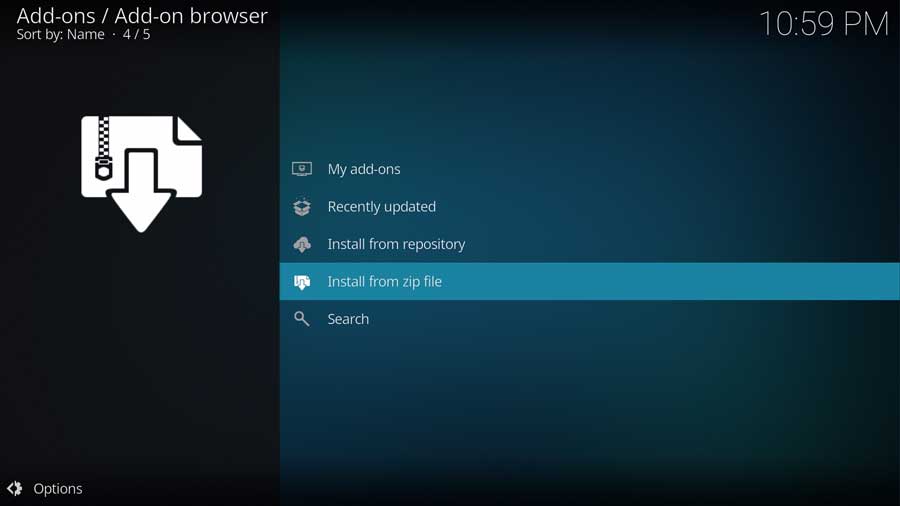
A popup window will appear, reminding you that any add-ons installed from a zip file will not auto-update. This means you will need to manually update them from time to time.
Click Yes to close that popup box.
The following window shows all of the standard Kodi locations and any custom file locations you’ve specified on that particular device. For example, if you have a network file share, it will be listed here.
Scroll down until you see the source name you entered in the previous section. In my case, I named my source location The Crew.
Click on it to continue.
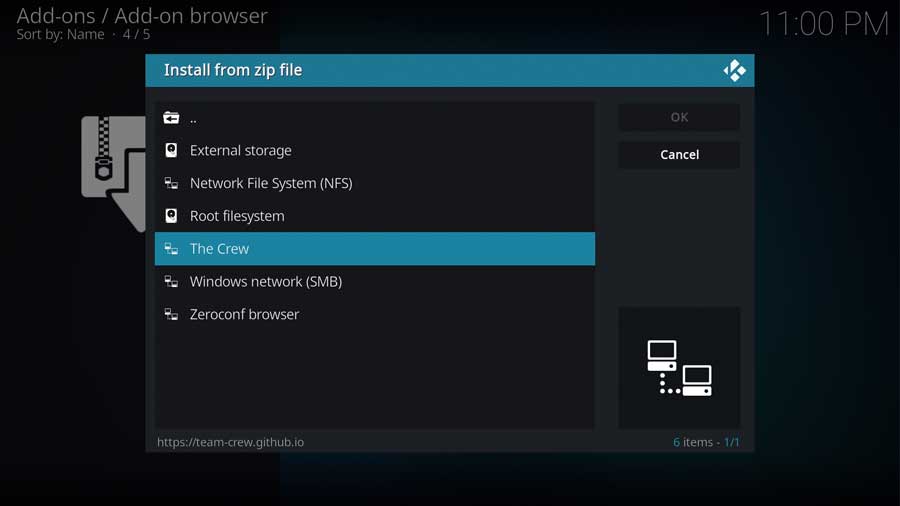
Then click on the repository.thecrew zip file.
Don’t worry if the version number appears slightly different than you see below.
Kodi will automatically pull the latest version from their GitHub site for you.
If you fail to install the repository directly at this step, you could also download the zip file, copy it to a USB drive / NAS, and install from there.
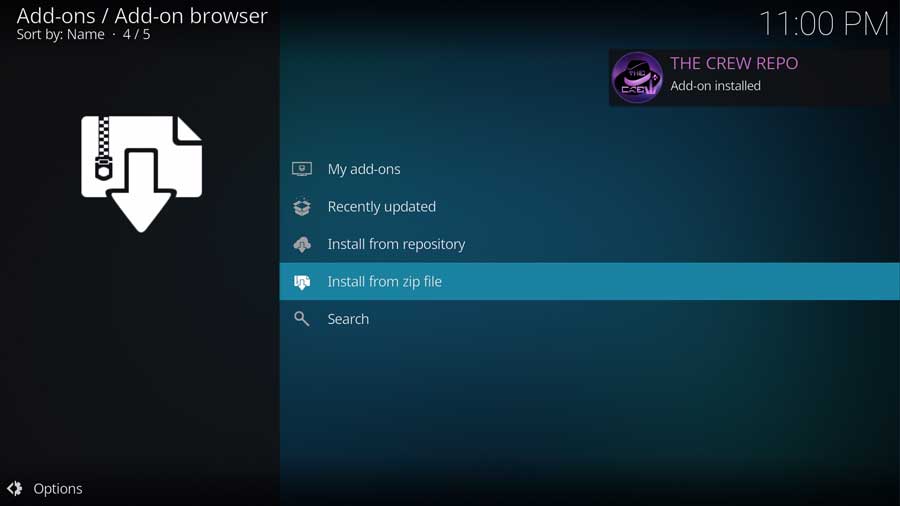
After installation, Kodi will take you back to the main Add-ons menu.
After a few seconds, you’ll get a message box that The Crew repository has been installed.
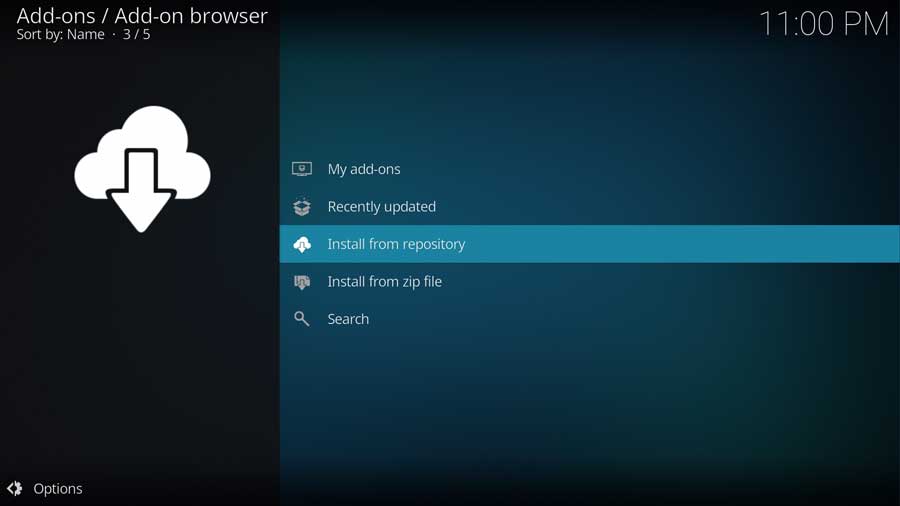
Step 4: Install The Crew Addon from the Repository
We’re almost done! Now that the repository is installed, the final step is to install The Crew addon.
Click Install From Repository to continue.
As I mentioned, I’m installing The Crew addon to a clean install of Kodi 20. So the only repositories that I have on this device are the official Kodi repository and the one we just installed.
You may have a lot more repositories on your system.
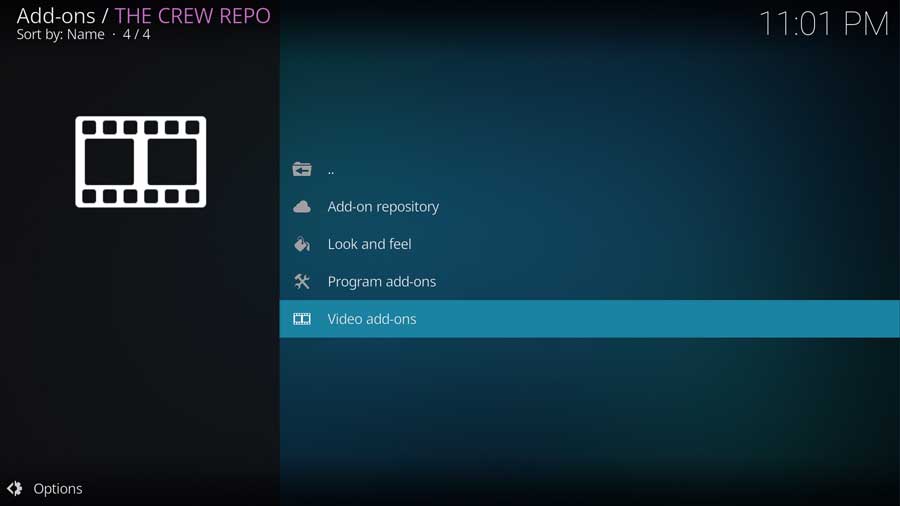
Scroll down until you see The Crew Repo and click on it.
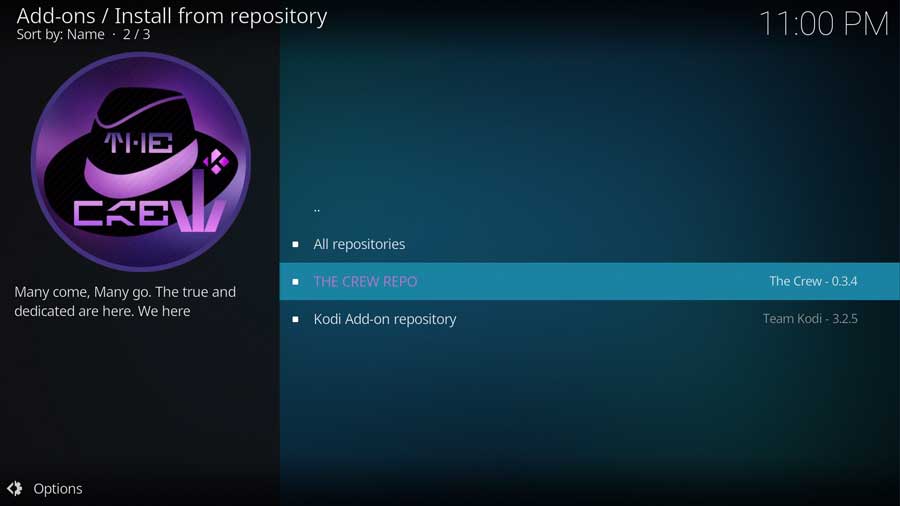
This brings you to the sub-menu that shows all of the individual addons included in The Crew Repo, sorted into categories.
The Crew addon is in the Video Add-ons section, so click on it to continue.
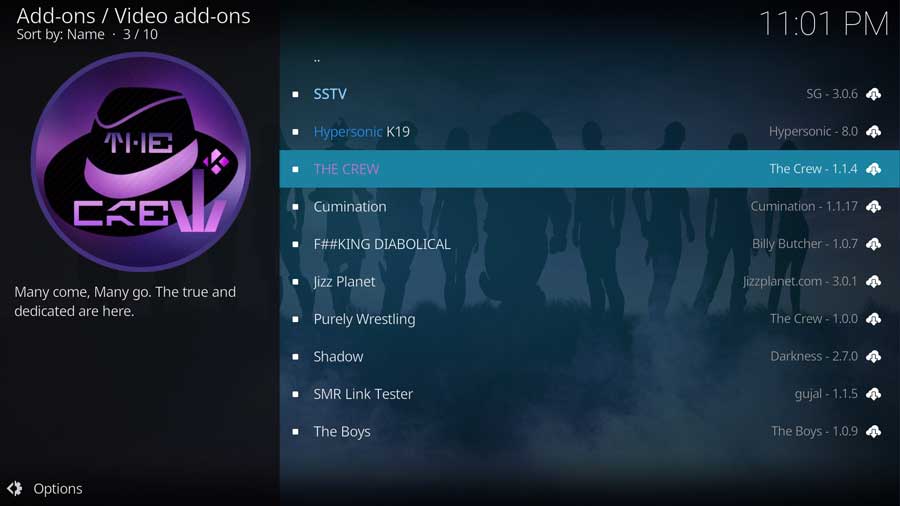
Scroll down until you see The Crew and click on it to continue.
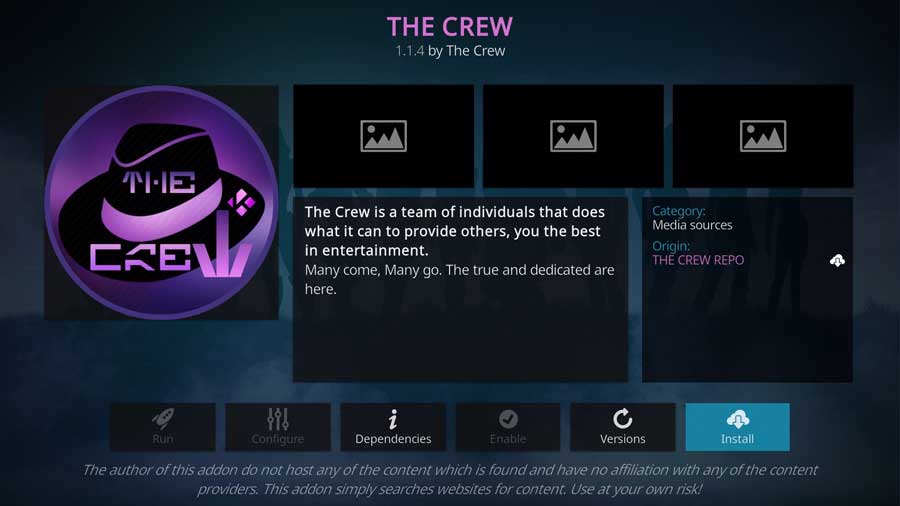
This brings you to the addon detail page, which looks like app detail pages in the Google Play Store or Aptoide TV.
It shows you more details, like different versions of the addon that are available, as well as any dependencies that will be installed along with the addon.
Click Install to continue.
After a few seconds, you’ll see a popup message the The Crew Add-on has been installed.
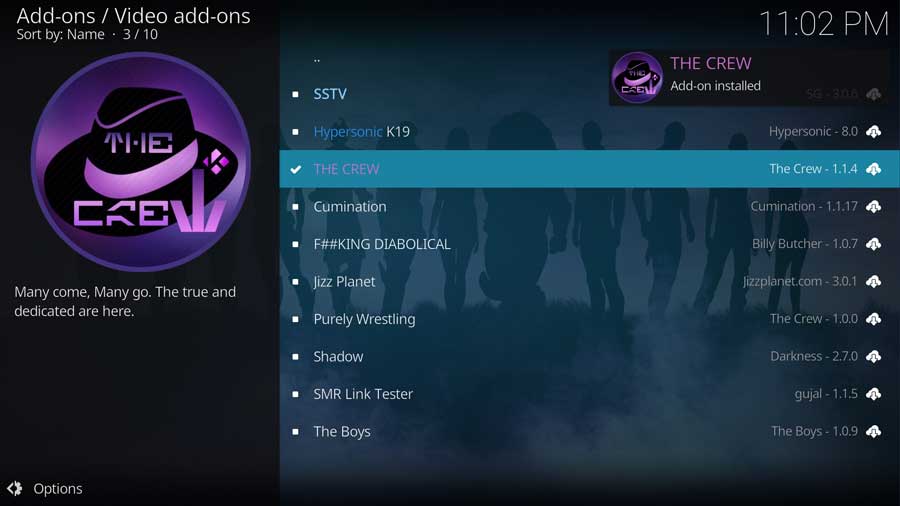
That’s it!
To watch content on The Crew, go to the Add-ons tab on the left-side menu and click The Crew icon.

How to Uninstall The Crew Add-on from Kodi
If the time comes when you don’t want to use The Crew addon in Kodi anymore, it’s pretty easy to uninstall.
We’re going to walk through that process now.
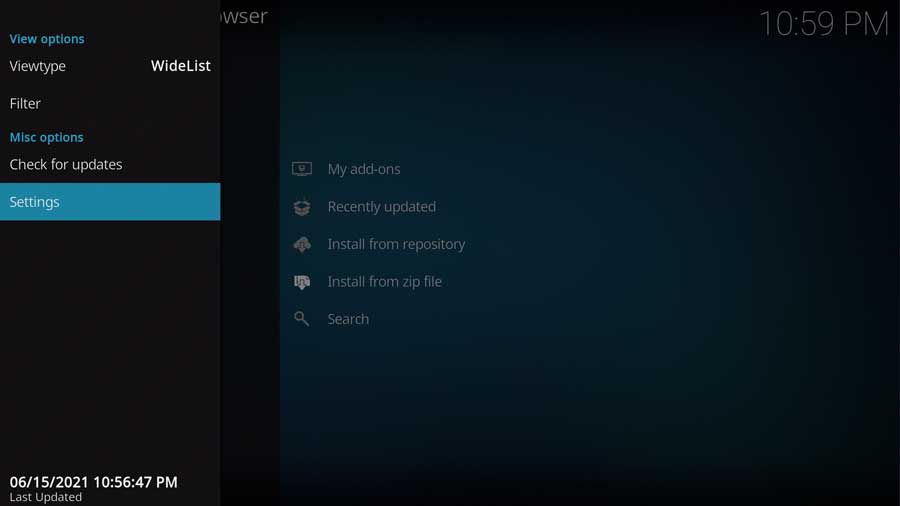
To start, go to the Add-ons tab and click on My Add-ons.
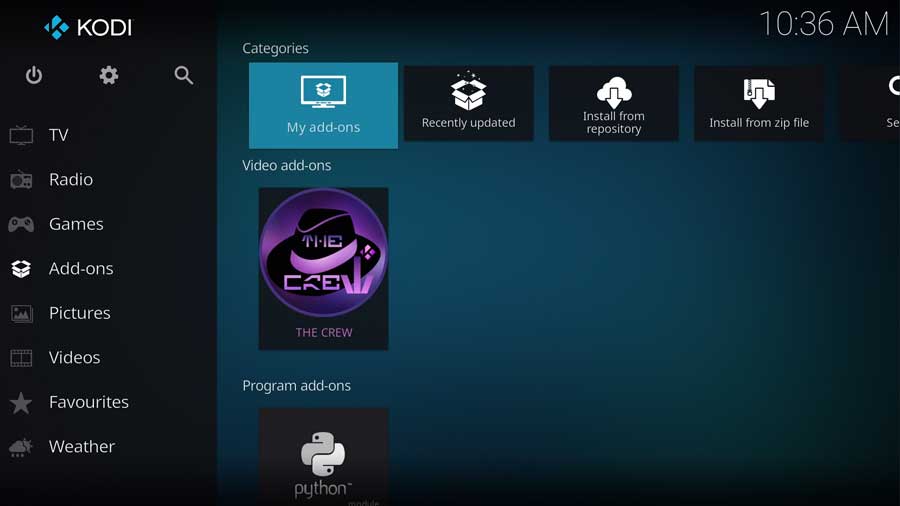
When we installed The Crew addon, we found it in the Video Add-ons section.
So we need to go back to that section to uninstall it.
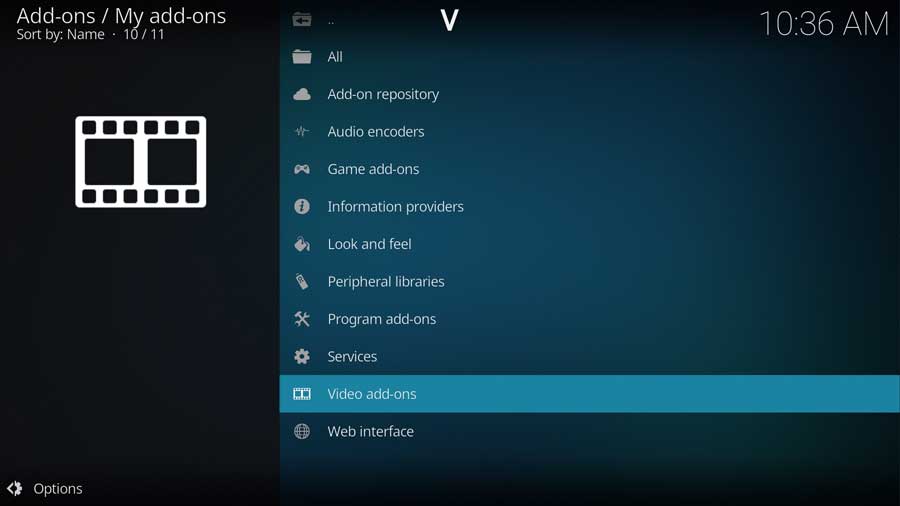
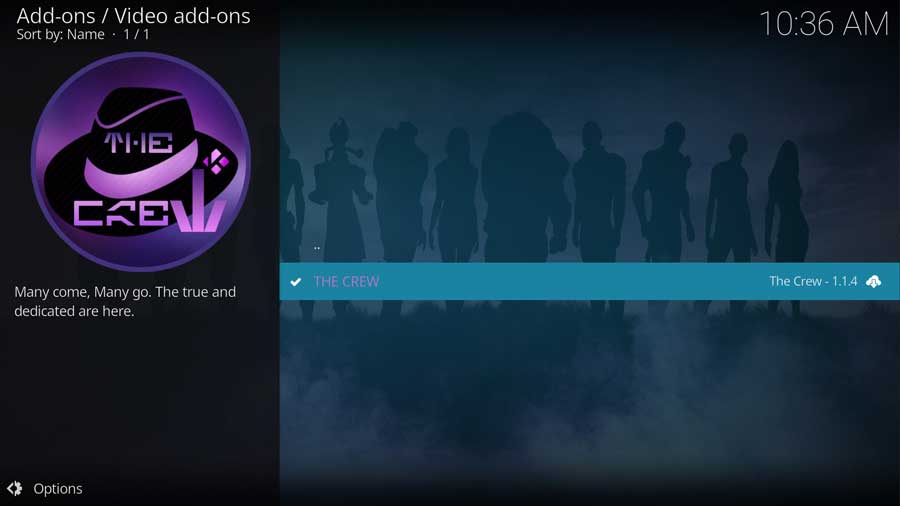
Scroll down until you see The Crew and click on it.
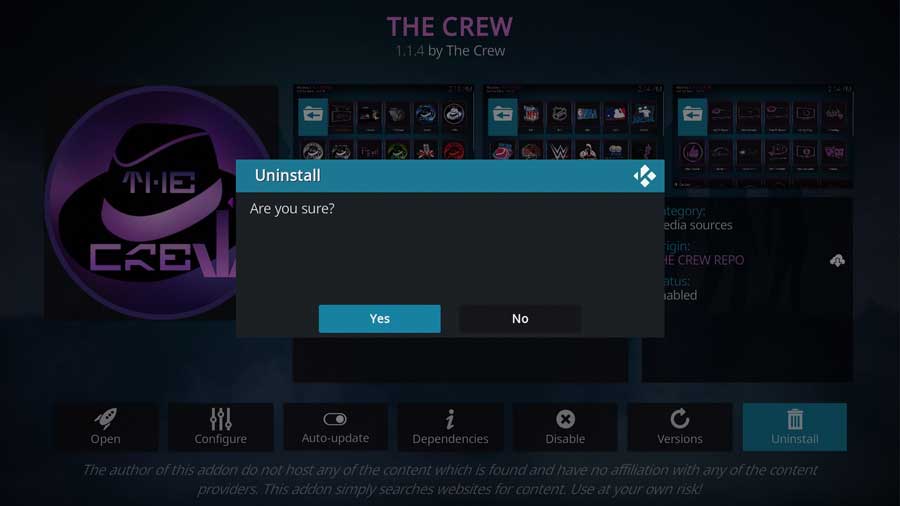
That takes you to the addon detail page. From there, click the Uninstall button in the bottom right-hand corner of the screen.
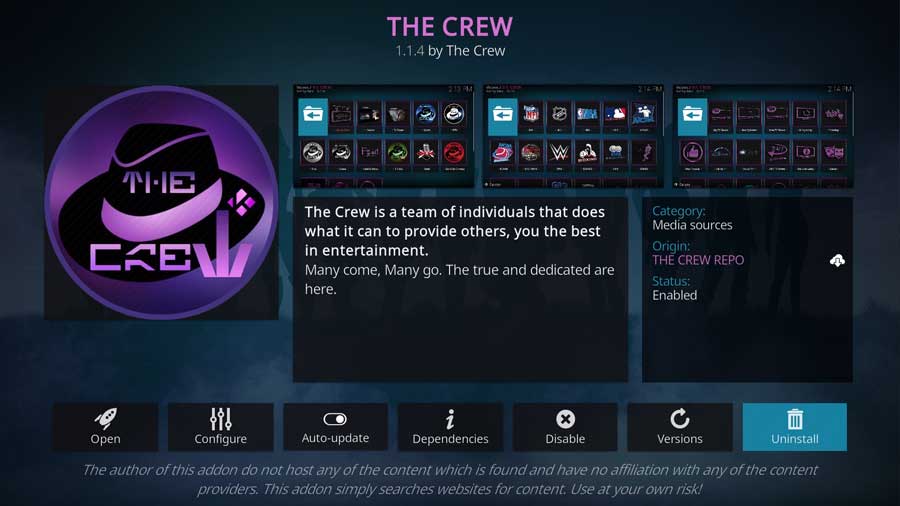
Kodi asks you to confirm if you really want to uninstall the addon.
Click Yes to confirm.
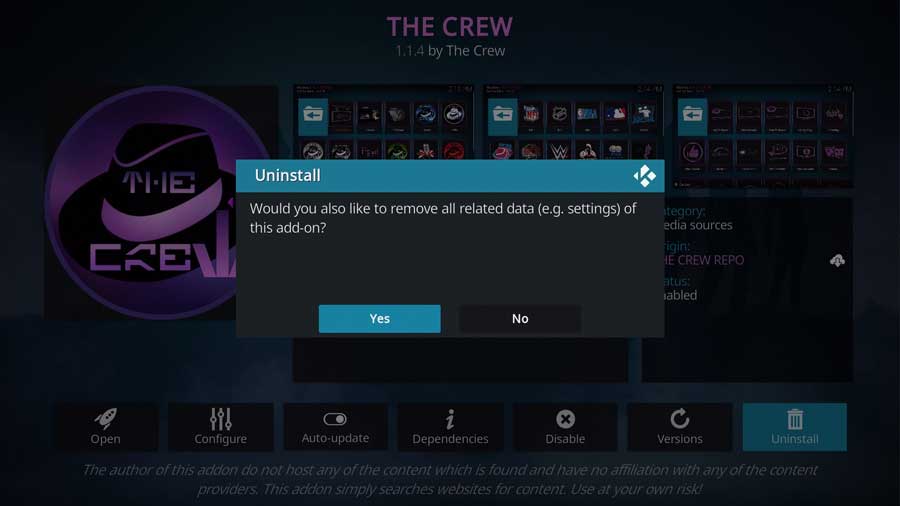
You have the option of keeping any custom settings or deleting them as well.
If you’re going to reinstall The Crew or install a different version, then it’s a good idea to say No to this.
However, if you’re completely uninstalling The Crew, then click Yes.
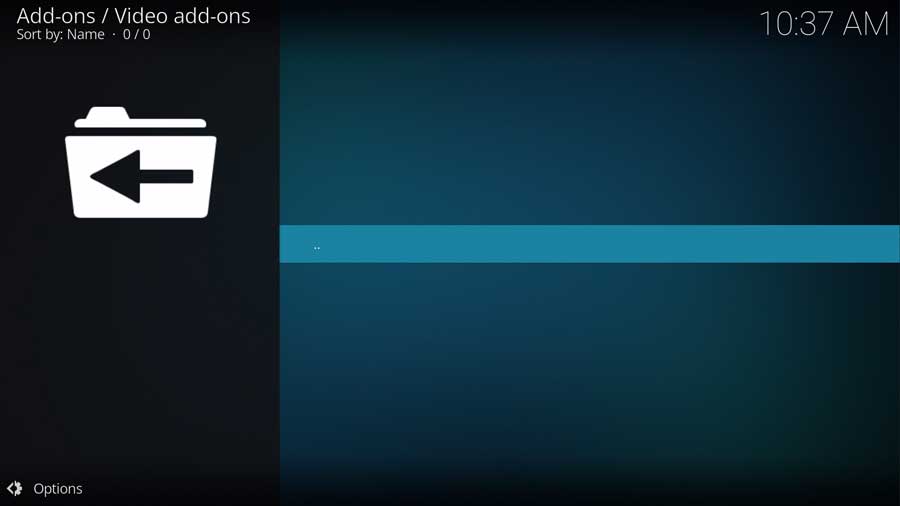
After a few seconds, you’re returned to the Video Add-Ons page, and the process is finished.

After a brief hiatus from the industry he's back at the helm of AndroidTVNews.com to bring Android TV and TV boxes to the forefront of the streaming world.
When he's not writing, he spends as much time as he can with his beautiful wife and his bulldog.
- How to set up and use Stremio with Real-Debrid on Android TV [2024] - August 18, 2024
- How to Install Kodi Diggz Xenon Plus & Free99 Build [March 2024] - March 3, 2024
- How to Enable Unknown Sources on Chromecast with Google TV [2025] - October 30, 2023