Last Updated on September 6, 2023 by Tim Wells
The final storage option for the NVIDIA Shield is mounting network storage to it, like a full-fledged NAS or Ethernet hard drive.
This is the third article in the series detailing the different storage options for the NVIDIA Shield.
We’ve already talked about external storage options like hard drives and SD cards and connecting your Shield to your Windows PC.
If you’ve set up your network already, sharing drives between different PCs in your home, you’ve done most of the work already. All you need is to go into your settings menu and do a few last things.
In this article, we will only cover the process on the NVIDIA Shield TV. We won’t discuss setting up a network share on your PC or NAS. There are already tons of articles and videos that will walk you through that portion.
But I will take you step-by-step through all the Shield TV settings you must configure.
Ready?
Let’s get started.
A Word About Mounting a NAS Drive for Streaming
I get asked often about how to mount a dedicated NAS (Network Attached Storage) to the Shield TV for streaming and whether this process will work.
I initially wrote this how-to guide using an old Western Digital MyCloud external hard drive and a newer external SSD for testing.
Since then, I’ve upgraded to a dedicated Synology DS920 4-bay NAS, so I wanted to see if this process would still work.
Thankfully, everything worked smoothly, and my NVIDIA Shield TV recognized my Synology NAS instantly. From there, I could play movies directly from the NAS using VLC media player, Plex, and Kodi.
If you use your NVIDIA Shield as a Plex Media Server, mounting a NAS as network storage is a great way to give your Shield access to all your media files.
How to Mount Network Storage on NVIDIA Shield
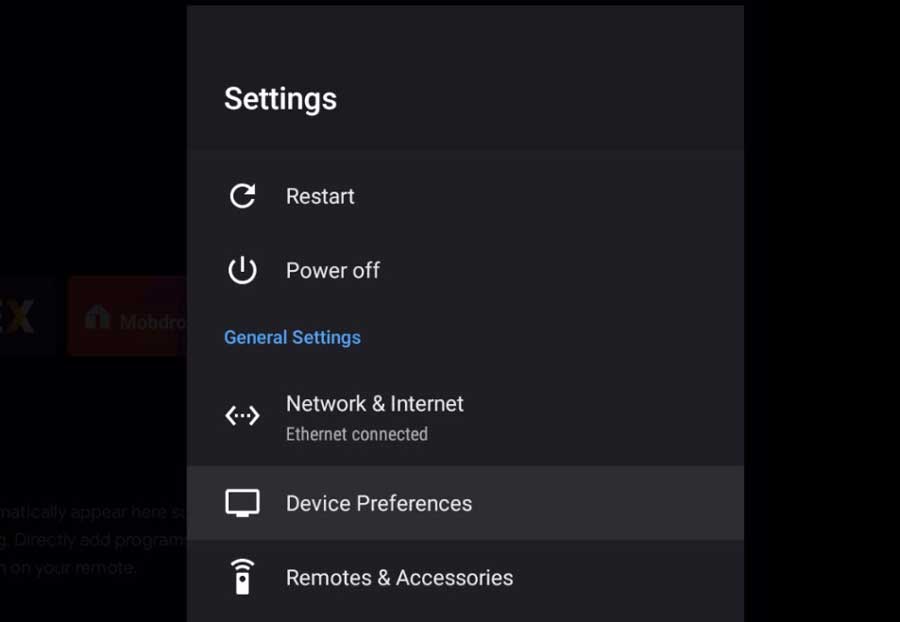
To start, open your Settings menu. If you’re on your Android TV home screen, look for the gear-shaped icon in the upper right-hand corner of the screen.
Scroll down until you see the Device Preferences section, and click on it.
Then, look for the Storage section and click on it to continue.
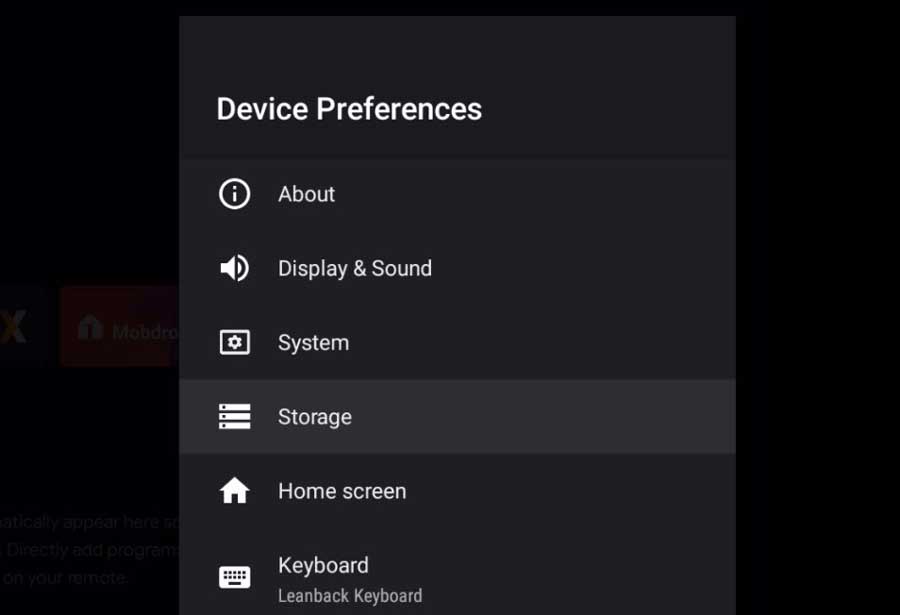
This should look very familiar if you’ve read the other articles in my storage series.
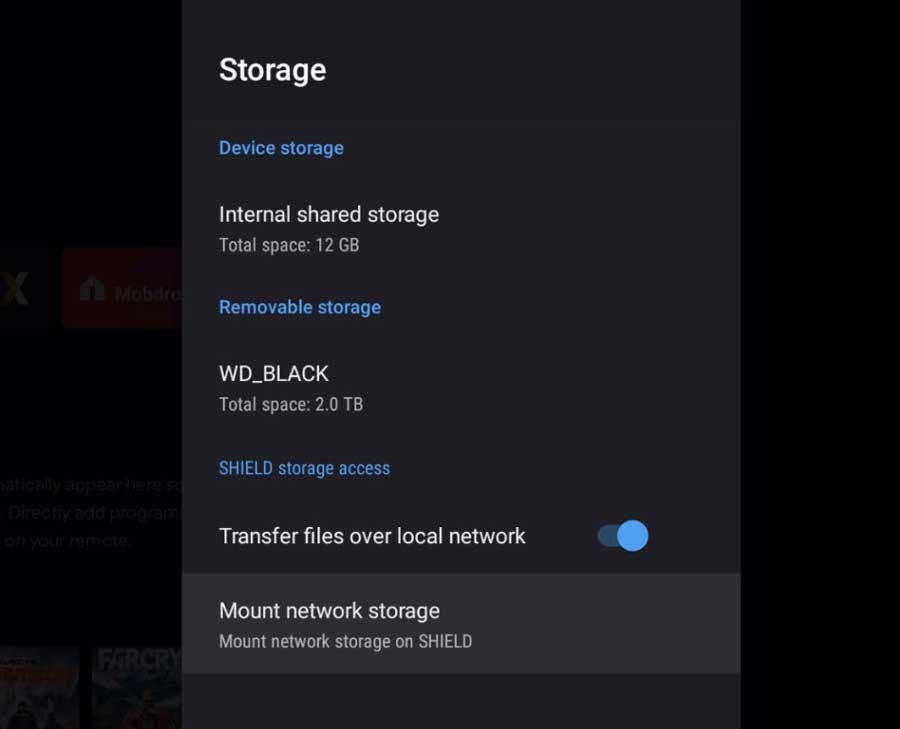
The option to Mount Network Storage on Shield will be at the bottom of this menu.
Click on it to open that menu.
The Network Storage menu will look very different, depending on what devices the Shield TV can see on your network.
In my case, I have three devices listed.
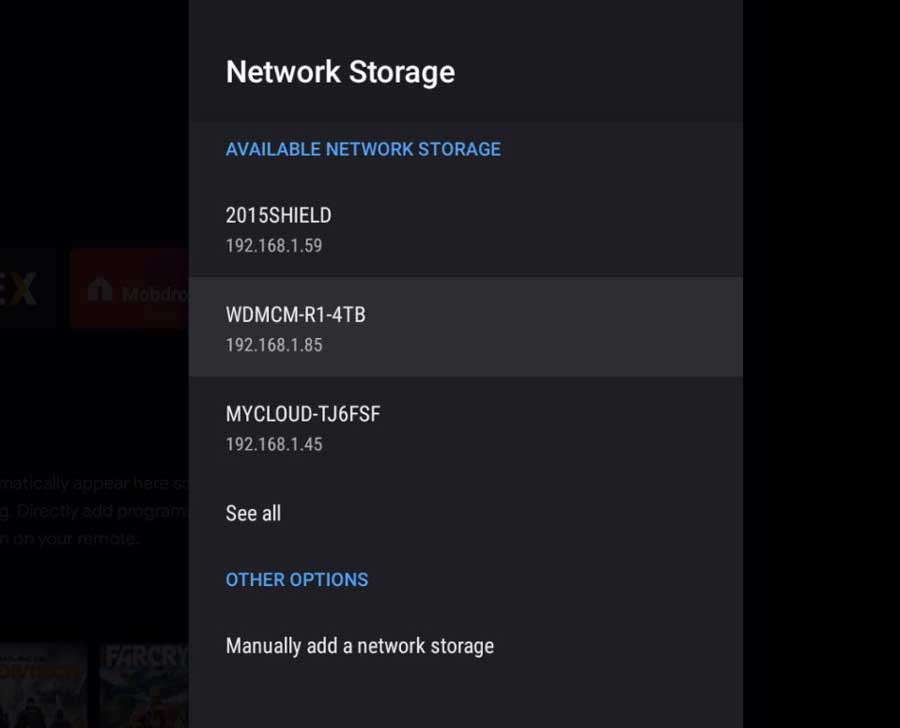
The first device (2015 Shield) is the Shield TV I use now.
Because I’ve enabled Transfer Files Over Local Network, the system sees and lists that network share for us.
The next two devices (WDMCM-R1-4TB and MYCLOUD-TJ6FSF) are Western Digital network hard drives.
In this example, we will mount the first one as network storage so my Shield TV can see the movies and TV shows I keep on it.
You can add the storage manually if you don’t see the device you’re looking for here or under the See All option. We’re going to cover that in the next section.
For now, let’s continue adding network storage through the wizard.
Adding Network Storage Automatically
In most cases, your NVIDIA Shield will detect the storage device on your network.
If so, the process is straightforward.
Once you select the device, a new window will open, asking you to choose a login type.
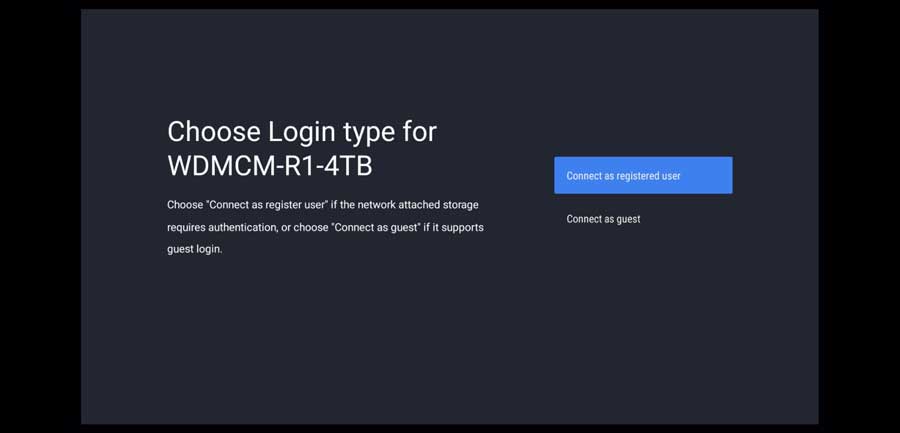
What you select here depends on how you’ve configured your network.
You’ll need to connect as a registered user if you’ve set up username & password authentication on your network-shared drive. If you haven’t, then you can connect as guest.
I recommend setting up username & password authentication on your network.
Signing in may be a hassle, but the Shield will remember the password, so you’ll only need to do it once.
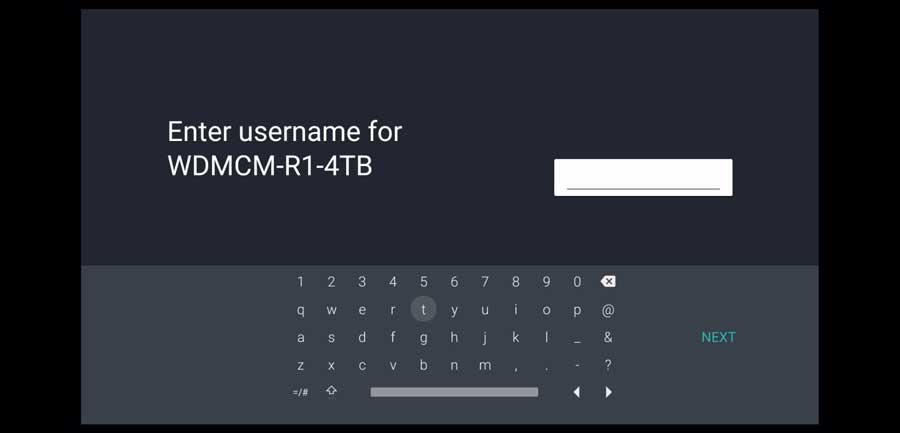
Once you go through the standard username\password screens, a new heading called My Network Storage will appear, and your Shield TV will attempt to connect to the device.
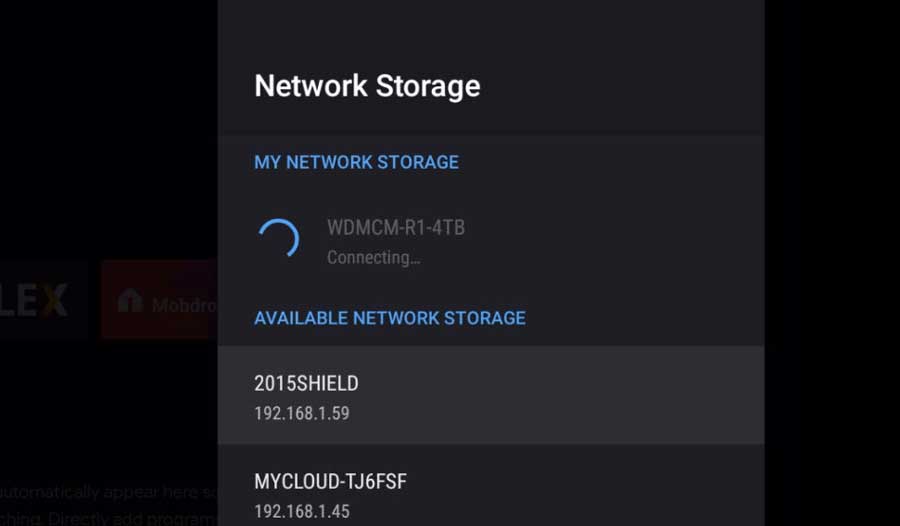
In most cases, this only takes a few seconds, depending on the speed of your network.
Once finished, you’ll see the word Connected underneath the device name.
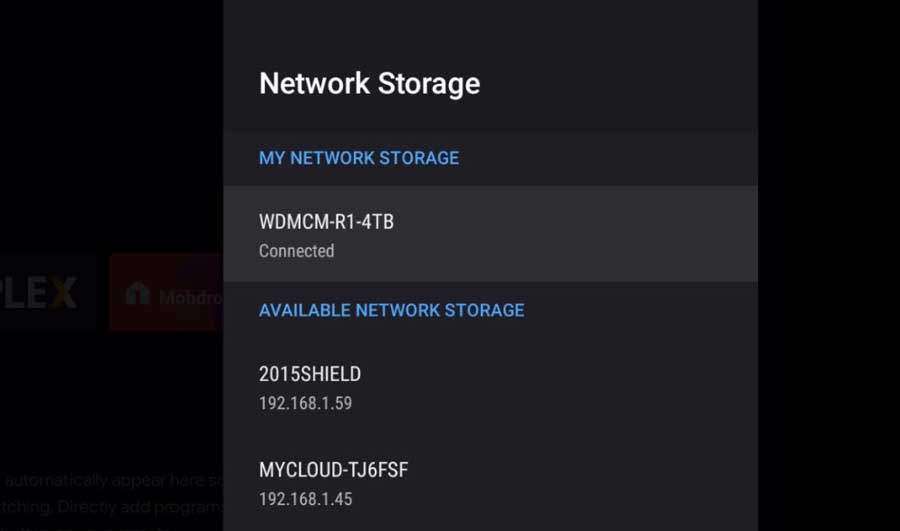
Now you’ll see a breakdown of the mounted network storage, just like all your other internal and external drives.
However, you won’t be able to make any changes to the files here.
You’ll need to go to your favorite Android TV file manager to do that.
Personally, I recommend X-plore.
I recently looked at all the different file managers available on Android TV, and that was definitely my favorite.
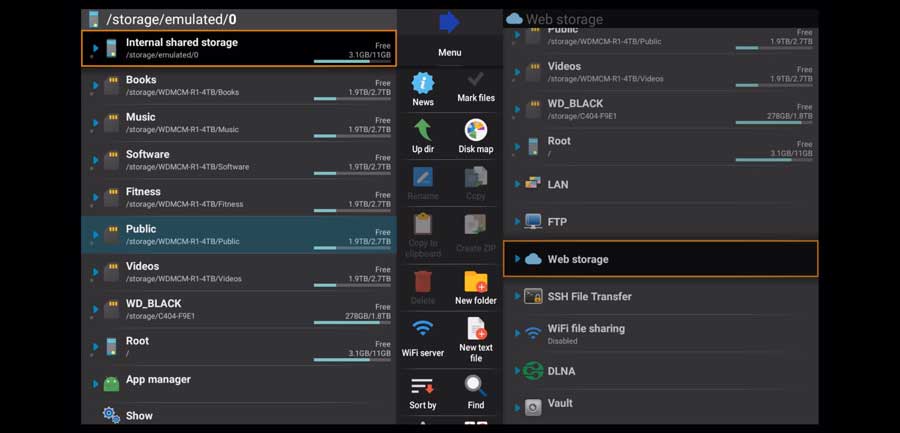
All mounted network shares will appear as different folders on the left-hand side. There you can copy and move files around as you would with internal storage on your NVIDIA Shield.
Adding Network Storage Manually
If the network storage device you’re looking for doesn’t appear in the list, you can still add it to your NVIDIA Shield. It’ll just take a few more steps.
Typically, the easiest way to create a network share is to enter the IP address of the device I’m looking for. However, many users, myself included, have trouble getting this to work on the NVIDIA Shield.
You’ll see many threads on the official NVIDIA forums discussing this issue, unfortunately, without much resolution.
I did find a workaround that worked, however.
If you know the full UNC path (usually \device name\shared folder), then that seems to work fine.
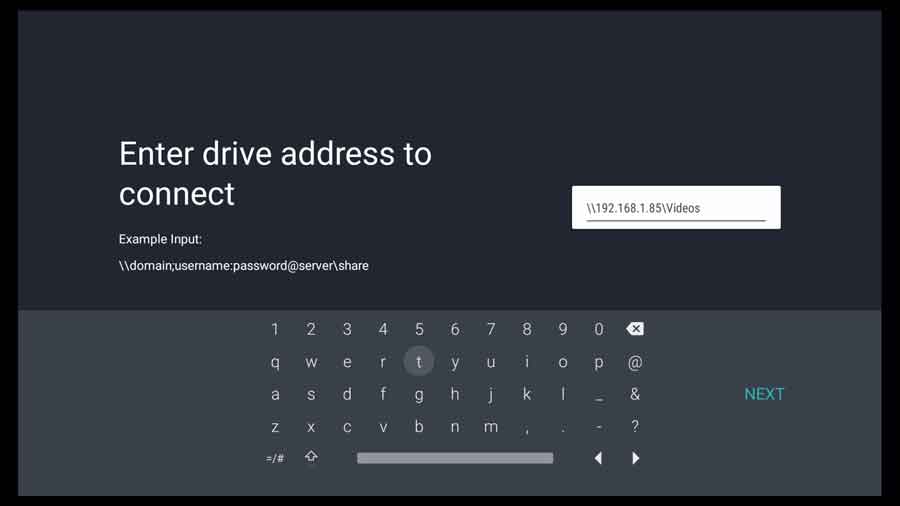
If you only know the IP address, you can mount a particular folder on that drive. That bypassed the problem, and I was able to connect.
Finding the UNC path can be tricky. However, if you have Microsoft Office, there’s a solution that user Dlauzon came up with on Stack Overflow that is pure genius!
If you hold down the right mouse button and drag the folder onto a Word document or Outlook email, you’ll get the option to ‘Create Hyperlink Here.’
That will be your full UNC path.
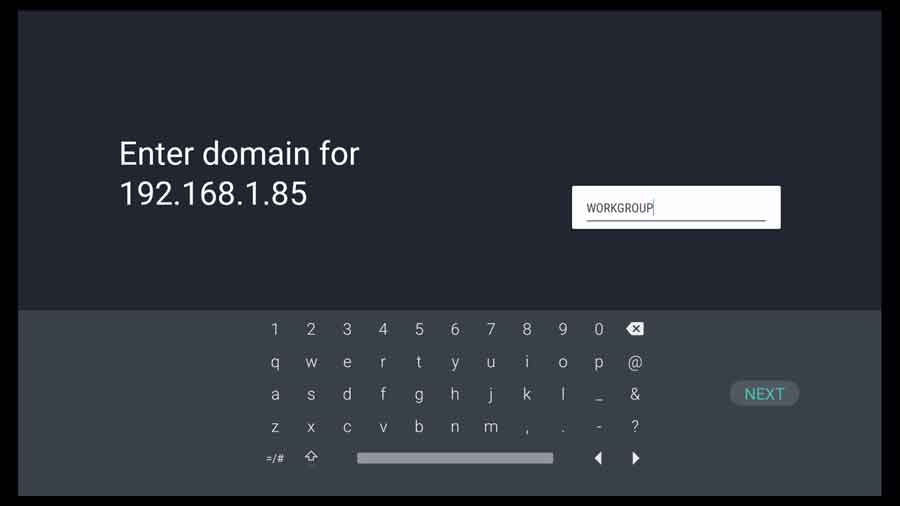
Depending on how your network is set up, you may be asked for your domain name.
Unless you’ve changed it, it should be WORKGROUP, so you can click Next to continue.
From here, it follows the same process as above. Enter your username and password, and your NVIDIA Shield will attempt to authenticate the connection.

After a brief hiatus from the industry he's back at the helm of AndroidTVNews.com to bring Android TV and TV boxes to the forefront of the streaming world.
When he's not writing, he spends as much time as he can with his beautiful wife and his bulldog.
- How to set up and use Stremio with Real-Debrid on Android TV [2024] - August 18, 2024
- How to Install Kodi Diggz Xenon Plus & Free99 Build [March 2024] - March 3, 2024
- How to Enable Unknown Sources on Chromecast with Google TV [2025] - October 30, 2023