Last Updated on June 8, 2025 by Tim Wells
The biggest problem with the NVIDIA Shield is you never have enough internal storage space.
In fact, unless you’re still using an original 2015 NVIDIA Shield Pro, you’ve only got 16 GB of storage space at most. The 2019 base model NVIDIA Shield TV has an even more stingy 8 GB storage space.
The average 1080p movie takes up between 5 – 8 GB, which means you can only store a couple movies on your Shield TV at a time. 4K media files are around 30 GB, so they won’t fit!
Adding an external drive (HDD, SSD, or USB drive) to the NVIDIA Shield is common to get more storage space, especially if they’re running Plex Media Server.
A few years ago, I wrote a tutorial covering adding external storage devices to your NVIDIA Shield TV. It became one of my most popular posts, helping thousands of people each month.
However, things have changed quite a bit since then.
NVIDIA no longer recommends using USB flash drives, so this was a great time to take another look and see what’s out there.
This article will discuss adding external storage drives (SD cards, hard drives, and portable SSD) to your NVIDIA Shield and NVIDIA Shield Pro.
I’ll give my recommendations on which I think are the best and show you how to add them to your NVIDIA Shield TV.
Finally, I’ll show you how to mount network storage to your NVIDIA Shield so you can stream movies over your home network.
Ready?
Let’s get started.
Additional Storage is a MUST for Your NVIDIA Shield
I’ve owned every version of the NVIDIA Shield.
My daily use Android TV device was my 2015 NVIDIA Shield Pro before upgrading to the 2017 NVIDIA Shield TV. It lacked the 500 GB hard drive of the Shield Pro, but it was smaller and could hide behind my television.
Recently I picked up the new, cylindrical 2019 Shield TV. However, I quickly realized the storage space was a HUGE drawback.
You only have 3.7 GB of available space left when you pull it out of the box.
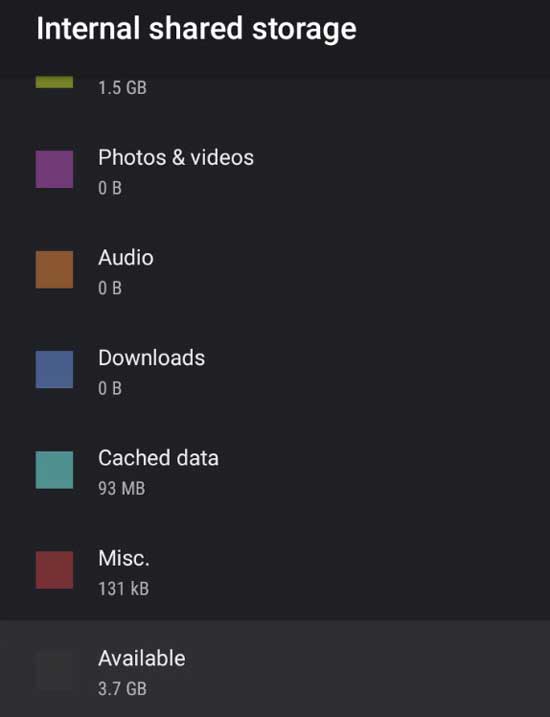
Yikes!
Obviously, the base model NVIDIA Shield TV is mainly designed to play streaming media from Netflix or some other streaming service.
Adding external storage allows you to run Kodi or Plex Media Server from the external drive and save your Shield’s internal storage for apps.
Since we run Plex Media Server extensively in our house, I upgraded again to the NVIDIA Shield Pro. However, I still keep my movie collection on an external storage drive.
Best External Storage Devices for the NVIDIA Shield
I did a lot of comparison shopping to find the perfect external storage for my NVIDIA Shield TVs.
However, there are differences between the 2019 NVIDIA Shield TV and older versions. The biggest of these is that it only has a micro-SD card slot, which meant I needed to buy an external hard drive and a microSD card.
This list contains micro-SD cards, external hard drives, and solid-state drives. However, one thing that’s NOT on this list is USB flash drives.
I’ll get into that a little further down.
First, let’s look at my favorite external drives for the NVIDIA Shield.
Best Micro-SD Card for NVIDIA Shield TV
There are dozens of different options for micro-SD cards, but I recommend the Lexar Professional 1000x Lexar Blue Micro SD Card.
The Lexar 512GB Blue Micro SD card is available in 128GB, 256 GB, 512 GB, 1 TB, and 2 TB sizes. Each is rated at read speeds of 160 MB per second and write speed of 40MB per second.
That’s fast enough to play 8K video if you’re using some compression.
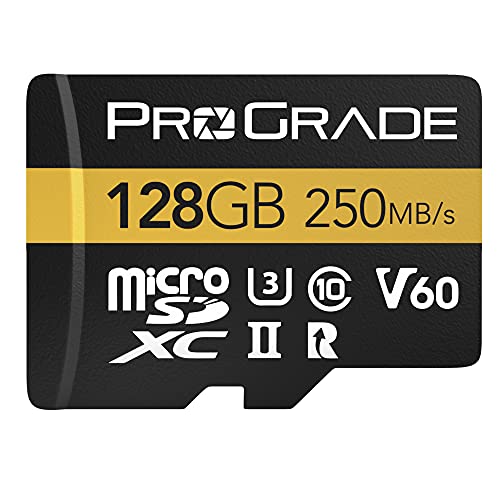
The ProGrade SD cards are also at this price point, and they boast a read speed of up to 250 MB per second and write speed of 130MB per second! However, you do sacrifice storage for the performance.
However, you can get double the expandable storage for the same price in the 1000x series.
Available in sizes ranging from 128GB all the way up top 2TB, the Lexar Professional series lets you add more storage anytime you want.

Best NVIDIA Shield External Hard Drive
I’ll admit I’m a big fan of Western Digital hard drives.
I’ve been building PCs for over twenty years, and I’ve only ever had one WD drive suffer a disc failure. I store a lot of personal information on various hard drives, so it gives me peace of mind to know that my critical data is safe.
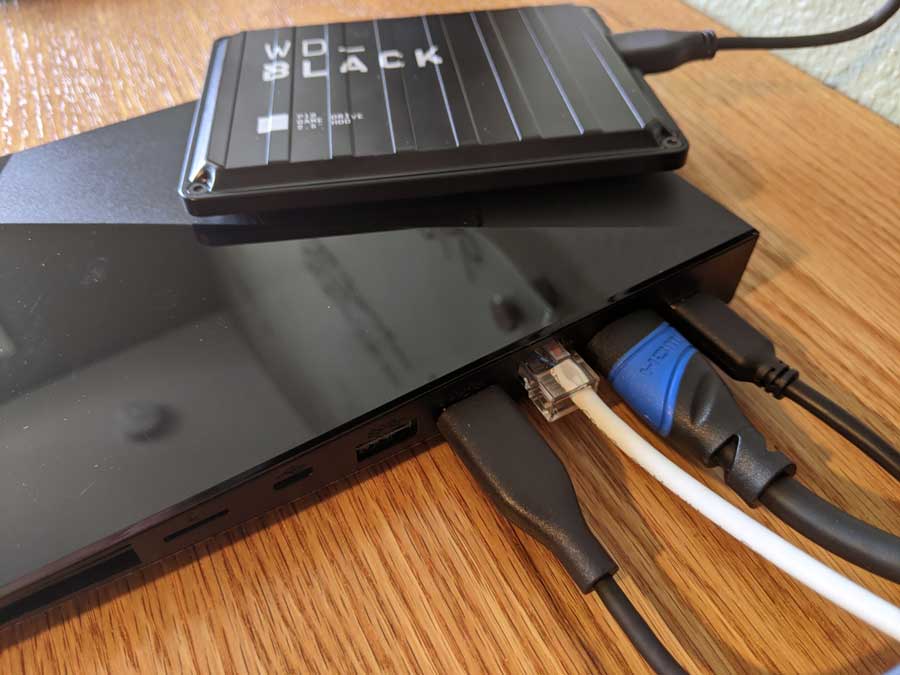
With that in mind, I looked at a few portable WD drives but quickly settled on the WD Black Series P10 gaming hard drives.
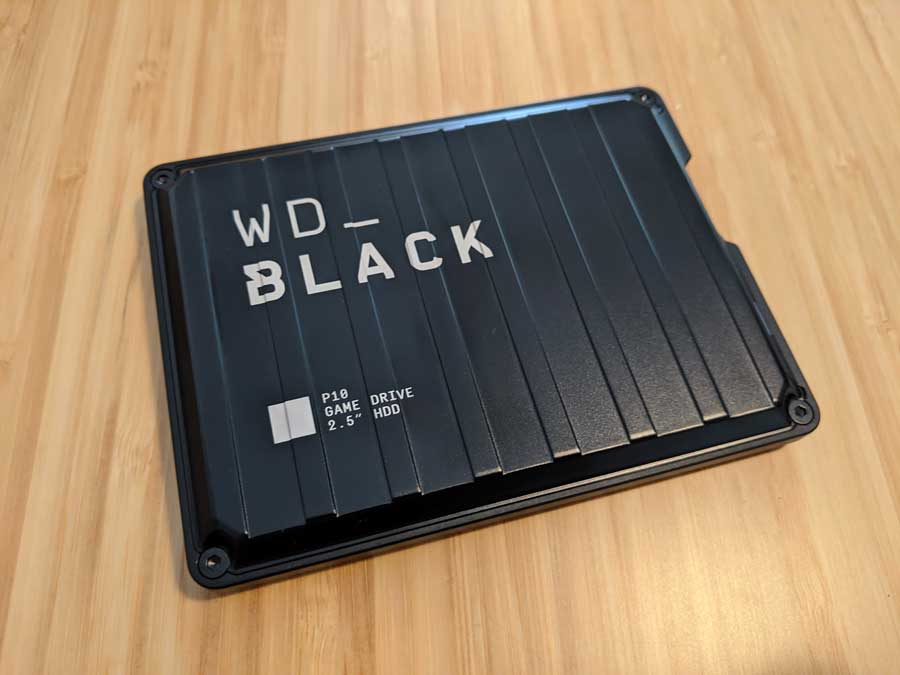
Streaming video and video games need insanely fast transfer speeds, so I knew this would be a great fit.
This drive has a transfer speed of 140 MB per second, making it just a touch slower than the Lexar micro-SD card you’ll see a little further down.
When you compare hard drives (HDD) to solid-state drives (SSD), you usually trade storage space for transfer speeds. An external HDD is slower than an SSD but is considerably less expensive.
I picked up a 2 TB WD Black P10 hard drive for a pretty affordable price. Getting an SSD with that kind of storage, you’d be paying three times as much.
Overall, the WD Black P10 has rock-solid reliability and good speed. I think it’s the best hard drive for the NVIDIA Shield.
Western Digital created an inexpensive external hard drive with fast transfer speeds and a durable case.

Best External SSD Drive for NVIDIA Shield TV
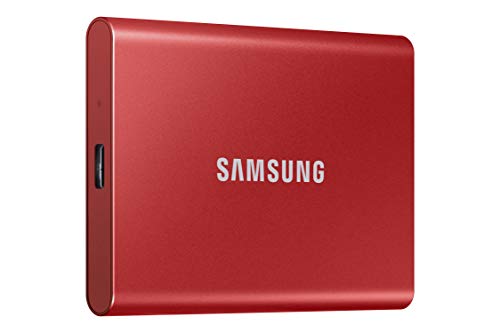
If you are okay with paying a little more for a blindingly fast external hard drive, you want to look at the Samsung T7 portable SSD.
When you hear Samsung’s name, you might only think about its amazing televisions. But Samsung is also the market leader in SSD technology.
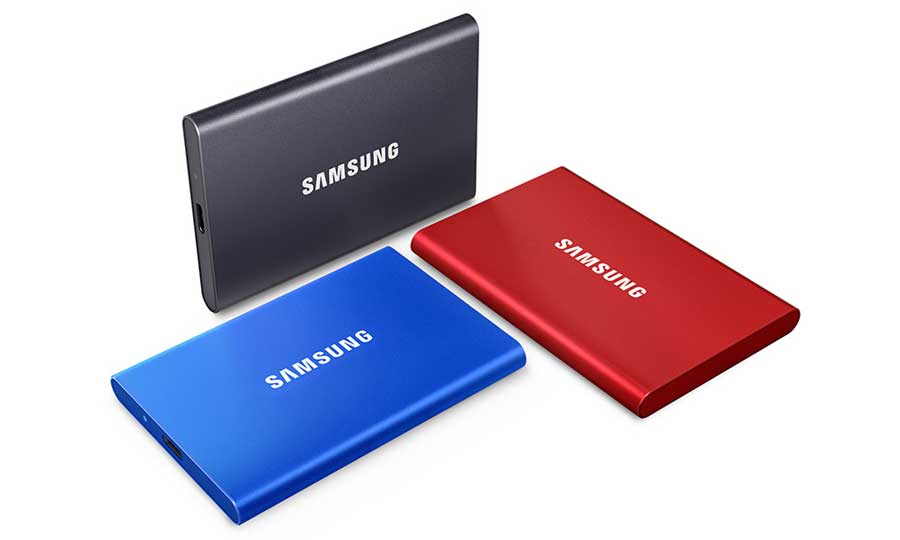
The Samsung T7 is the replacement for the award-winning T5 external SSD. They come in 500 GB, 1 TB, and 2 TB sizes and start at around $110.
Each boasts a transfer speed of 1050 MB per second, which is over seven times faster than traditional hard drives!
As I said earlier, you will pay a premium for that speed. When I was shopping, I got BOTH the WD Black and the Lexar micro-SD card for less than the price of a 500 GB SSD.
Lightning fast performance in a stylish, ultra-lightweight package. Available in several colors.
On the other hand, if you are looking for a SSD that’s shock and weather-ressistant, check out the offering from SanDisk. It’s a bit slower than Samsung, but still a lot faster than the SD cards.
With speed up to 520 MB/s, this "budget" choice can handle the highest quality of content - supporting 8K playback like a breeze.

No More Recommended USB Flash Drives!
For a time, NVIDIA maintained a page on its official support site with a list of recommended USB flash drives. After all, a flash drive is a very inexpensive way to add extra storage to almost any device.
Not anymore.
Over the years, several NVIDIA Shield TV owners reported cases where their USB flash drives would overheat.
While there are no reports of fires caused by USB flash drives, it was enough to cause NVIDIA to withdraw its recommendation.
I recommend avoiding USB flash drives on the NVIDIA Shield TV or any other Android TV box.
The Ultimate Storage Solution – Network Attached Storage (NAS)
Okay, so you’ve heard about NAS and are wondering what it is? Don’t worry, it’s not as complicated as it sounds. NAS stands for “Network Attached Storage.” Basically, it’s like your own personal cloud storage server, but instead of being run by a company like Google or Dropbox, it’s a device you own and control, sitting somewhere on your home network. Think of it like a central hard drive that everyone in your house can access. It has one or more hard drives inside, and it connects to your router (the thing that gives you Wi-Fi) with an ethernet cable.
Why would you want one? Well, there are a few good reasons. You can back up all your computers, phones, and tablets to it automatically. You can also store all your photos, videos, and music in one place, making it easy for everyone to get to them. And for someone with a Nvidia Shield, it’s a great way to add more storage. Your Shield is wonderful for streaming and gaming, but it has a limited amount of space built in.
Here’s how a NAS can help with your Shield. Instead of being limited by the Shield’s internal storage, you can configure the Shield to use the storage on your NAS as if it were another hard drive. You can then save recorded TV shows, download games directly to the NAS, or even store your personal videos and photos there, accessing them through the Shield. The Shield will see the NAS as a folder you can browse, similar to plugging in a USB drive. There’s a little setup involved – you’ll need to make sure the NAS is set up correctly and know its address on your network – but it’s not too difficult, and there are plenty of guides online specific to the Nvidia Shield and different NAS brands. It’s a helpful way to expand your Shield’s capabilities and avoid running out of storage space.

How To Add More Storage Space to Your NVIDIA Shield
It’s super-easy to add additional storage to your NVIDIA Shield TV. In fact, there’s only one decision that you need to make ahead of time.
Do you want to use it as Device Storage for more apps, or do you want a place to store your media files?
Adoptable Storage vs. Portable Storage
As soon as you plug an SD card into your NVIDIA Shield TV, you’ll be asked whether you want to use it as Device Storage.
Adopting the SD card as device storage, also called Adoptable Storage, allows the system to use the SD card as internal storage. This means you can install new apps directly to it or move apps to free up space.
It may seem like a no-brainer, but adopting the SD card as device storage has drawbacks.
Adoptable storage is slower than the internal storage on your device. It’s never a good idea to offload apps you frequently use to external storage because you’ll notice the performance lag.
SD cards have a shorter lifespan than the hard drive on your NVIDIA Shield. The average lifespan of an SD card is between 5-10 years, depending on the manufacturer. That’s still a long time, but remember that your SD card will probably fail before your device does.
The SD card will only work on that device. This was the biggest shock for me. Adoptable storage is explicitly formatted to work on that device. You can only try to use it on another device after reformatting it.
While none of these reasons are deal-breakers, I recommend using external storage as portable storage instead of adopting it as device storage.
Remember, if you format your SD card or hard drive, you will lose any information stored on it.
How to Add External Storage to Your NVIDIA Shield
Adding additional storage is similar, whether adding an external hard drive through the USB port or plugging in a micro-SD card.
The first thing you’ll want to do is physically attach the external storage drive.
If you’re plugging in an external hard drive, you can use whichever USB port is more accessible.
For example, I mount my NVIDIA Shield’s behind my television, so I plug it into the slot next to the Ethernet port. That way, I can still reach the other USB port for my wireless keyboard.
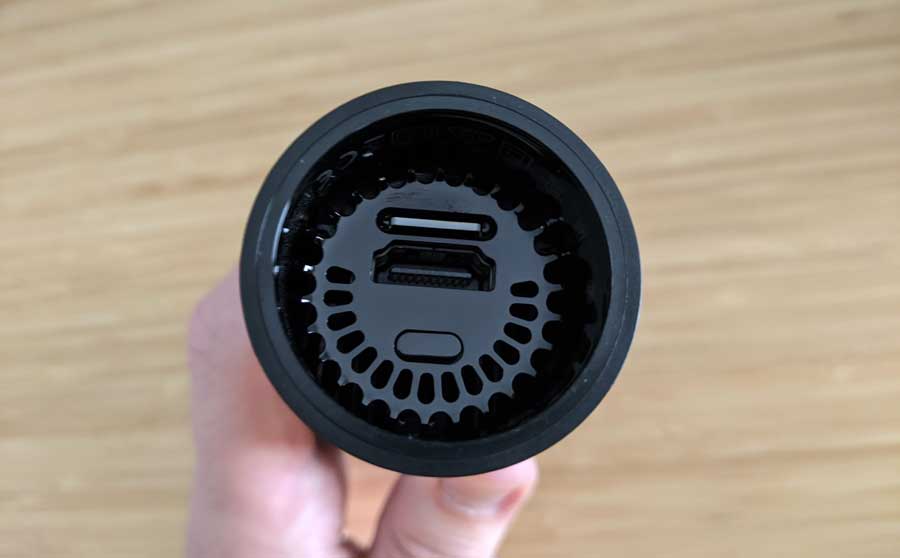
Micro-SD cards are more straightforward because there’s only one place the card can go.
If you have a 2015 NVIDIA Shield TV, or a 2015\2017 NVIDIA Shield TV Pro, the micro SD card slot is on the back of the device.
On the 2019 Shield TV, the micro-SD card slot is on the end of the device, directly above the HDMI port.
As soon as you plug in the SD card or hard drive, you’ll get a warning when you turn on your NVIDIA Shield TV.

How to Add a Micro-SD Card to Your NVIDIA Shield TV
Let’s talk about adding a micro-SD card to your Shield TV first.
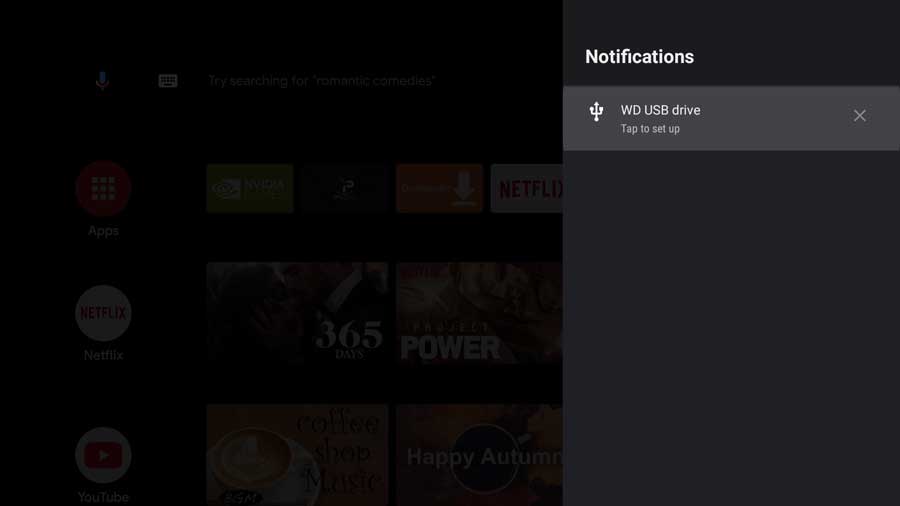
The easiest place to start is by clicking on the notification message in your home screen’s upper right-hand corner.
In this example, your NVIDIA Shield TV recognized that you installed an SD card and prompted you to tap to set it up.
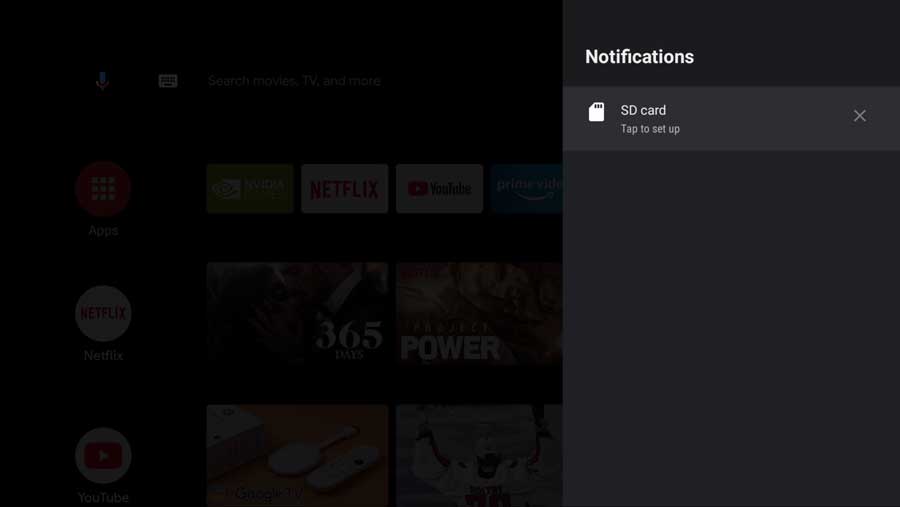
Clicking on the notification takes you to a screen where you’ll decide whether to adopt the card as device storage or to browse the contents at this time.
If you’re unsure what that means, go back up and re-read the section on Adoptable Storage vs. Portable Storage.
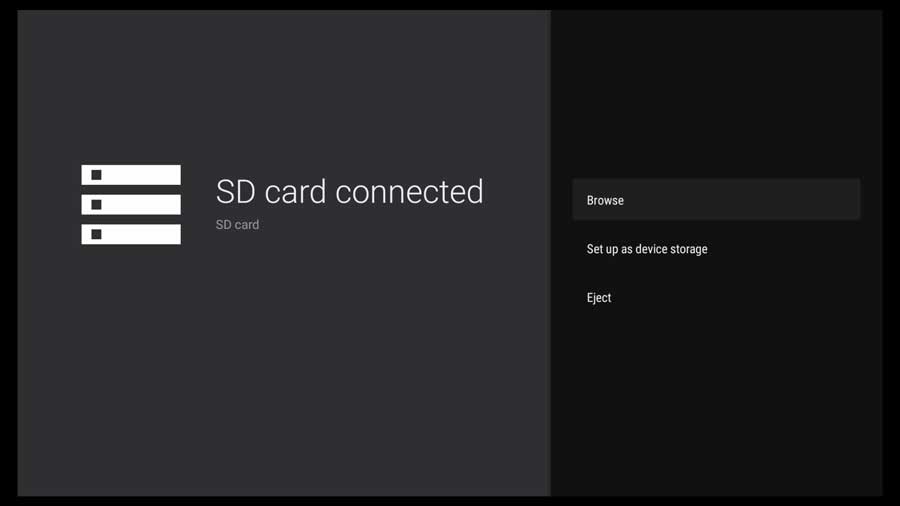
In this example, we will select Set up as device storage.
When we cover installing an external hard drive, we will configure that one as portable storage.
The choice is up to you. You can configure external hard drives and micro-SD cards as both device storage and portable storage.
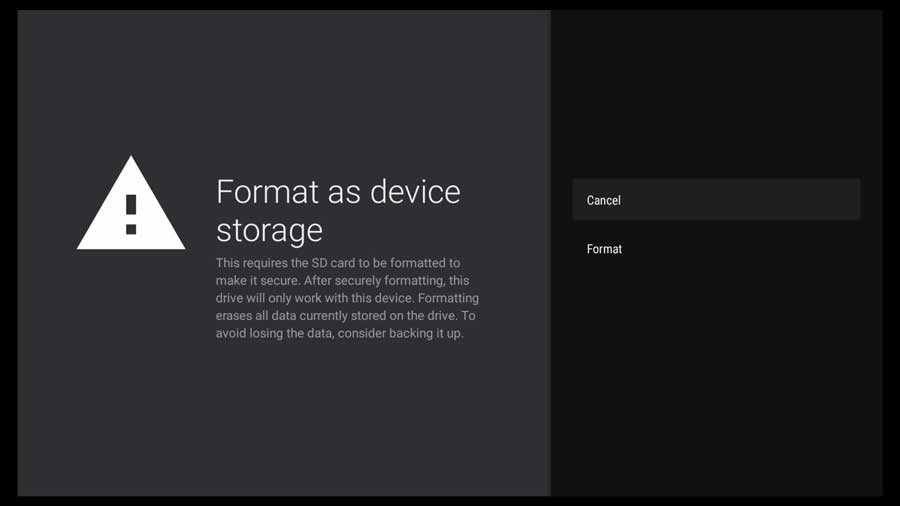
Once you click to set up your SD card as device storage, the system warns you that you’re about to format the drive.
Remember, once you click format, you’ll lose anything stored on the card.
Click Format to continue.
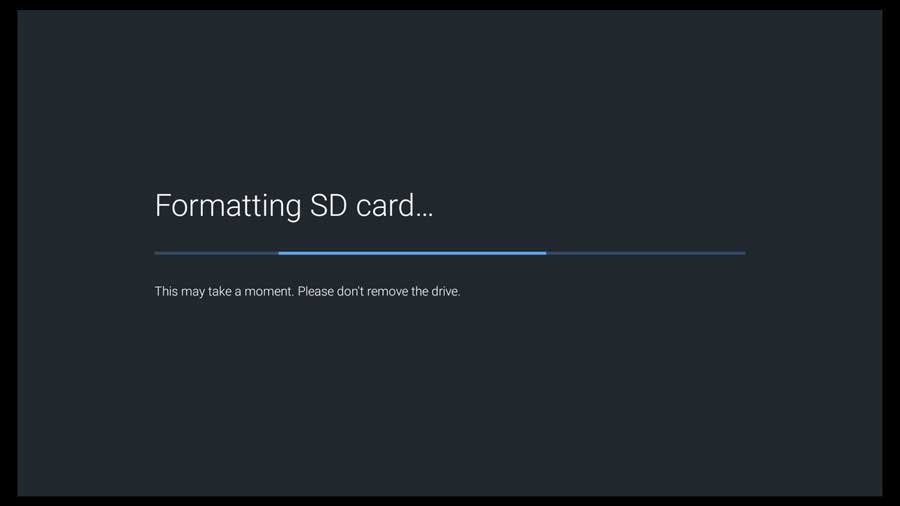
Depending on how large it is, it should only take a few seconds to format your SD card.
Once that process is complete, you’ll be asked whether you want to move some system files to your card now or later. Since the card can’t be used until these files are moved, click Move now.
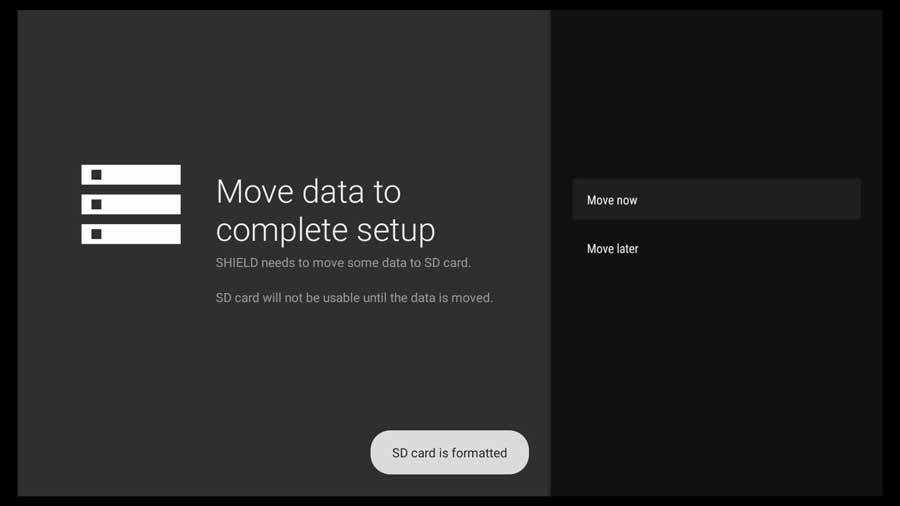
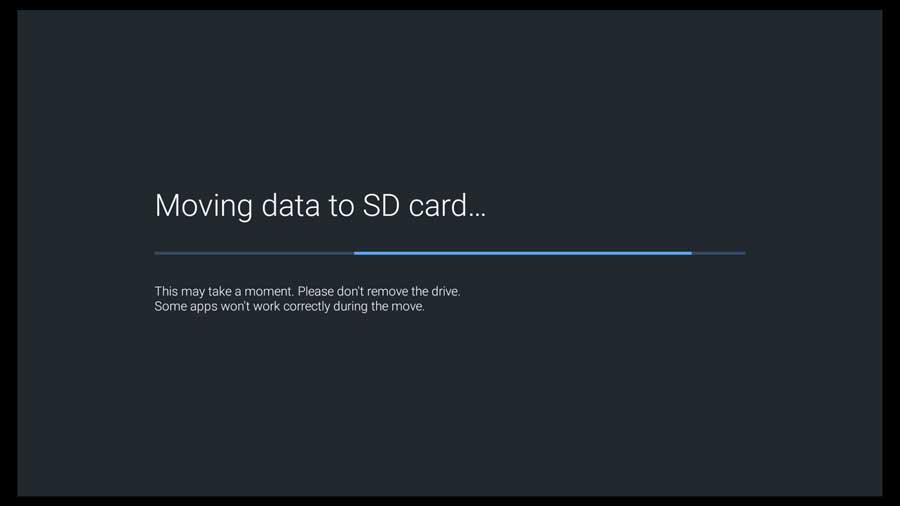
A brief splash screen tells you that the system is moving data to the SD card. You’re then brought back to the storage screen, where you can see a breakdown of how the space is used.

Since we set up the SD card as device storage, you have two options: eject the card or reformat the card as removable storage.
Keep in mind that this card is secure storage now and can only be used with this device.
If you remove it, you won’t have access to any of the apps you’ve migrated to it.
How to Connect an External Hard Drive to Your NVIDIA Shield TV
Adding an external hard drive to your NVIDIA Shield TV follows a similar process.
In this example, we will set it up as portable storage rather than adopting it as device storage.
That makes the setup super-easy.
You can quickly jump to the Storage section of the Settings menu by clicking on the notification warning in the upper right-hand corner of your home screen.
Alternatively, you can navigate there directly by going to Settings, Device Preferences, and Storage.
If you purchased an external hard drive from a major manufacturer, I’ve found that the NVIDIA Shield TV is good at figuring out precisely what it is.
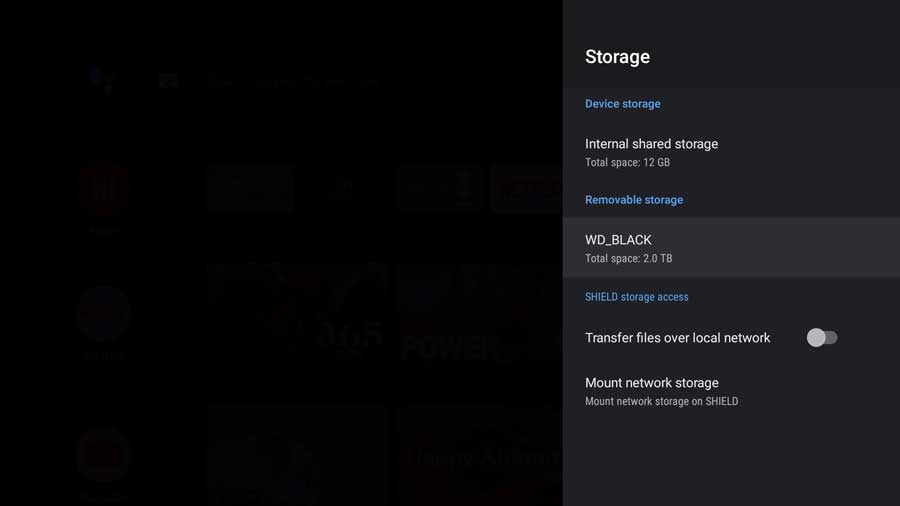
In this example, it’s already figured out that I connected my WD Black P10, and it’s ready to go.
Believe it or not, you’re already done.
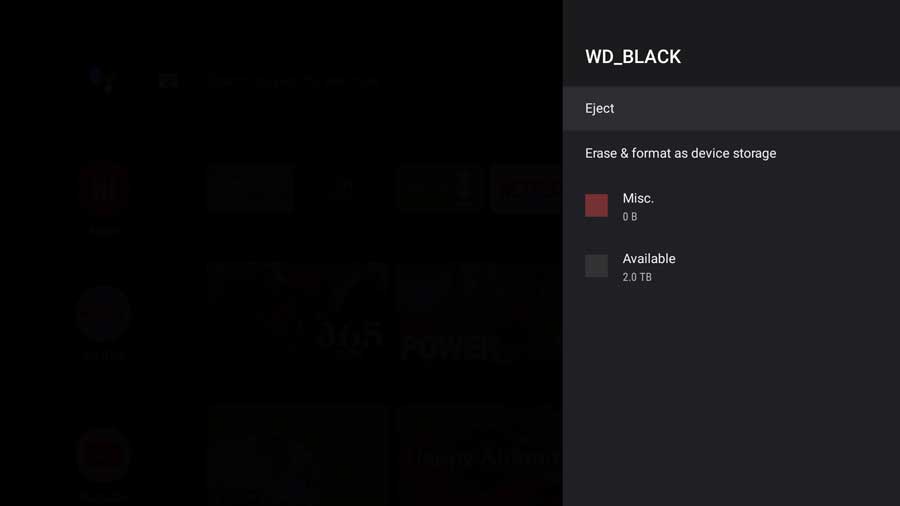
Since we’re not adopting it as device storage, the drive is ready to use. You can access it through your favorite Android file manager. Or, you can click on the drive’s name to get a quick idea of how much space is available.
How to Mount Network Storage to Your NVIDIA Shield TV
You will love this part if you’re like me and use a network storage drive as a Plex server.
No matter which NVIDIA Shield TV you own, you can connect it to shared drives on your network.
It’s important to note that you won’t have the option to add a network share as external storage, which makes sense. A network storage drive can only add extra storage for media files, not apps.
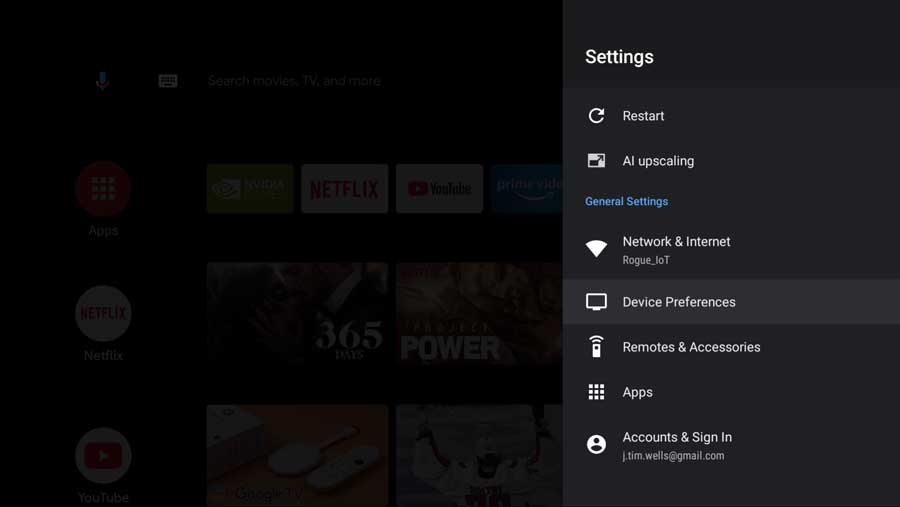
Start by going to the Settings menu and clicking on Device Preferences. This is the same starting point you’d use to set up a hard drive or SD card.
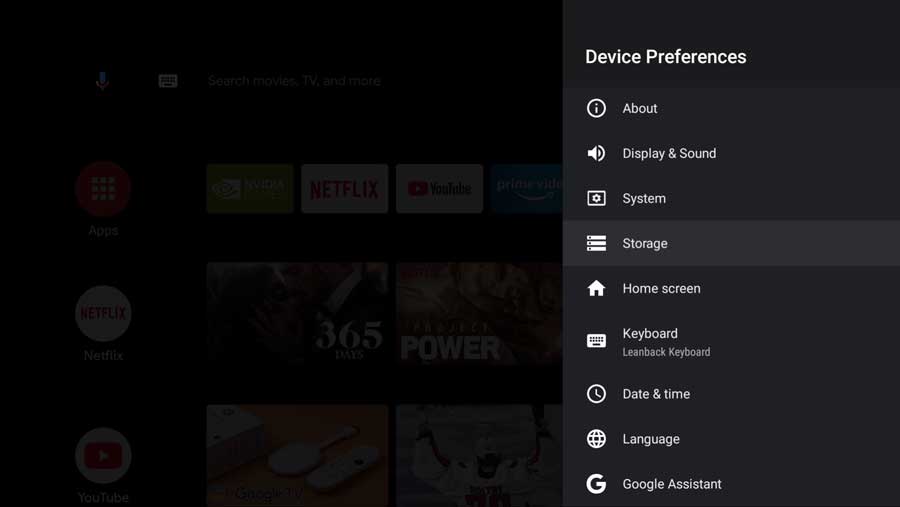
Then click on the Storage menu.
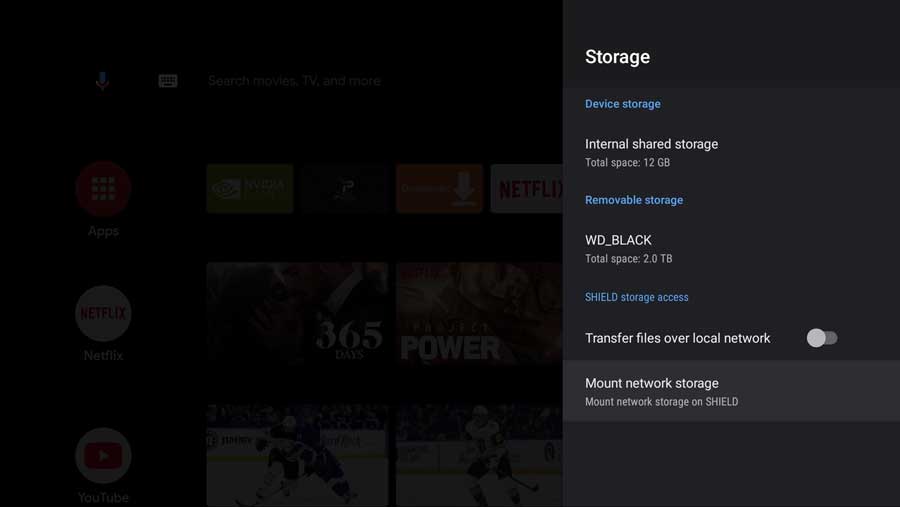
Here you can see I’ve already got my WD Black P10 external hard drive installed from the last section.
But we’ll scroll down past that and click on the option to Mount Network Storage.
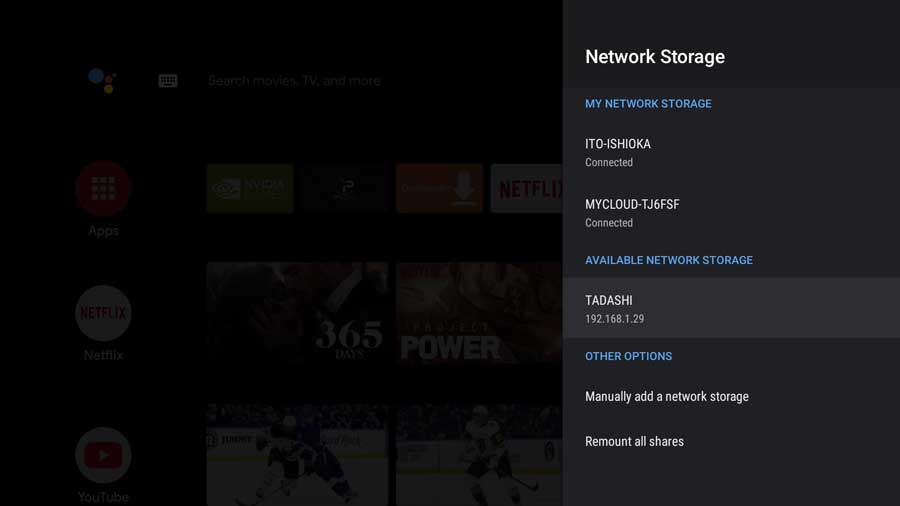
As soon as you do, your NVIDIA Shield TV will quickly scan your network to see what shared folders it can find.
This example shows three devices: two Western Digital My Cloud drives (MYCLOUD and ITO-ISHIOKA) and my laptop (TADASHI).
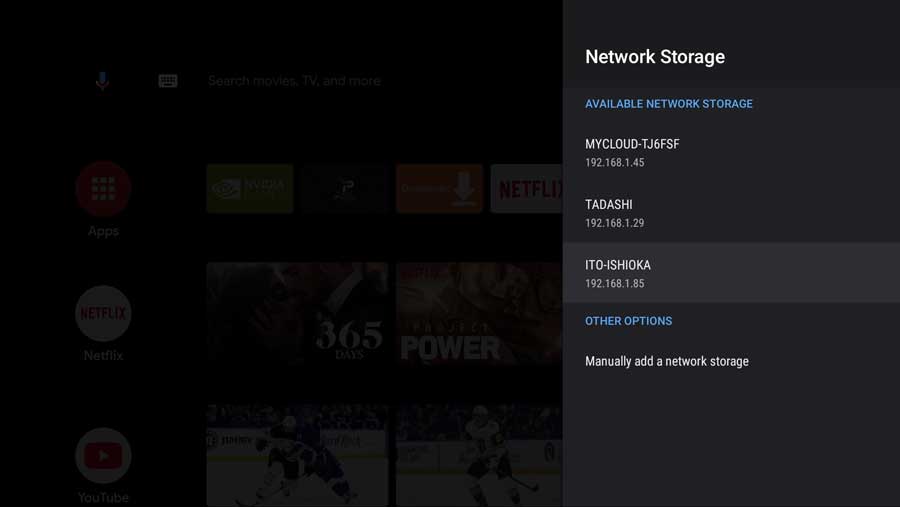
Fun fact: I named my network devices after characters and locations from the movie Big Hero 6. In hindsight, I’d pick simpler names next time around because they’re too complicated to manually type in.
The Shield TV lets you skip that in most cases, but you can still manually add a network share if necessary.
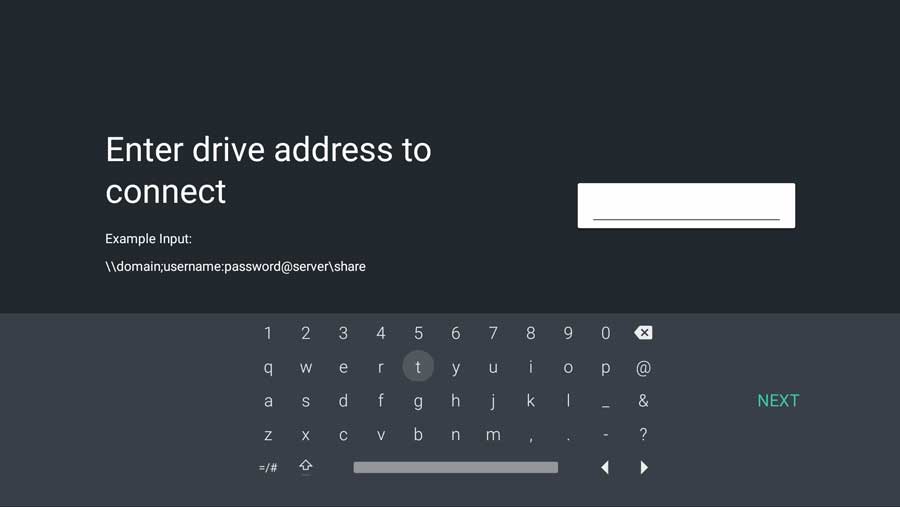
If you manually add a shared drive, you’ll need to type in the full URL for the drive. You can’t use the IP address, unfortunately.
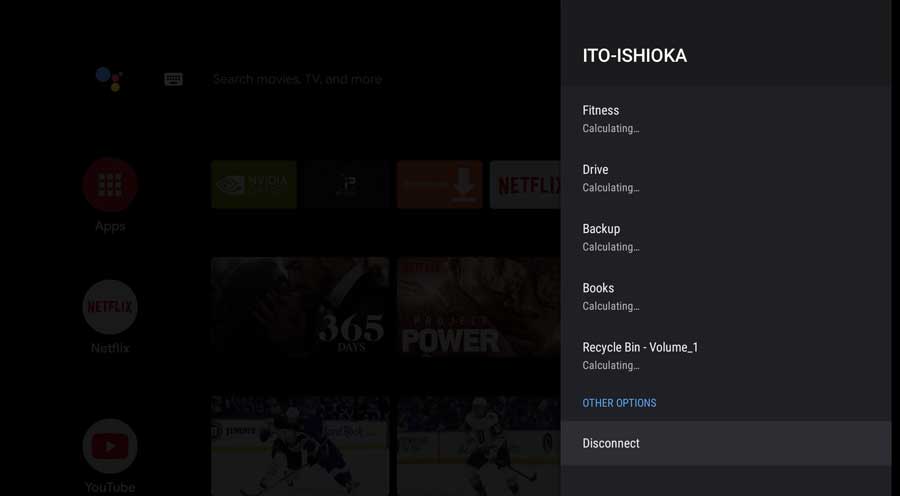
However, in my case, we will be adding my MyCloud Mirror, which is named ITO-ISHIOKA.
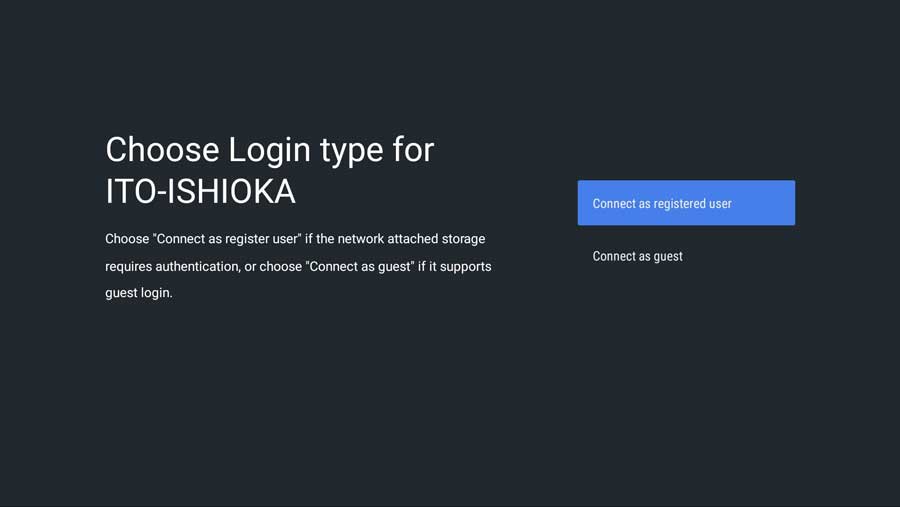
You’ll need to provide login credentials depending on how you’ve set up the shared folder on your network. I’m on a Windows network, so this is an account that has access to that folder.
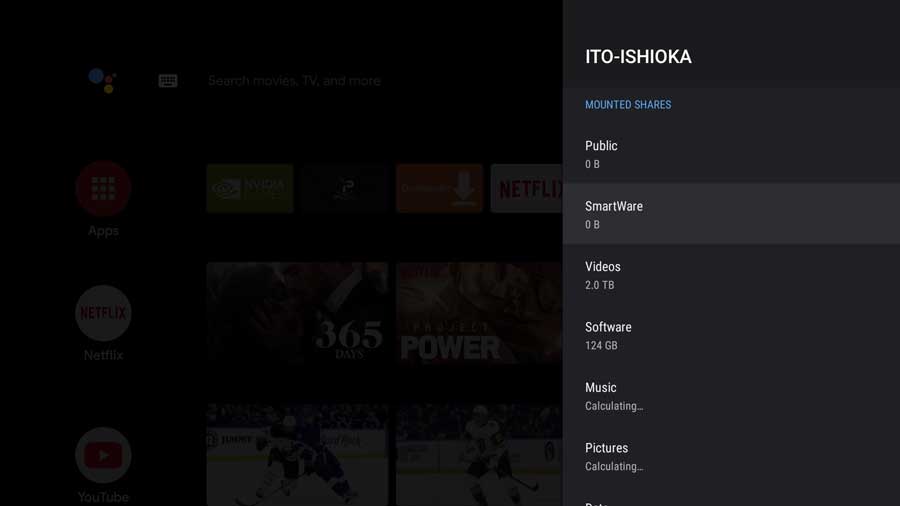
Once you’ve successfully logged in, your NVIDIA Shield TV will start to scan the folder structure.
Once it finishes, you’ll see a list of folders and the approximate size of their contents.
Even though I’m on a gigabit network, this process took a really long time. However, you can use the network drive before the scan finishes.
You can have several network shares at any time, which is nice. I was able to quickly add both MyCloud drives using the same process.
If you want to remove a network share, all you need to do is click into the drive, scroll down, and click Disconnect.

After a brief hiatus from the industry he's back at the helm of AndroidTVNews.com to bring Android TV and TV boxes to the forefront of the streaming world.
When he's not writing, he spends as much time as he can with his beautiful wife and his bulldog.
- How to set up and use Stremio with Real-Debrid on Android TV [2024] - August 18, 2024
- How to Install Kodi Diggz Xenon Plus & Free99 Build [March 2024] - March 3, 2024
- How to Enable Unknown Sources on Chromecast with Google TV [2025] - October 30, 2023