Last Updated on August 28, 2023 by Tim Wells
Venom is a Kodi addon very similar to Exodus Redux, which we’ve discussed before.
It allows you to stream tons of movies and TV shows. Its beauty is that you can easily get it from premium sources like All Debrid, Furk, Premiumize, and Real Debrid.
Venom has become remarkably popular because it offers high-quality streams and is updated regularly (unlike many other Kodi addons). Venom works well with the older Kodi 18 Leia, the newer Kodi 19 Matrix, and Kodi 20 Nexus.
On top of that, it also has fantastic features like continuous episode playback, Context Menu items, Integrated Subtitles, Play Next, and Still Watching dialogs.
How do you install it, and is Venom safe or legal to use?
In this quick guide, you’ll discover everything you need to know, including how to handle quick fixes whenever you run into tech issues.
Venom is one of the best Kodi addons I’ve found in 2023.
Check out the rest of the list after you’re finished here!
How to Install The Venom Kodi Addon
Venom is a great addon that deserves a place on everyone’s Kodi device.
In this section, I will walk you through how to install Venom, whether you’re running Kodi on an Android TV, FireStick, or even a Windows PC.
Recently, Team Kodi upgraded their programming language to Python 3, which broke many popular addons built on Python 2. Fortunately, the Venom developers have transitioned the app to Python 3, ensuring it works with Kodi moving forward.
I’m using a clean installation of Kodi 19.1 Matrix for this tutorial. I haven’t installed any other addons or set up my media libraries. That should make it as easy to follow as possible.
What Your ISP isn’t telling you…
Your ISP knows more about you than you think!
Your IP address is your online fingerprint. It logs everything you do online and is visible to your Internet Service Provider, the apps & addons you use, and even the government.
Kodi Builds & Addons offer unlimited free streaming content, but there are risks.
Stream safely with Surfshark.
The Best VPN hides your identity and bypasses geo-blocked content and government surveillance while letting you stream your favorite movies buffer-free.
I’ve tested all the major VPNs on Android TV boxes and recommend Surfshark. It’s the fastest VPN for streaming and gives you access to the most geo-blocked content!
SAVE 81% ON Surfshark!!!
Try it risk-free for 30-days on unlimited devices at the same time.
Step 1: Enable Addons from Unknown Sources
When you first install Kodi, the only repository it gives you is the official Kodi repository. You’ll find a select few addons vetted and maintained by Team Kodi.
They let you change the look & feel, add new video sources and backgrounds, and some useful utilities.
Most of the popular addons are built by third-party Kodi developers. To install them, you’ll need to change a setting that enables addons from unknown sources.
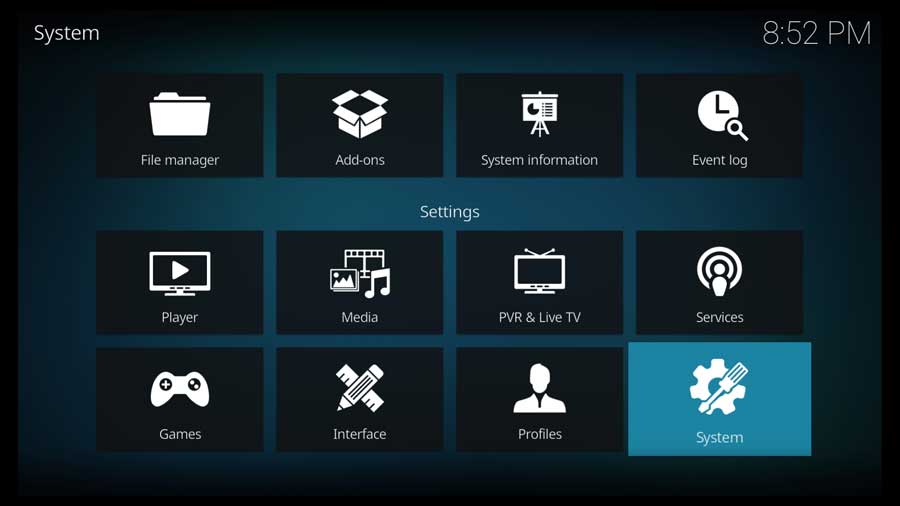
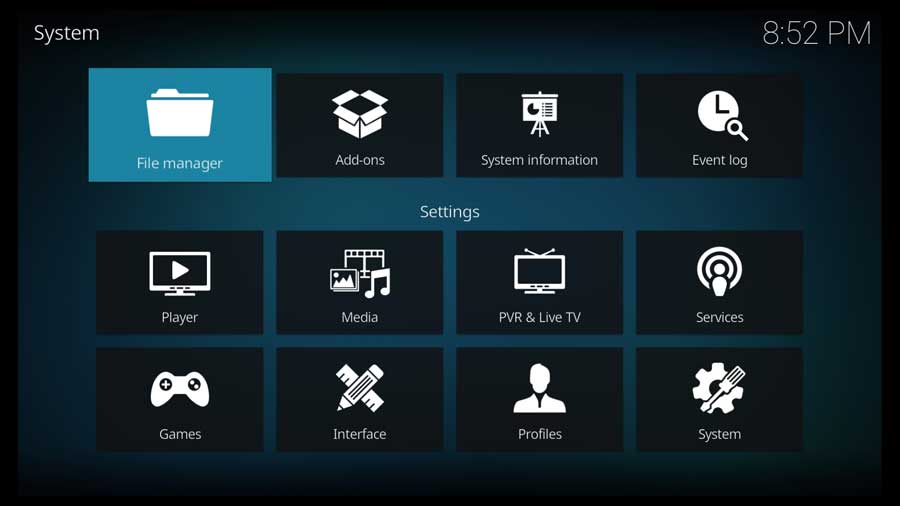
To get started, go to the Settings Menu and click the System icon in the bottom right-hand corner.
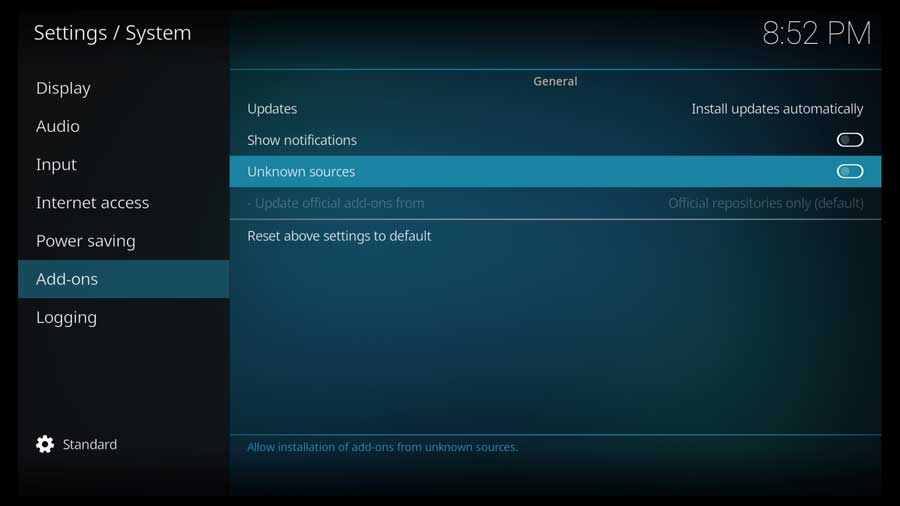
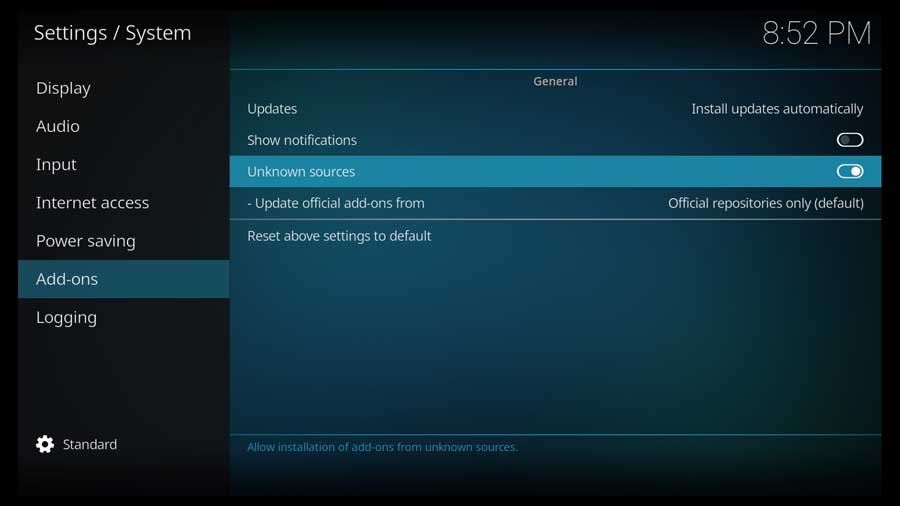
Then, scroll down to the Add-ons section and click on Unknown Sources.
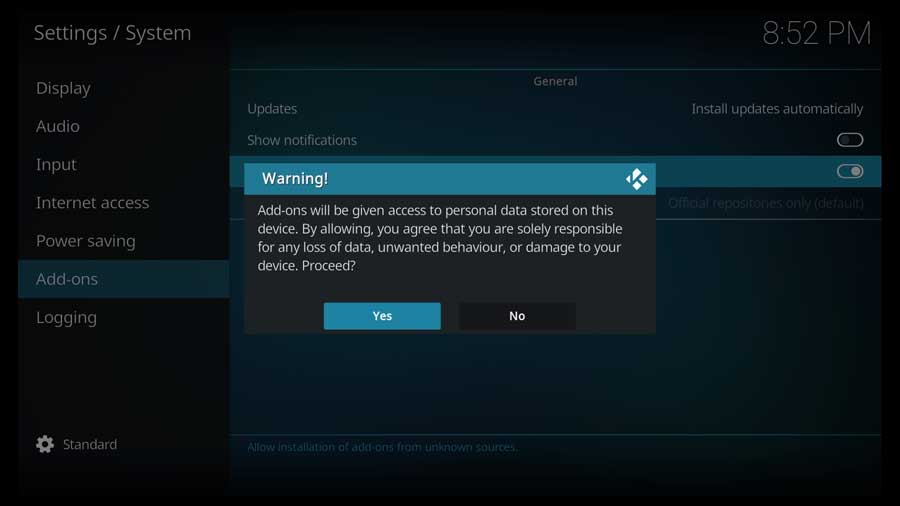
You’ll see a warning message telling you that any addons you install will have the same rights as Kodi. Since Kodi has access to the files on your device, these addons will also.
If you’re installing Venom on a dedicated streaming device, that’s probably not a big deal.
However, you should always use caution and never install addons you don’t trust.
Click Yes to continue.
As soon as you do, the toggle switch turns white to tell you the setting is enabled.
You’re now able to install Venom or any other third-party Kodi addon.
Step 2: Add the Venom File Source
Like most third-party addons, installing the Venom addon is a three-part process.
The first step is to add a new file source to tell Kodi where to find the repository we need.
First, go to the Settings/System menu and click the File Manager icon.
This is the same menu where you can add directories to your media library. We will point it to the developer’s GitHub page in this case.
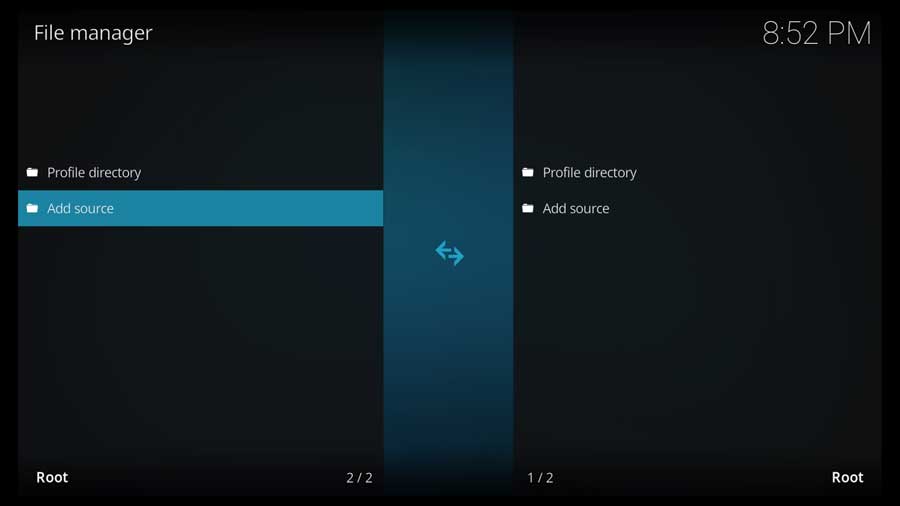
Click on Add Source.
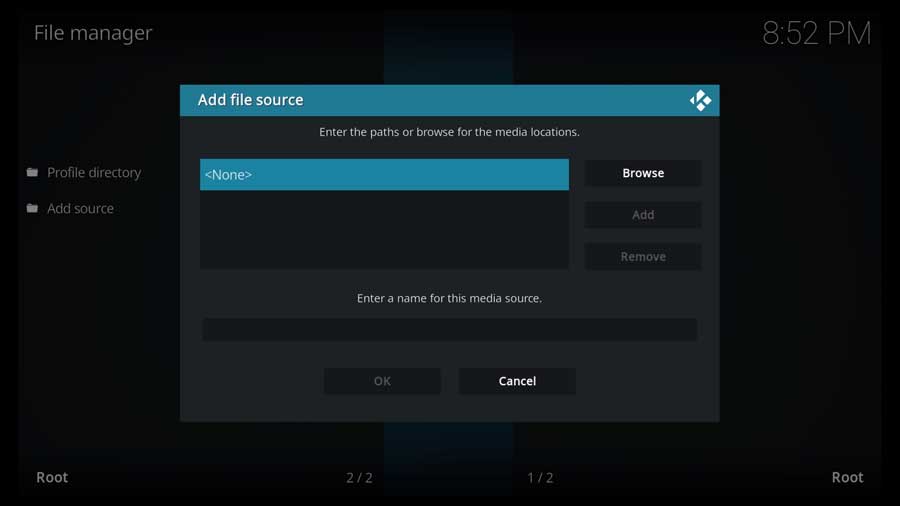
In the Add File Source menu box, click on <None> to add a custom source.
Usually, we use this menu to tell Kodi where to find our media folders – where we store our movies, music, and TV shows. It can be a local folder on your device, a shared folder on your network, or even an external website.
We will point Kodi to the developer’s GitHub page in this case.
GitHub is a well-known code repository where developers can publish code to the site and ensure that everyone is working on the latest version, even in different parts of the world.
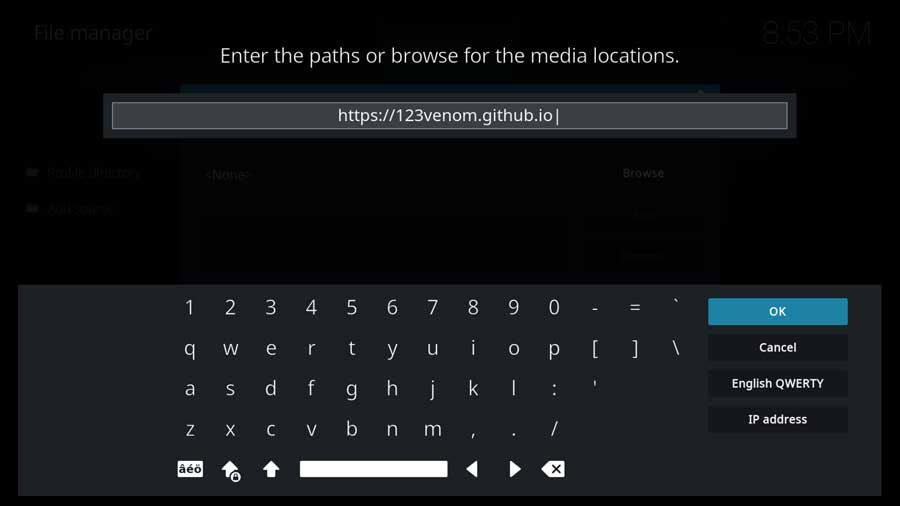
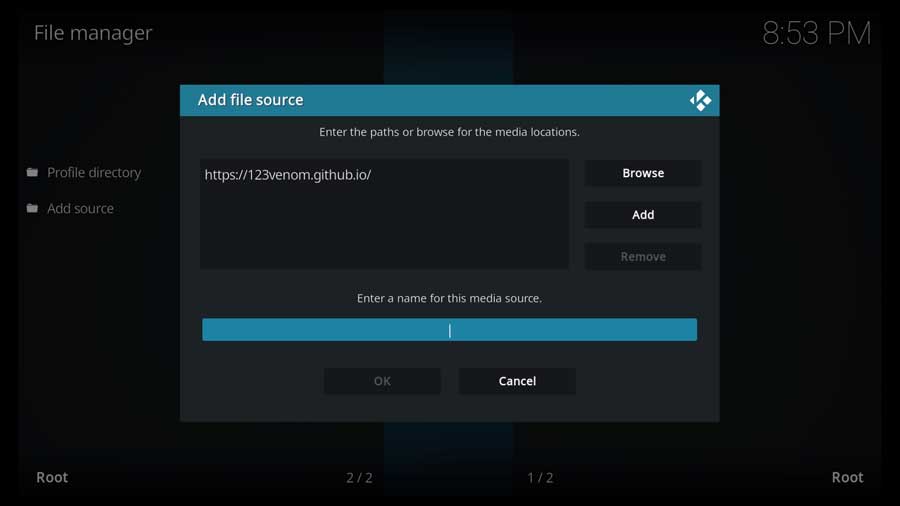
Type in the following URL and click OK:
https://123venom.github.io
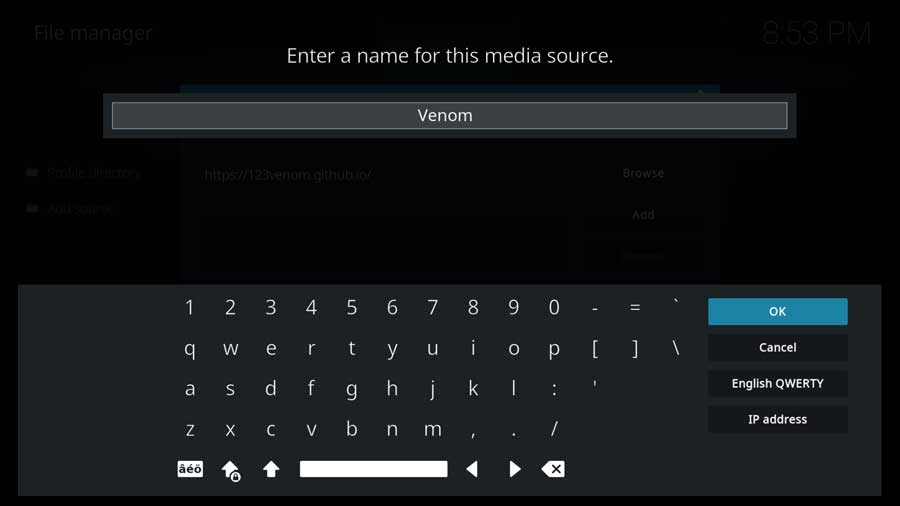
Go to the next section, where you will Enter a Name for this Media Source.
The name can be anything you like. However, I recommend making it somewhat relevant to the source.
In this case, I named mine Venom.
Once you’ve entered a name, click OK to continue.
Once you have the file source URL and the name, click OK to continue.
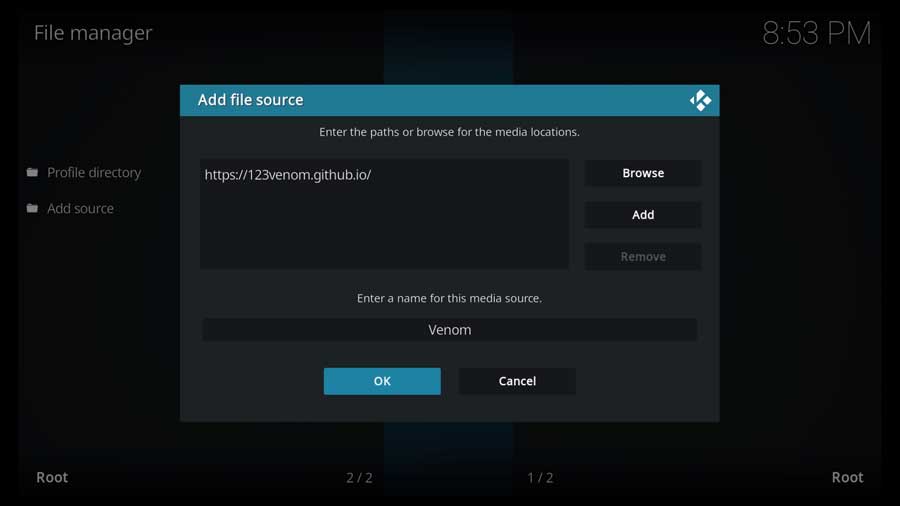
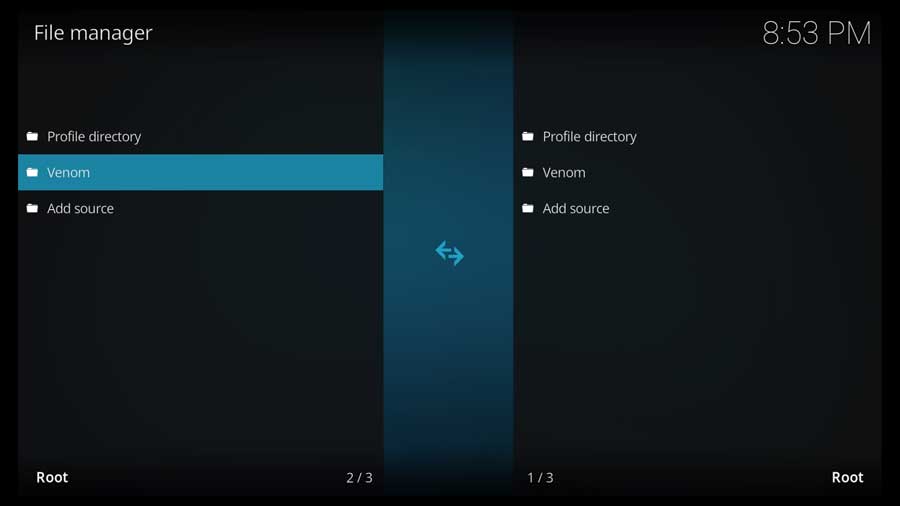
Kodi will do a quick check to make sure that it can reach the site. If it’s successful, it’ll bring you back to the File Manager window.
Your new file source will be listed on the left-hand side of the screen.
Step 3: Install the Venom Repository from Zip File
Next, we will install the official Venom repository on our Kodi device.
Go back to your Kodi home screen.
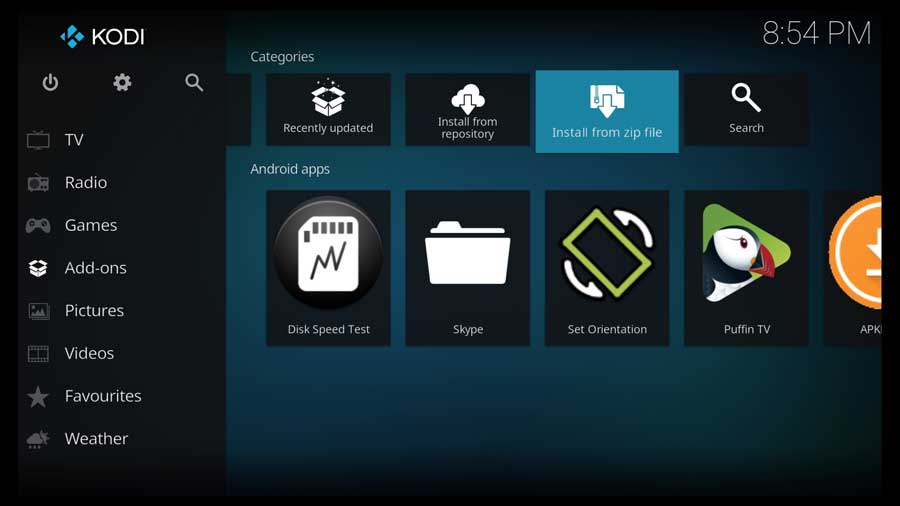
Then, scroll down until you find the Add-ons section. Finally, click the Install from Zip File icon.
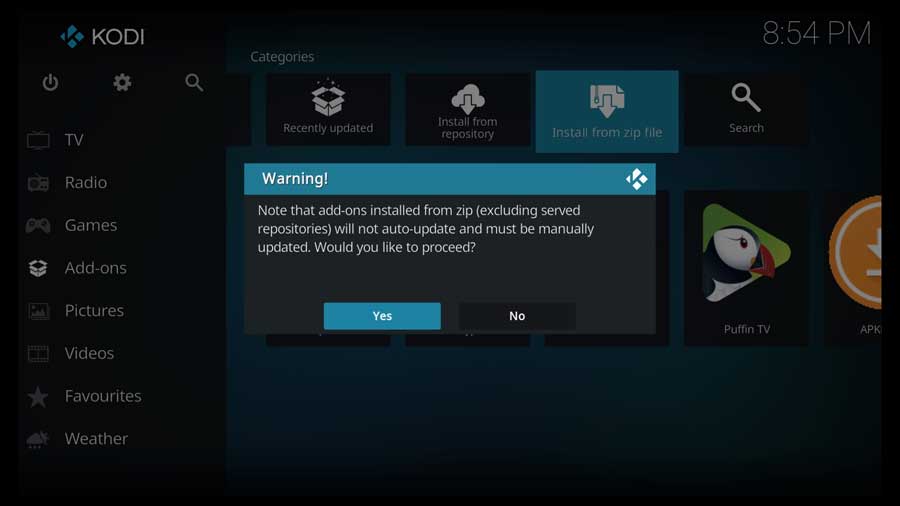
A pop-up message box warns you that any add-ons you install from a zip file must be manually updated.
Click Yes to proceed.
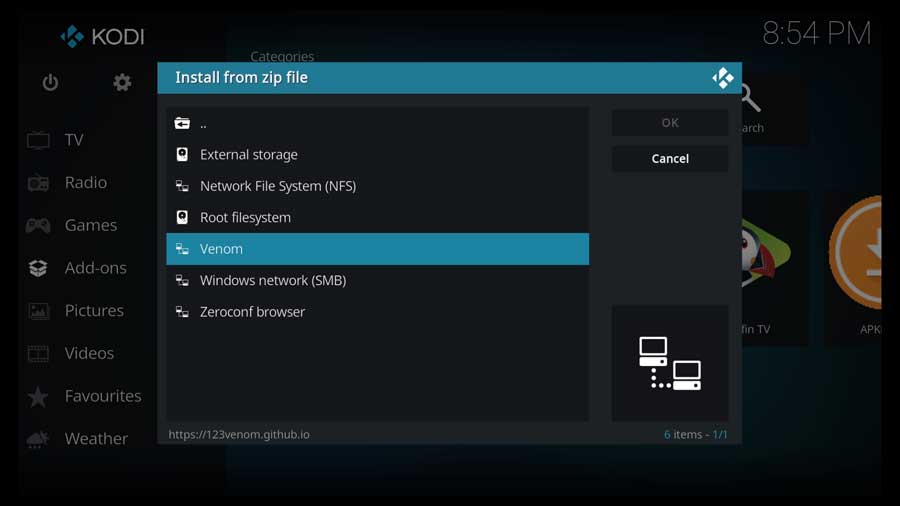
This pulls up a list of all the file locations on your device. This includes any internal folders, external drives like flash drives or external hard drives, and any shared network drives you have.
It’ll also show custom file locations, like the one we created.
Click on the name that you entered in the previous section.
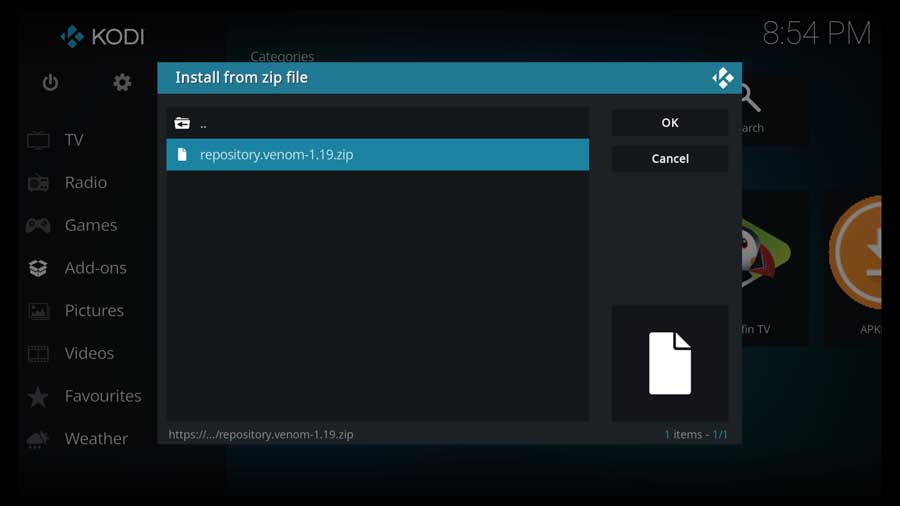
Finally, click on the repository zip file to install it.
Don’t worry if the version number differs from the one in the image below.
That will change as the repository is updated.
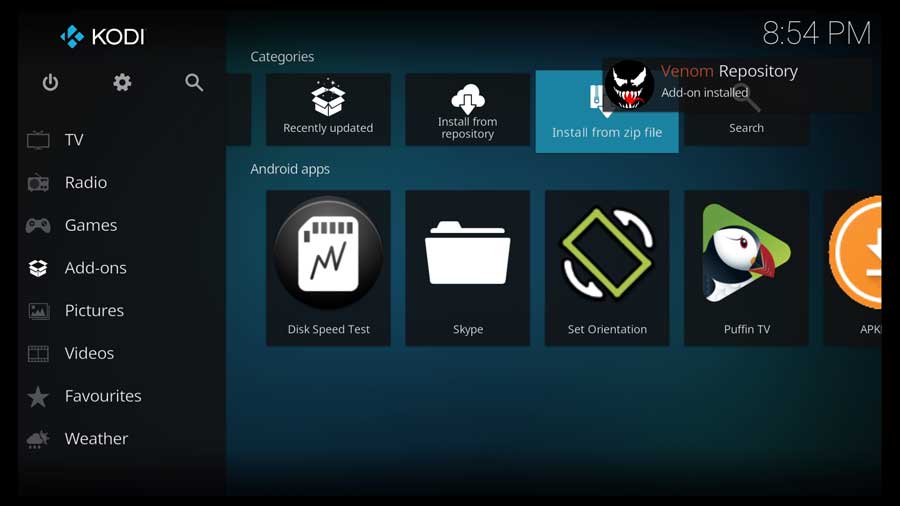
After a few moments, you’ll be taken back to the Add-ons screen, and a message box will appear saying the Venom Repository add-on is installed.
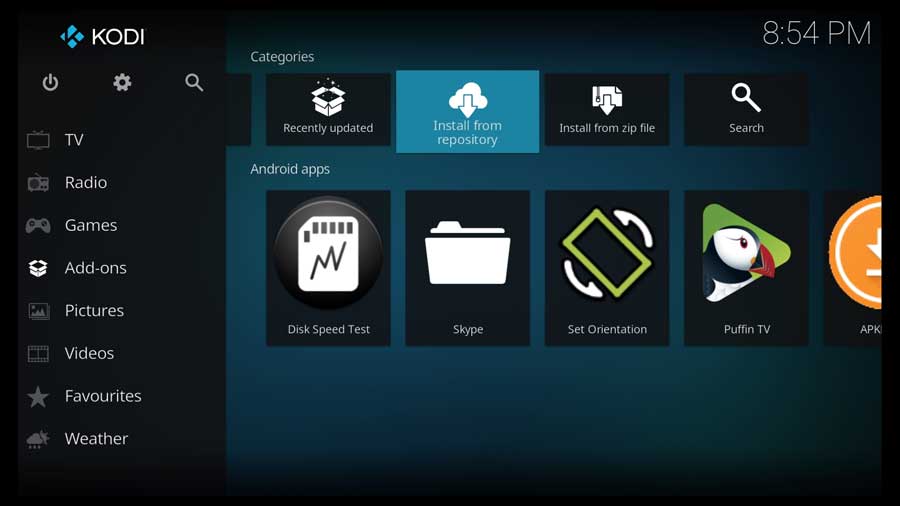
Step 4: Install the Venom Addon from the Repository
The final step is to install the Venom addon from the repository.
Click on the Install from Repository icon to continue.
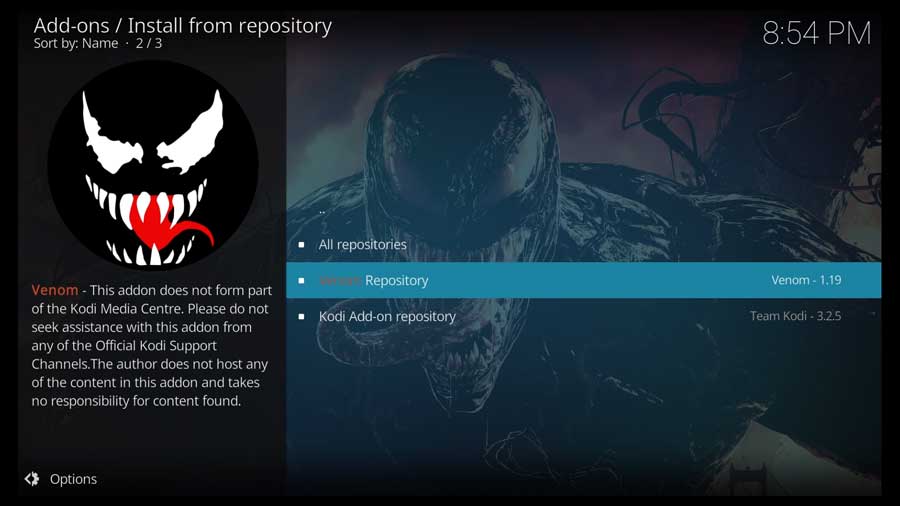
This pulls up a list of all the repositories installed on your device.
In his case, I have only listed the official Kodi Add-on Repository and the Venom repository we just installed. That’s because I’m showing you on a clean installation of Kodi. You may have several other repos on your system.
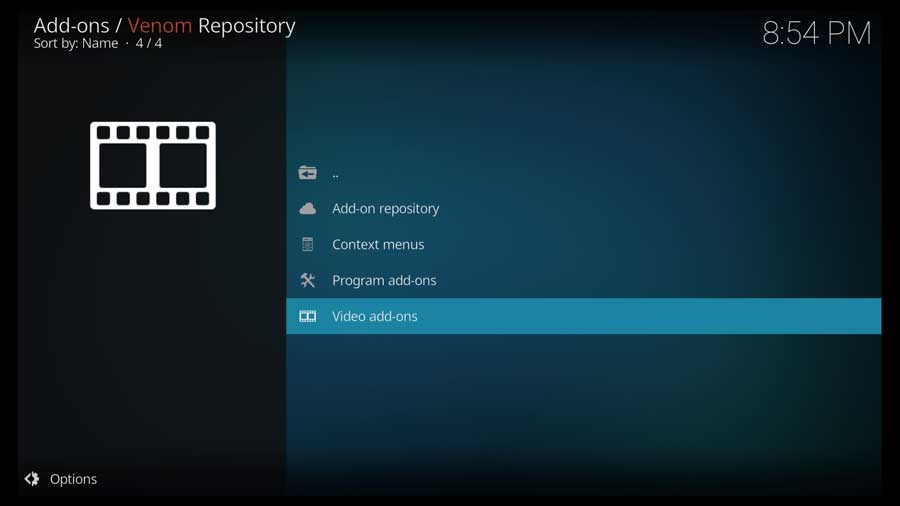
Click on the Venom Repository to continue.
Like many Kodi repositories, there are several addons within the Venom Repository.
The one we’re looking for is in the Video Add-Ons section.
Click on that now.
Click on Venom to continue.
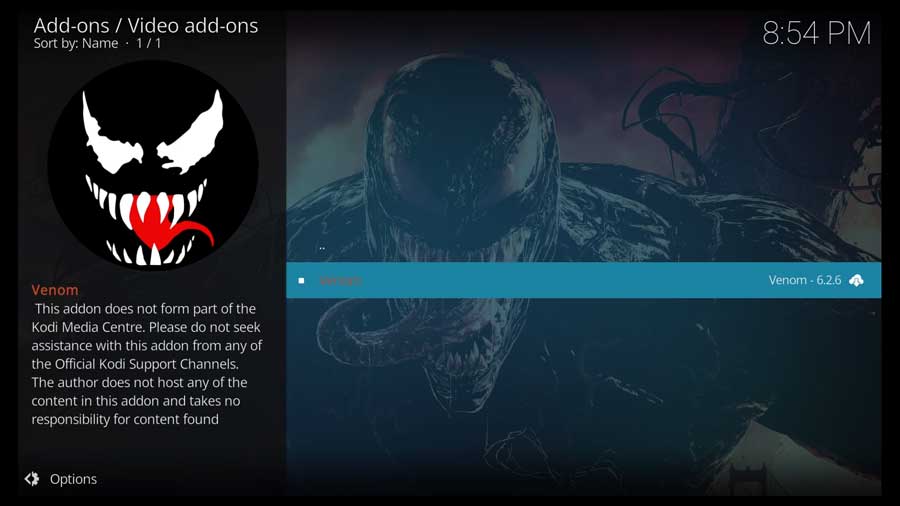
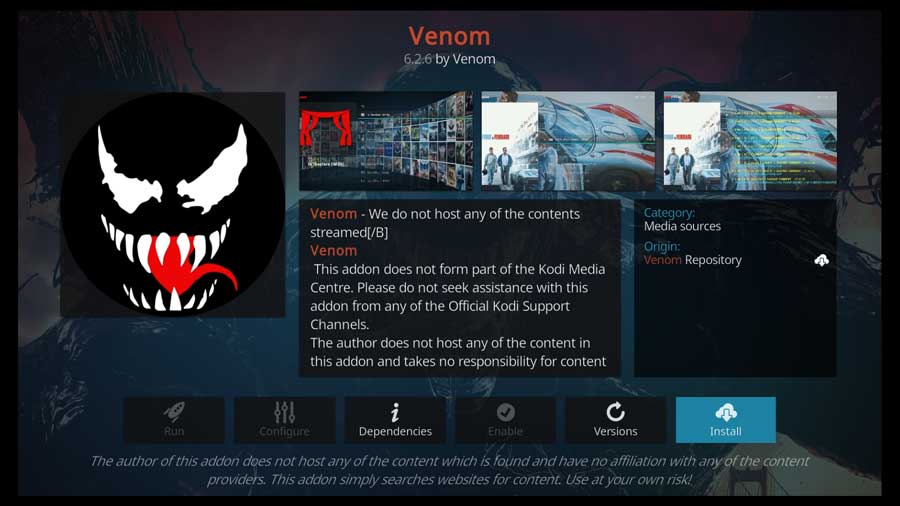
That takes you to the addon’s detail page.
Venom is one of the few addons I’ve seen with a fleshed-out detail page. It has a summary of the app, what it does, and even screenshots.
Click on the Install button to continue.
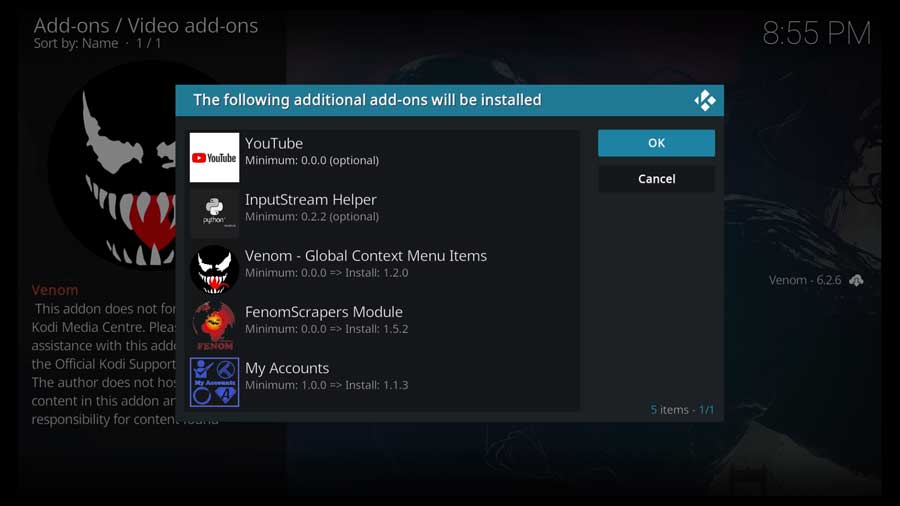
Depending on your system, you may have several additional addons or modules that Venom requires.
On my system, I had over a dozen required addons that needed to be installed. Even with all that extra work, the installation only took a few seconds.
Click OK to continue.
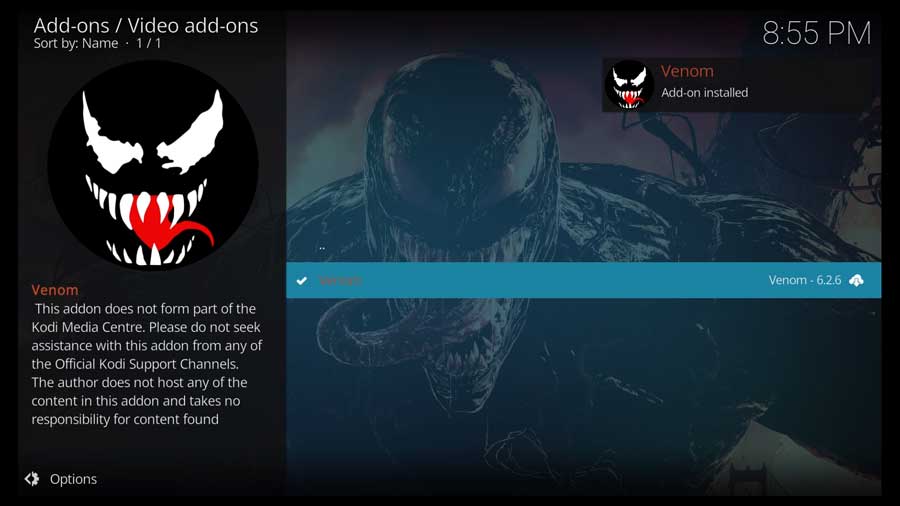
Once it finishes, you’ll get a pop-up message box in the upper right-hand corner telling you the Venom addon has been installed successfully.
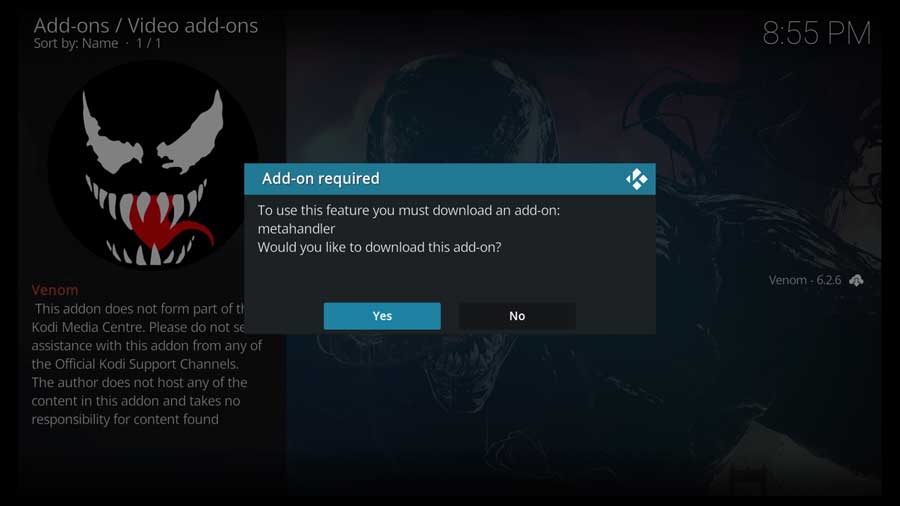
After that, however, I got another pop-up box telling me that one additional addon was required.
If you get a similar message, click Yes to continue.
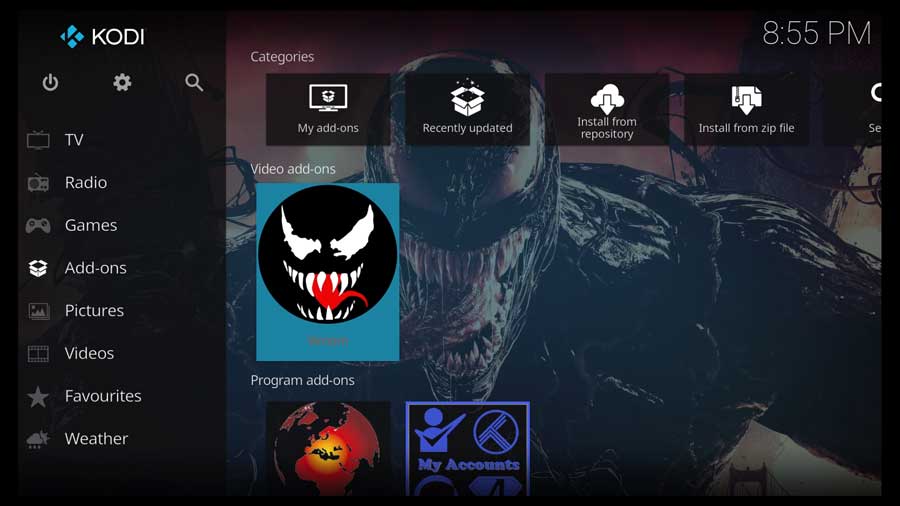
To launch Venom, return to the Add-ons tab in Kodi, then click on the icon in the center of your screen.
Is Venom Legal to Use?
Venom also taps into piracy and could heavily outsource its content from illegal websites like any unofficial addons.
So, let’s be blunt: we’re talking about something as nasty as copyright infringement for streaming, which could quickly get you into serious trouble in many countries.
Overall, using Venom is unpredictable over the long term, and it’s inherently risky and could cause serious legal consequences.
Is the Venom Kodi Addon Safe to Use?
By installing Venom on Kodi, you may be paving the way for a malware attack.
That’s because many similar addons integrate deeply with Kodi. And should you download one that’s infected, it could be disastrous for your system.
With that in mind, Kodi developers have consistently warned their users to avoid third-party repositories and stick to the official Kodi addons.
You’ll need to enable Kodi’s support for unknown sources before you install Venom.
How to Protect Yourself When Using Venom for Kodi
If you’re a Kodi user, you’ve likely seen prompts online urging you to subscribe to VPN (Virtual Private Network) services.
Pro Tip: VPNs are an effective way of protecting your privacy by guaranteeing online anonymity. A reputable VPN like NordVPN is an excellent choice for beginners and seasoned users.
Venom Not Working With Kodi? Try This:
Venom, like any other addon, will experience challenges occasionally. Here are a few quick tips and tricks to help you get around the most common issues with Venom:
How to Stop Slow Video Buffering with Venom
We’re looking at two options here.
You either use Real-Debrid to help you figure out high-quality links or settle for a good VPN. A VPN allows you to access geo-restricted content, say when you’re traveling abroad but still want to enjoy your favorite shows and movies.
What’s more, a VPN like NordVPN or ExpressVPN offers incredibly fast speeds suitable for streaming. Reputable VPNs also guarantee airtight security and privacy protection.
How to Clear Venom’s Cache Data?
Clearing cache data is another great tip if you bump into tech issues with Venom.
Pro Tip: Consider revisiting your settings to ensure things are in order since clearing an addon’s cache may also wipe off some of your settings.
- Open Kodi and launch Venom.
- Open “Tools” and select “Cache Functions.”
- Go for the “Clear All Cache” option at the top.
How to Update Venom
Expect some Venom updates every couple of weeks as they enable the smooth operation of the addon apart from eliminating bugs.
Here’s how to manually update Venom:
- Launch Venom from Kodi or right-click on its icon.
- Select “Information” from the drop-down menu that pops on the screen.
- Select the “Update” button to check for any newer versions.
- If there’s the latest version, select the update options you’d like to apply and confirm for updates to start running.
How to Fix Venom’s “No Debrid Account Setup” Error
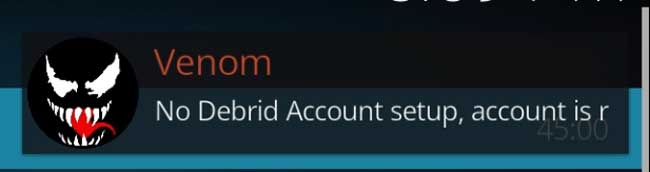
First, you should always expect this error with any unofficial Kodi addon.
However, integrating a third-party addon like Real-Debrid could save you this headache, and here’s how:
- Go to the Real-Debrid website on your browser.
- Set up your account and subscribe to the Real-Debrid service.
- Launch Kodi and open Venom.
- Go to Tools; navigate to My Account Settings.
- Click on Debrid Account on the left side.
- Now click on Authorize in the Real-Debrid segment.

After a brief hiatus from the industry he's back at the helm of AndroidTVNews.com to bring Android TV and TV boxes to the forefront of the streaming world.
When he's not writing, he spends as much time as he can with his beautiful wife and his bulldog.
- How to set up and use Stremio with Real-Debrid on Android TV [2024] - August 18, 2024
- How to Install Kodi Diggz Xenon Plus & Free99 Build [March 2024] - March 3, 2024
- How to Enable Unknown Sources on Chromecast with Google TV [2025] - October 30, 2023