Last Updated on September 6, 2023 by Tim Wells
Emby released a server app for the NVIDIA Shield TV in February 2019. I’ve returned to it several times since then, but it was never as smooth as I’d like.
My experience involved a lot of trial and error and reaching out to the Emby community before I finally got it working the way I wanted.
A few times, I wanted to give up and return to Plex.
But there had to be other people that were having the same problems.
So I created this guide to help save you some frustration getting an Emby server set up on your NVIDIA Shield.
For more great articles like this, visit my NVIDIA Shield TV resource page. You’ll find all of my tips, tricks, reviews, and tutorials to help you get the most out of your NVIDIA Shield.
Emby Server vs. Emby Client
First, let’s make sure we understand the difference between Emby Server and Emby Client.
Emby is more like Plex than Kodi. It has one app you run on the server and a different app you download and run on your clients. By contrast, Kodi has one app that plays your media files, no matter where you’re hosting them.
Emby’s client app is available on the Google Play Store, so it’s an easy download for NVIDIA Shield TV users.
Unfortunately, Emby Server is only available as a direct download from their website. That means you’ll need to sideload it on your NVIDIA Shield TV.
We’re going to walk through the process in the next section.
If you’d like a primer on what sideloading is and how you can access thousands of additional apps on your Android TV, check out my How-To Guide here.
How to Install Emby Server for NVIDIA Shield
The first step is to download Emby Server for Android directly from their webpage at https://emby.media/server-android.html.
You can do this on your favorite web browser, but I will use the Downloader App.
I prefer to use Puffin TV to browse the web on my Android TV, but Google forced them to disable the download feature to keep it on the Google Play Store.
Open Downloader, and go to the search bar on the Home screen. You can enter the link above or search for “emby server android,” as I do here.

If you choose to search, as I did, the page on Emby’s website will be the first result.
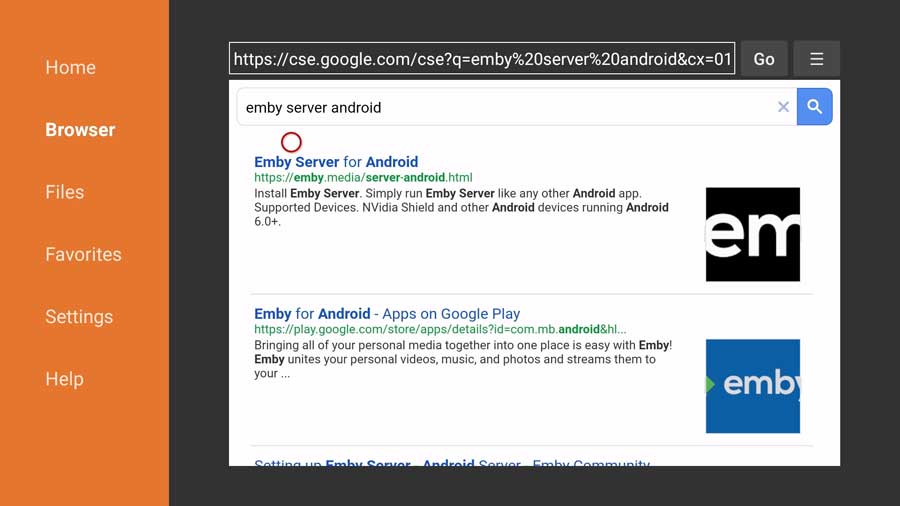
I have to give credit to Emby here. They simplify the download process because there’s only one version and one link to click on.
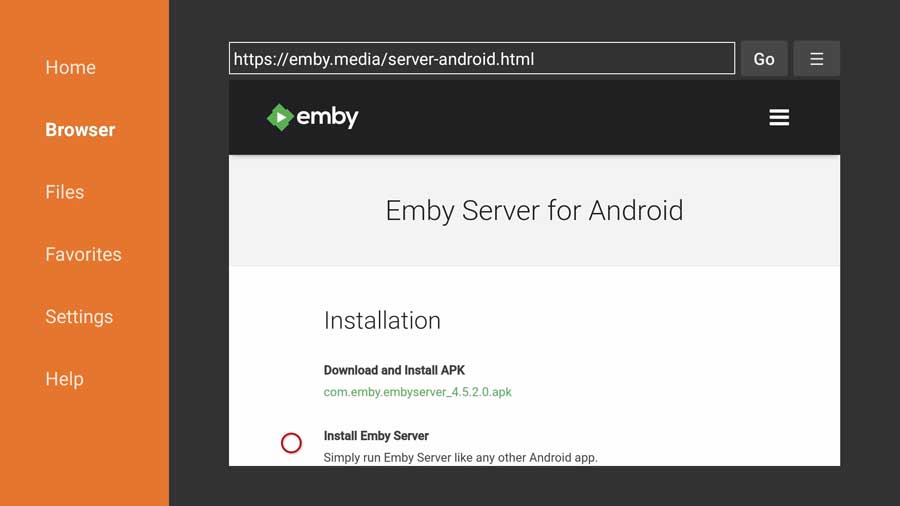
The Emby Server APK is just over 200 MB, so it won’t take up much space on your NVIDIA Shield TV.

You can go through the installation process directly from Downloader. If you’re using a different web browser for Android TV, you may have to download the Emby Server APK file and install it from your file manager app.
Once that’s finished, remember to delete the APK file to reclaim some of that file space.
Then, go ahead and exit Downloader and go back to the home screen.
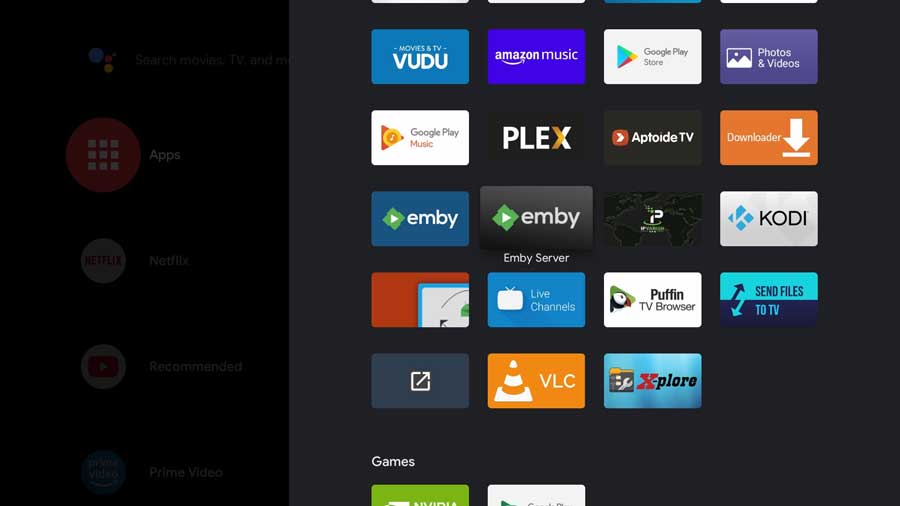
Click on your Apps icon to pull up the apps installed on your Shield TV.
As you can see in this image, I’ve installed the Emby Client and Emby Server apps. The Client app has a dark blue background in the icon, whereas the Emby Server app has a grey background.
We need to do one more on your NVIDIA Shield TV before switching to the web configuration screen.
Open up the gray Emby Server app to get it running. The first time you run it, it’ll ask you permission to access your device’s photos, media, and files.
Click Allow.
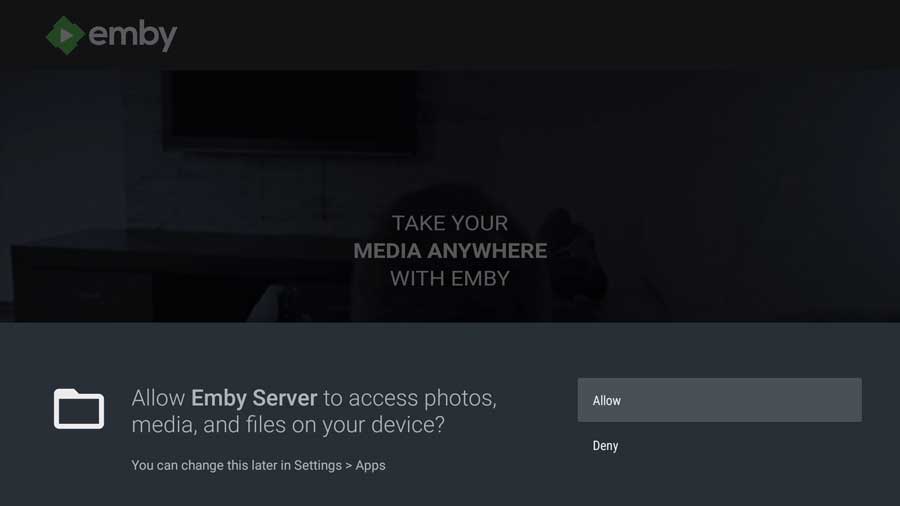
Once you click Allow, there’s not much to the rest of the app. All configurations are handled from a web browser interface.
At the bottom of the screen, you’ll see the IP address for your NVIDIA Shield TV and the port to let your other devices talk to Emby.
In this case, my IP address is 192.168.1.59. The ‘:8096’ tacked on to the end is the port number.
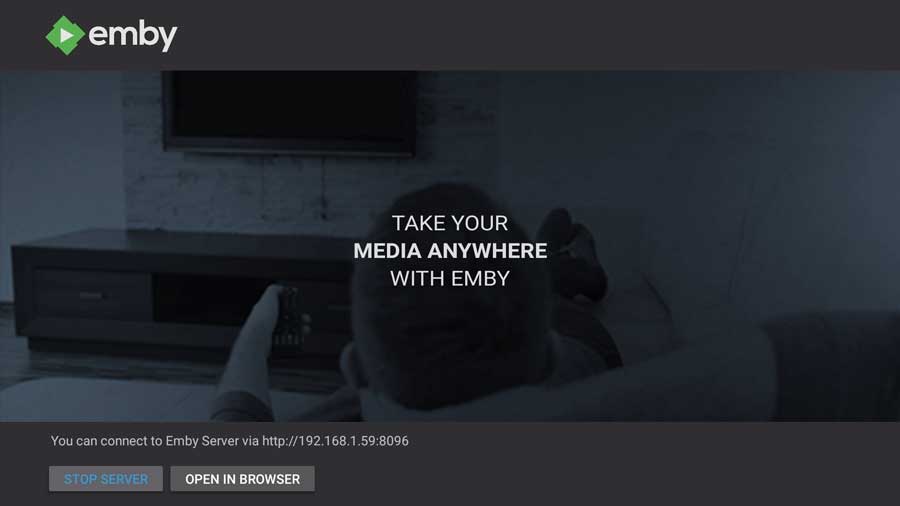
Write down your server’s address, including the port number. We’ll need it for the next section.
Configuring Emby Server on NVIDIA Shield TV
I recommend configuring your Emby Server on your PC or laptop instead of your NVIDIA Shield TV.
As we saw in the image above, a link on the Emby Server app will open your web browser automatically. However, I prefer using the web browser on my PC, where I can sit at my desk and be comfortable.
With that in mind, the rest of the screenshots I will show you are from the Chrome browser on my PC. Just know up front that you don’t have to switch to a computer if you don’t want to.
Remember when I told you to write down the IP address from your NVIDIA Shield TV?
Open up a new web browser and type that into the URL field at the top.
When you first connect to your NVIDIA Shield TV, Emby Server will realize it hasn’t been configured yet and go straight into the configuration process.
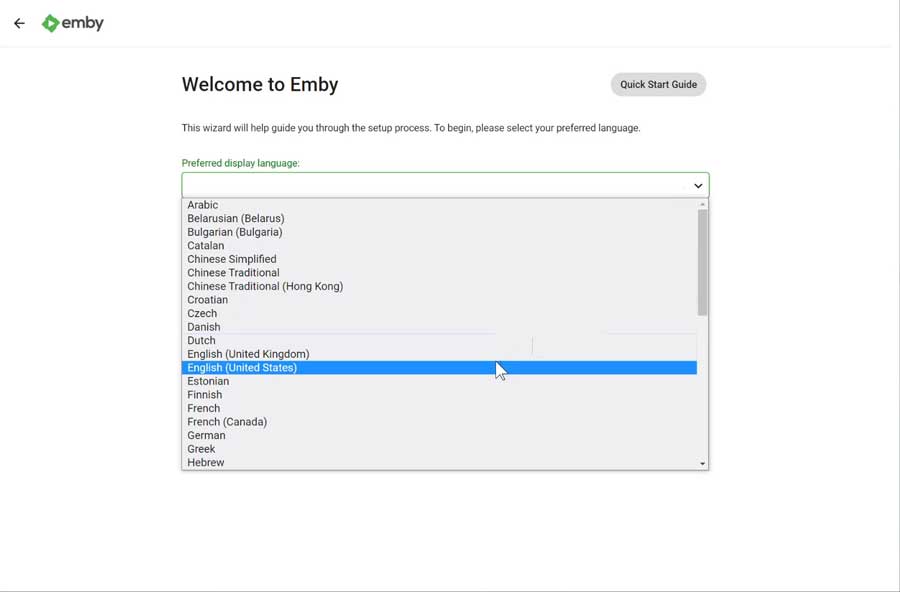
The first thing you’ll need to do is to choose your default language for the remainder of the process.
Then you’ll be asked to create your first user.
I recommend that you create separate users for everyone in your house that will be using your media library. Meaning if you have children, create individual profiles for each.
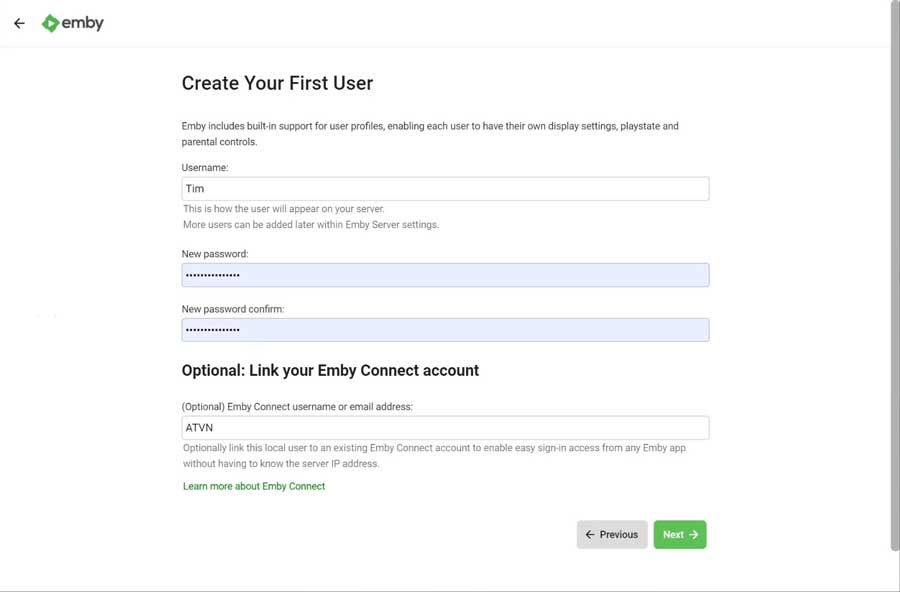
This is because you can restrict access to content and devices based on the user account. If you want to limit your child to only watching movies on a specific TV, you can do that.
If you have an Emby Connect account, you can link it to your server app to make setting up client apps much more manageable.
Once that’s done, it’s time to set up your media libraries!
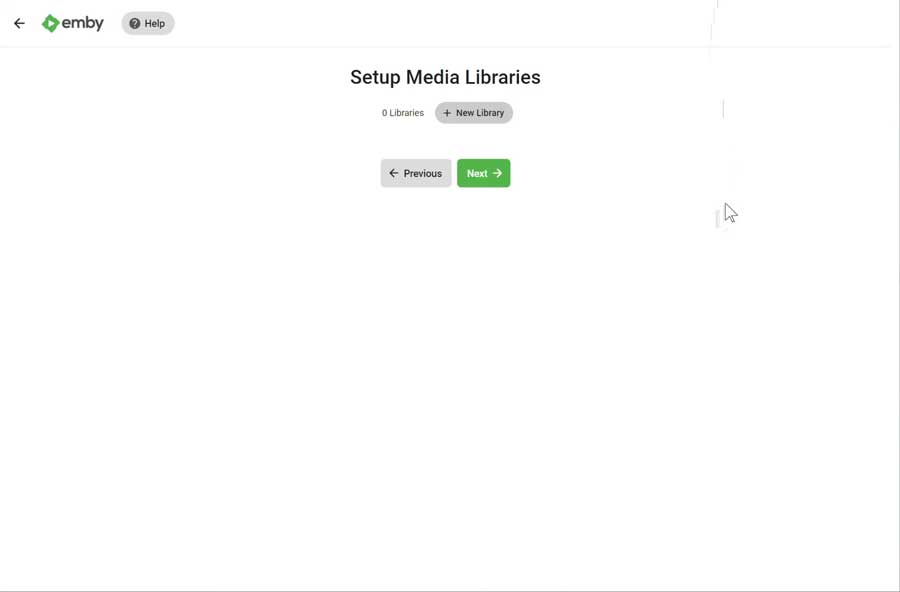
Create Your First Emby Library
You can set up libraries for Movies, Music, TV Shows, Audiobooks, Books, Games, Music Videos, or Home Videos. We’re going to walk through setting up a sample movie library.
But before you do, I recommend using the proper naming convention for your media files. Emby uses the same naming convention as Plex and Kodi. I recommend getting that dialed in before you go any further.
The process for the other types is very similar to Music and Movies. Knowing how to configure these libraries will go a long way to get you started.
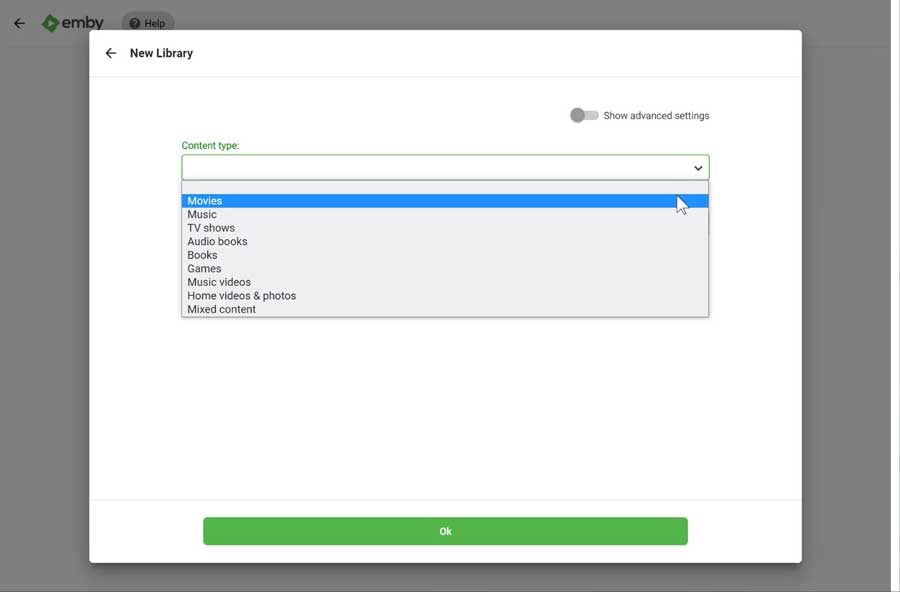
First, click on the gray New Library button. The next screen will have a drop-down menu with all the different library types you can create.
Let’s start with getting your movie library up and running.
Select Movies from the drop-down menu and click OK.
The next screen will have several options tailored explicitly for movie libraries.
Start by selecting a display name for the library. This is how it will appear on the screen in your Emby client app.
On my Emby server, I have all of my movie files in one library, but you don’t have to. If you want, you can split up your library into different sub-categories.
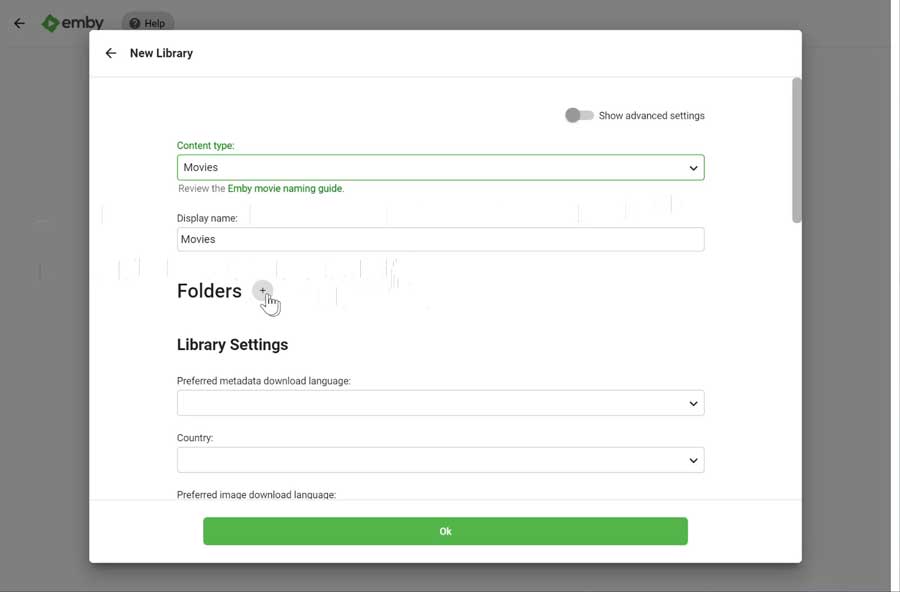
Next, we will point your Emby server to the directory where you’re storing your video files.
Click on the Folders button to continue.
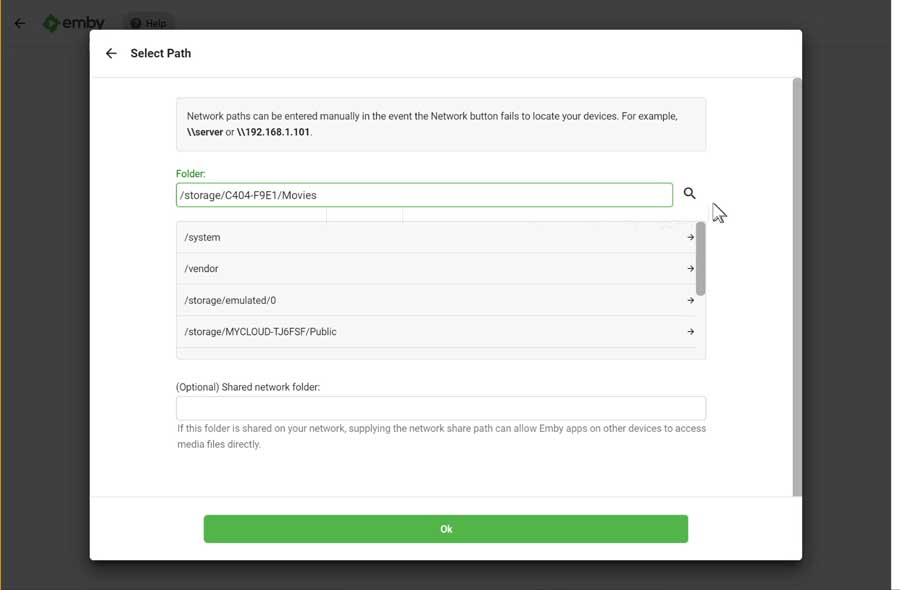
You can either type in the address directly or browse your media.
Honestly, this was one of the most frustrating parts of configuring the Emby server. It could only find one of my network hard drives for whatever reason.
In this example, I will connect it to the external hard drive on my NVIDIA Shield TV.
To learn more about using external storage on your Shield TV, check out this overview article, where I go into all the details.
I used X-plore File Manager to get the exact folder name, which worked great the first time.
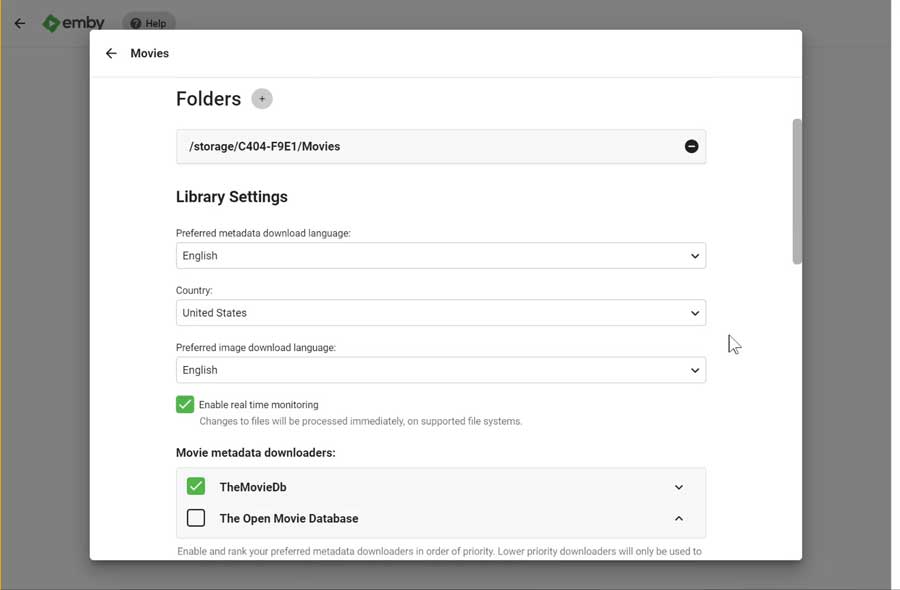
Next, select the metadata language that you want to use.
It might make sense to create several smaller libraries instead of one larger one.
For example, you can have English movies in one library and Spanish films in another. The great thing about setting it up like that is the metadata will download in the correct language.
Once you set it up how you like, click OK to continue.
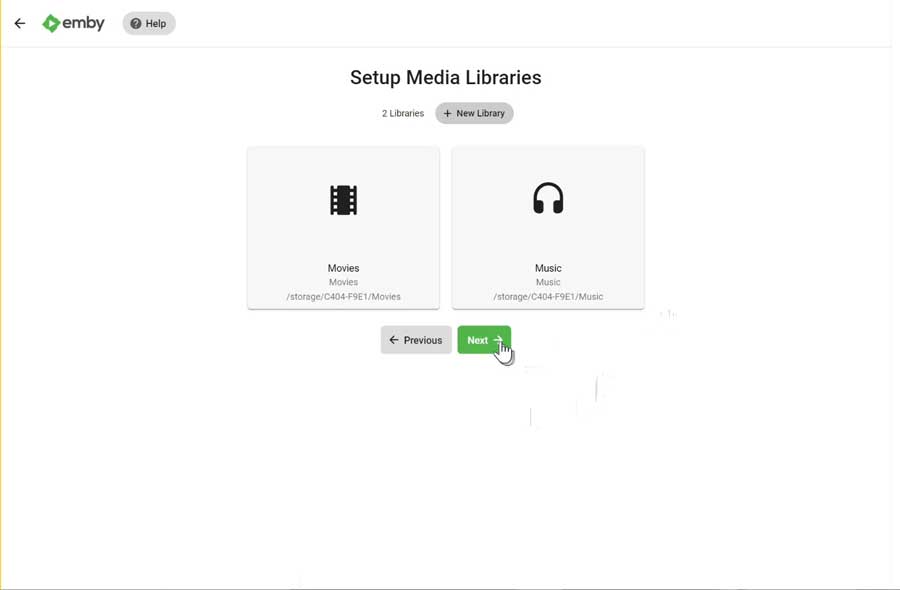
Once you’re done, you’re taken back to the Setup Media Libraries page, where you can add additional libraries.
We’re going to continue with the setup process, however. Click Next to continue.
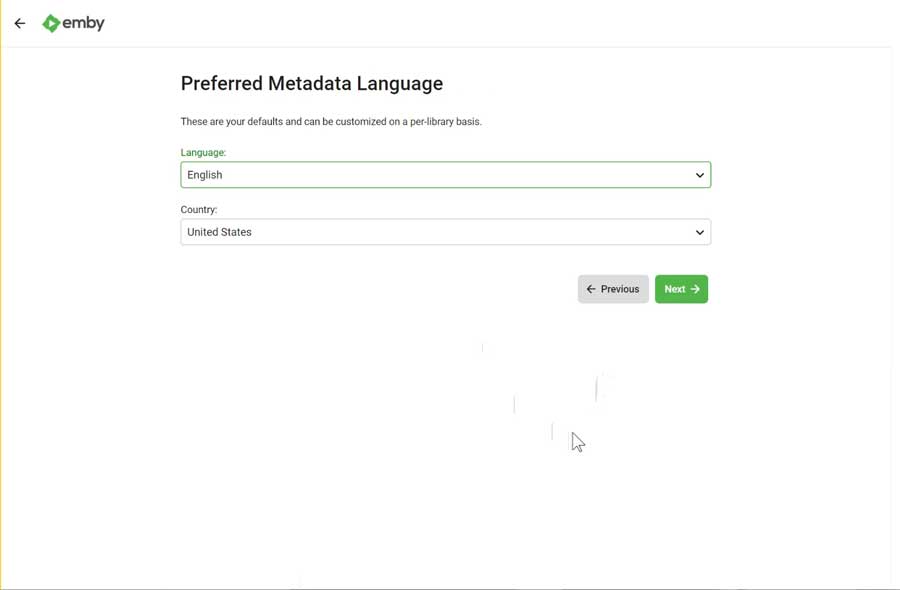
Finish Configuring Emby Server
On the next screen, you will select a default metadata language. You can still change this on individual libraries, but it will save you some time if you don’t need to.
Next, we’ll configure remote access to your Emby server.
Most users will keep both options on this screen turned on.
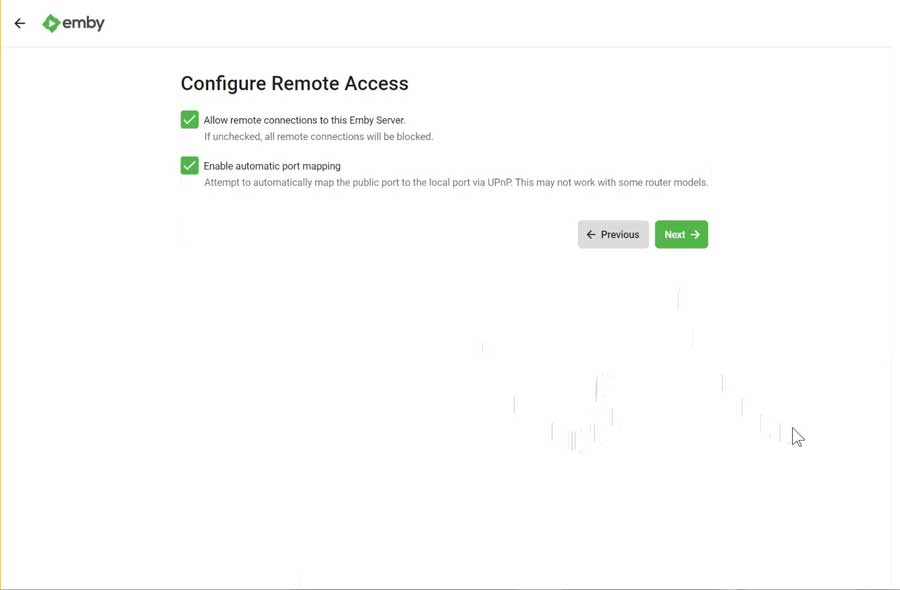
The first is to Allow Remote Connections to this Emby Server. If you want to connect to your Emby server from any device besides your NVIDIA Shield TV, this needs to be checked.
If this setting is turned off, it will refuse all remote connections.
The second setting, Enable Automatic Port Mapping, is helpful for power users who want to get really specific on configuring their network.
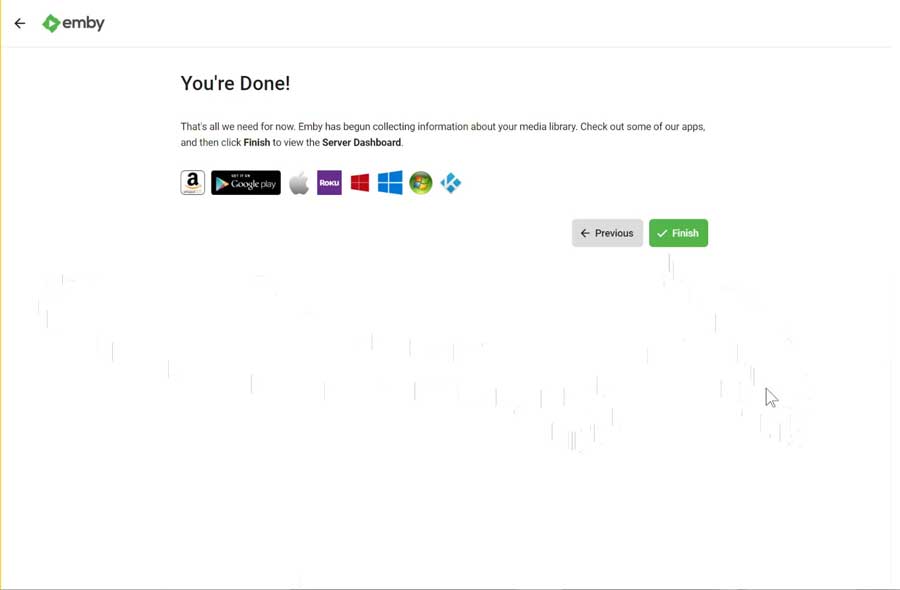
The final screen will ask you to accept the Emby terms of service.
After that… you’re done!
Shield TV Settings for Emby Server
Over the first few days that I had the Emby server running on my NVIDIA Shield TV, I ran into a couple of issues.
For example, the initial media and thumbnail scans were still running after several days and were never completed.
Every time I checked their progress, the percentage bar barely moved.
Eventually, I could track down the problems to some simple settings on the Shield TV. Once I made those changes, the whole thing ran much smoother.
Use Ethernet Instead of Wi-Fi
It’s essential to use an Ethernet connection for your Shield TV.
Video files are huge. An uncompressed 1080p movie can easily take up 20-30 GB of space. 4K movies can be up to 100 GB in size.
That can easily overwhelm your Wi-Fi network. Once that happens, Emby won’t be able to playback the video without stuttering and stopping.
Also, check your Ethernet speed to ensure you’re running at 1 Gbps and not 100 Mbps. Even if you have a gigabit network, it’s a fairly common issue for the Shield TV to drop the speed down to 100 Mbps.
Screen Saver: Sleep Mode
Remember earlier when I mentioned that the initial tasks took days to complete?
Well, here’s why.
It turns out that my Shield TV would sleep midway through the scan. When I turned on the system the following day, my Emby Server dashboard barely showed movement.
You can change this in the Screen Saver tab of the Settings menu.
While running my initial setup tasks, I turn off the sleep mode on my Shield TV. Once they’re done, I turn it back on but set it for a six-hour delay.
USB Port – Always On
ou must pay attention to this setting if you’re using an external hard drive or SSD on your NVIDIA Shield.
Most external hard drives draw power from your Shield TV unless they also have an external power supply.
The catch is that Android isn’t as smart as Windows when it comes to sleep mode. Android was designed for your smartphone, which doesn’t have a USB port, last I checked.
As a result, there have been issues where owners have complained that their NVIDIA Shield TV has gone into sleep mode, but the USB hard drive is still receiving power.
This isn’t explicitly an issue for running an Emby Server. However, you’ll likely be using an external hard drive, so it’s something to be aware of.

After a brief hiatus from the industry he's back at the helm of AndroidTVNews.com to bring Android TV and TV boxes to the forefront of the streaming world.
When he's not writing, he spends as much time as he can with his beautiful wife and his bulldog.
- How to set up and use Stremio with Real-Debrid on Android TV [2024] - August 18, 2024
- How to Install Kodi Diggz Xenon Plus & Free99 Build [March 2024] - March 3, 2024
- How to Enable Unknown Sources on Chromecast with Google TV [2025] - October 30, 2023