Last Updated on September 6, 2023 by Tim Wells
Installing new firmware on your Android TV box is a great way to get additional features or fix some pesky bugs. Many manufacturers have an OTA (Over The Air) process to update their firmware.
If your device doesn’t have OTA updates, you can still flash your firmware using the Amlogic USB Burning Tool.
Important Notes:
- This tool will only work if your device has an Amlogic chipset. (s805, s905, S912, s922, etc.)
- Never disconnect the power to your device while flashing the firmware. That’s a great way to brick your device.
- Always use the “Normal Erase” option in the tool. I’ll remind you of this once we get to that particular section.
Before we get started, head on over to our Android TV Box Firmware Guide. It’s a great resource where you can find links to download official firmware for every manufacturer of Android TV devices.
For this walk-through, We’ll install the Amlogic USB Burning Tool on a MINIX NEO U9-H.
Download the Amlogic USB Burning Tool
The first step to flashing your Android TV box’s firmware is downloading the latest Amlogic USB Burning Tool version.
It’s essential to download the latest version. The Amlogic USB Burning Tool has been around for a long time, and a new version comes out every few months.
Usually, the latest version fixes a couple of bugs. However, it also adds drivers for any new Amlogic chipsets that have come out since the last version.
Without the proper drivers, your PC won’t be able to connect to your Android TV box.
There are legitimate reasons for using an older version of the tool.
However, I recommend downloading the latest version (version 3.1.0) and only installing one of the older versions if you have an error that can’t be resolved.
You can download the files here (links to Mega):
Version 3.2.0
Version 3.1.0
Version 2.2.0
Version 2.2.0
Version 2.1.7.1
Version 2.1.6
Version 2.0.9
Version 2.0.8
Once you download the version you want, extract it to a temporary directory on your PC.
For each version, I’ve created a RAR file with the USB Burning Tool file and a shortcut to this article if you get stuck along the way.
I created a folder in my C:\Temp directory called Amlogic and extracted the files.
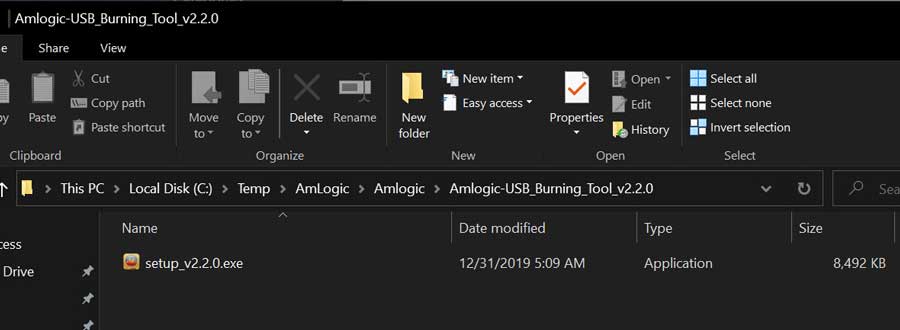
Once the files are extracted, navigate to that directory and click on the setup exe file to get started.
But first…
Connect your Android TV Box to Your PC
There’s one critical step before installing the Amlogic USB Burning Tool on your PC.
You’ll need to connect your Android TV box to your PC using a USB cable.
Most TV boxes come with a small OTG-USB cable.
OTG stands for On-The-Go (seriously), and it’s simply a cable with a USB Type-A on one end and a micro-USB on the other end.
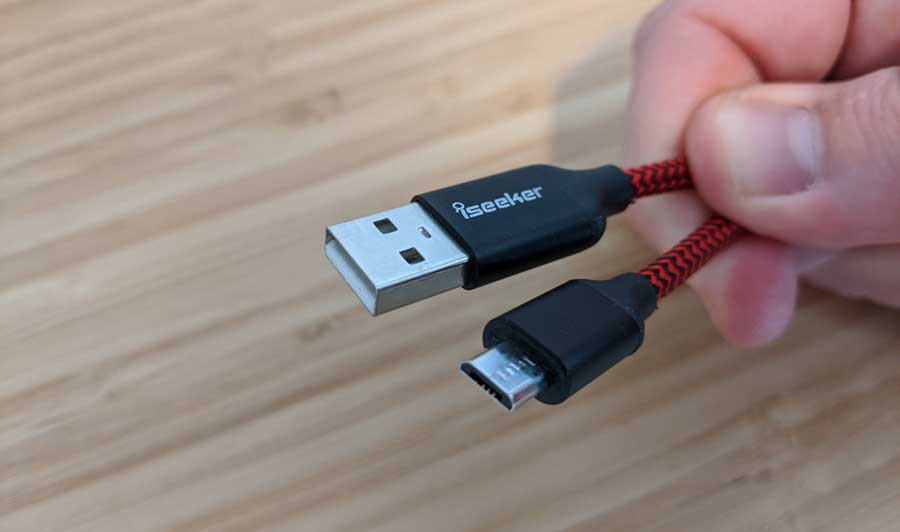
If your TV box came with one, that would be your easiest (and cheapest) option.
I used a 15′ USB-A to micro-USB cable that I had purchased for another USB device, and it worked great. It allowed me to keep my Android TV box connected to my TV and connect the cable comfortably to my laptop.
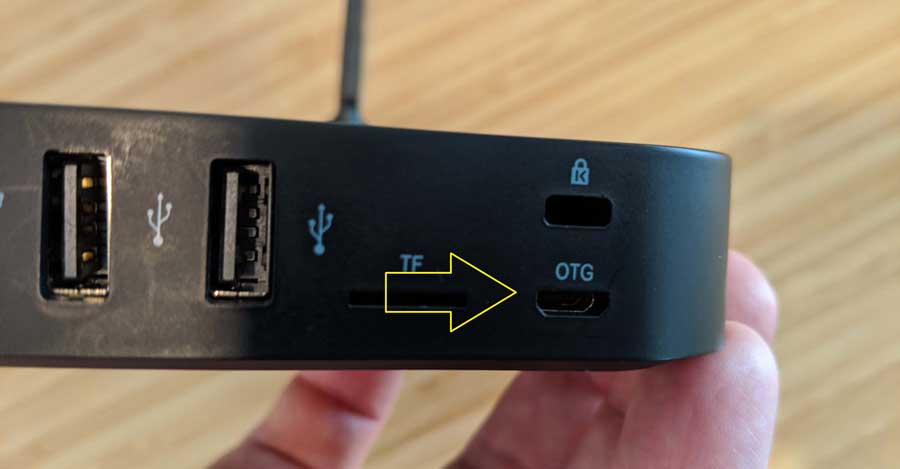
No matter which cable you use, you will want to connect the micro-USB end to the OTG port on your Android TV box.
It’ll look like this:
Once both ends of the cable are connected, turn on your TV box and let it boot up normally.
Once it powers up, your PC will detect it as a new device, and a pop-up box will appear in the screen’s lower right-hand corner, just above the clock.
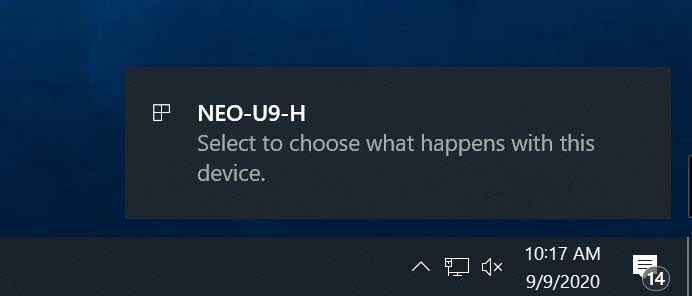
You don’t have to do anything with this message at this time.
Once the message appears, you can install the Amlogic USB Burning Tool on your PC.
How to Install the Amlogic USB Burning Tool
Installing the Amlogic USB Burning Tool is straightforward, but there are a few potential hiccups to watch out for.
So let’s run through the process together.
As I mentioned, I’m installing this on Windows 10. If you have a different version of Windows or are installing this on a Mac, your screens will probably look different from mine.
The installation process is split into two sections: the burning tool itself and the drivers for your Android TV box.
Install the Tool
Start by clicking on the Setup.exe file you extracted in this article’s first section.
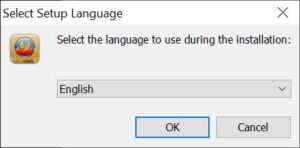
A small pop-up window will appear, asking you to choose a default language for the tool. We’ll assume you want English for this guide, so go ahead and click OK to continue.
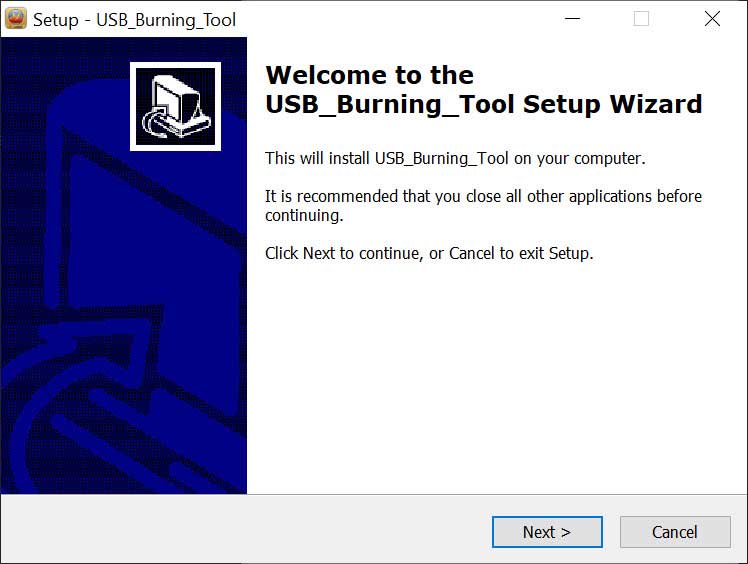
The first installation window gives the standard disclaimer that you should exit any other program. Click Next to continue.
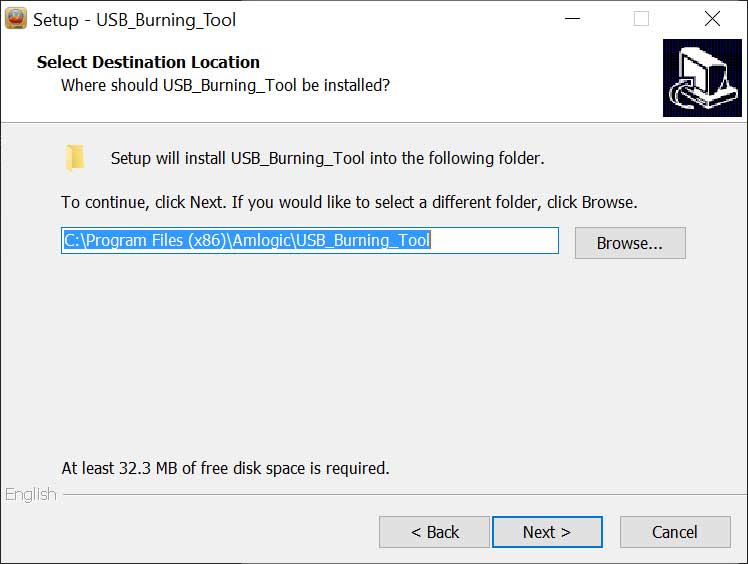
You’re then given the option to change the installation directory.
Leave it at the default location unless you want to change it.
Click Next to continue.
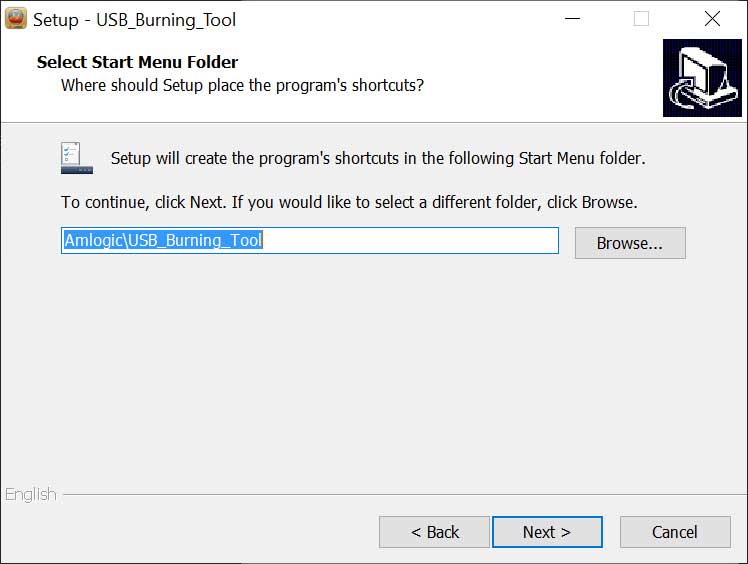
You’re also given the option of where you want to create the Start Menu folder and icon for the tool.
By default, it will create a folder titled Amlogic. However, if your Android apps are in one specific folder, you can change that here.
Once you’ve selected the installation folder, click Next to continue.
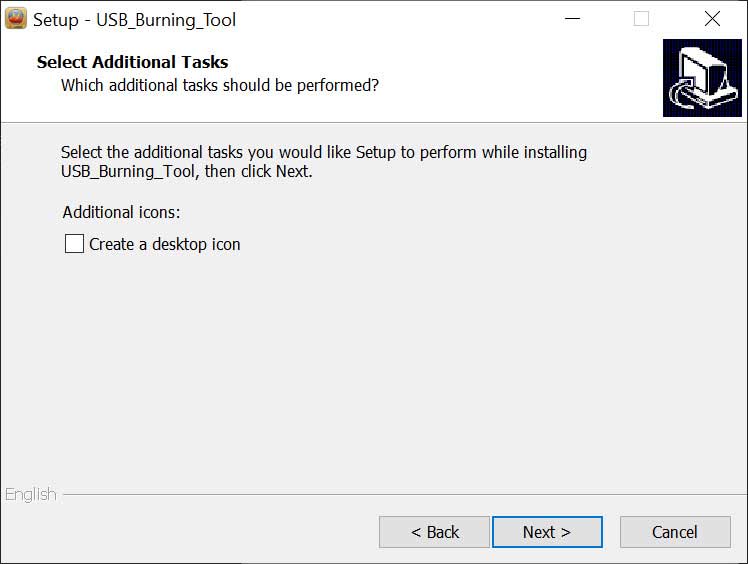
Finally, you’re given the option to add an icon on the desktop. I usually leave this unchecked.
Click Next to continue.
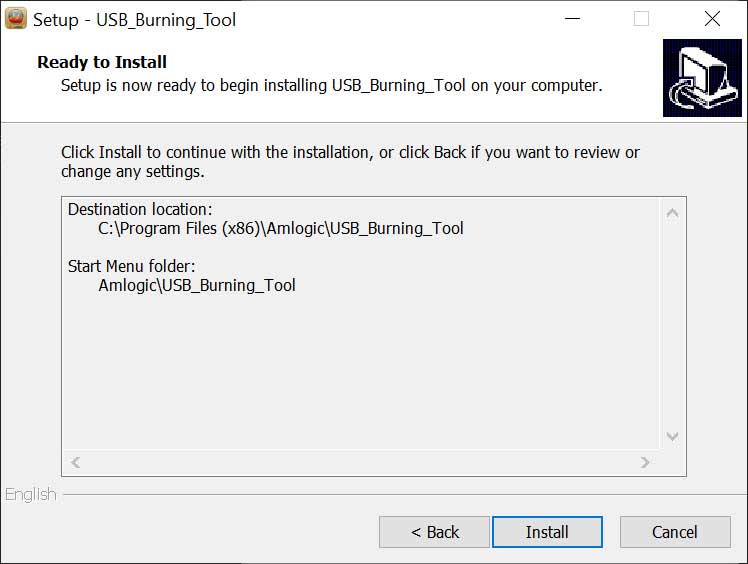
The installation program will ask you to verify your settings one last time.
If everything looks correct, click Install to complete the process.
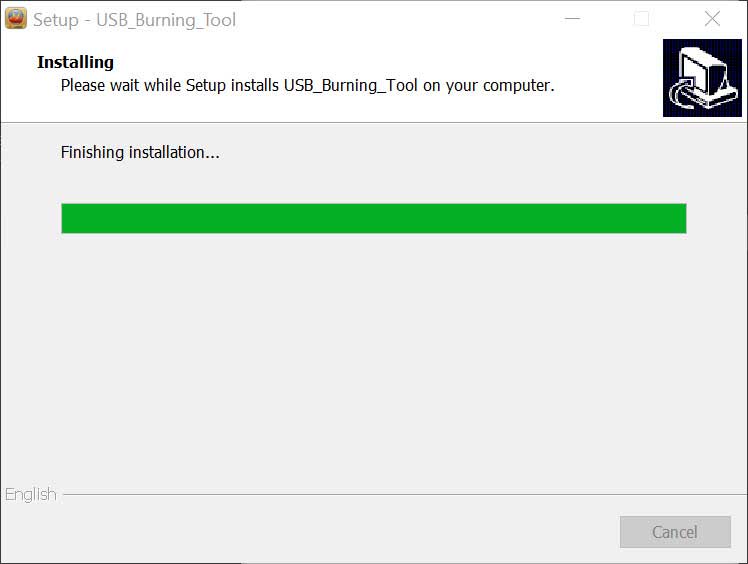
At this point, the actual Amlogic USB Burning Tool is installed.
However, if you’ve previously connected your Android TV box to your PC, you should see a second window pop up.
Install The Drivers
The second part of the installation will load the correct drivers for your device. This will allow your PC to actually communicate with your TV box.
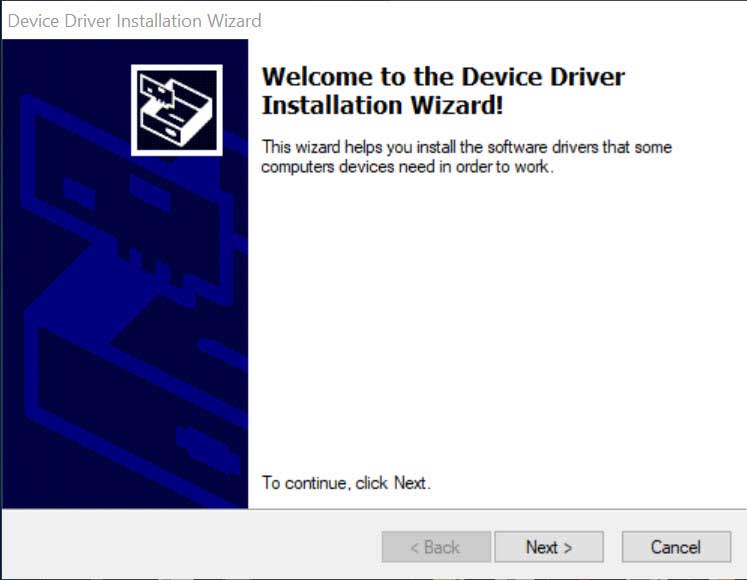
If your Android TV box isn’t connected to your PC and turned on, this is your last chance to do so.
But if you were following along, you’d already taken care of that, right?
Click Next to continue.
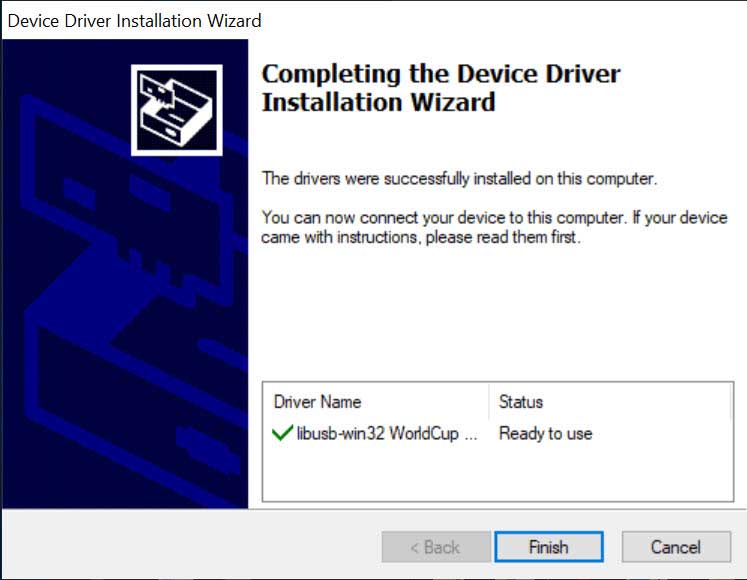
Your screen will show something different now unless you’re flashing the firmware on the same device I am. As long as your PC correctly installs drivers on this step, you’re OK.
Click Finish to close this secondary window.
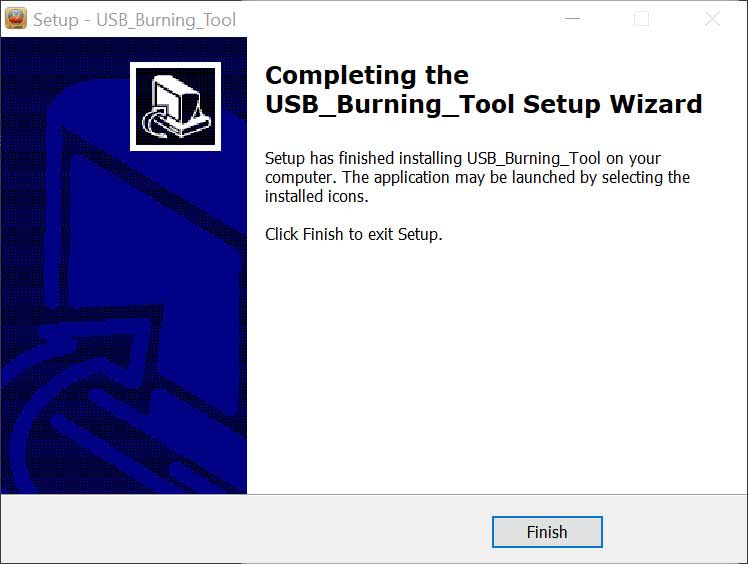
Once the drivers are correctly installed, the original setup window will change to the above image.
Click Finish to complete the installation of the Amlogic USB Burning Tool.
How to Change the Language
In the first step of the installation process, you selected the default language for the app.
However, if you click the wrong button, or if you have an older version of the Amlogic USB Burning Tool, you may be shocked to see your screen like this:
Thankfully, changing the language is easy. Best of all, it doesn’t require you to be fluent in another language.
The menu bar will be on the top left-hand corner of the app’s window. The second word will allow you to change the Language.
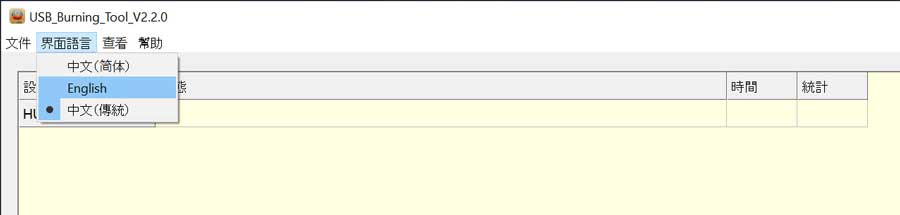
You can change the language back to English in the drop-down menu by clicking on that option.
How to Use the Amlogic USB Burning Tool to Flash Firmware
Now for the fun part. It’s time to flash your Android TV box firmware.
You’ll need to do three things before you open the Amlogic USB Burning Tool:
- Download the latest firmware image file using our Firmware Resource Page,
- Turn your Android TV device completely OFF
- Connect your TV box to your PC using the OTG cable (discussed above)
Once all that’s done, it’s time to get started.
Open the Amlogic USB Burning Tool as Administrator.
Windows is set up to be a (relatively) secure operating system, so they want to ensure that you’re not inadvertently harming your computer.
Because of that, we need to run the burning tool as the Administrator.
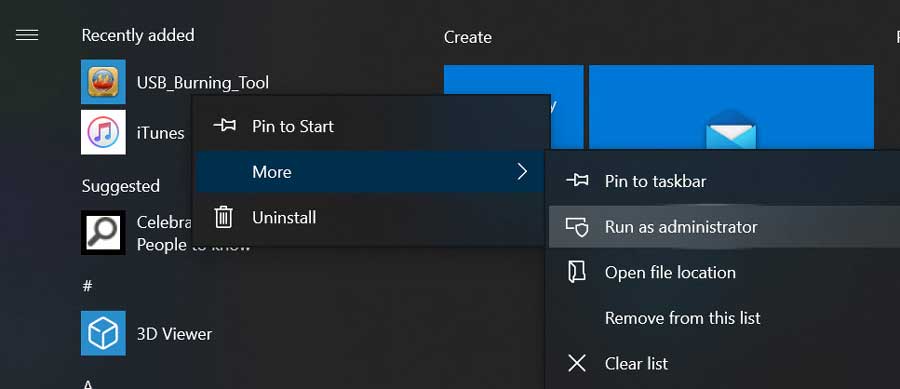
To do this, locate the USB Burning Tool icon in your Start Menu.
Right-Click on the icon.
Depending on your version of Windows, you may be able to click Run As Administrator directly, or you may need to click on the More menu, as you see above.
The screen should change once you click on it, and all your windows will vanish temporarily.
A new pop-up box will ask you to confirm that you want to run this program.
Click yes\ok to confirm.
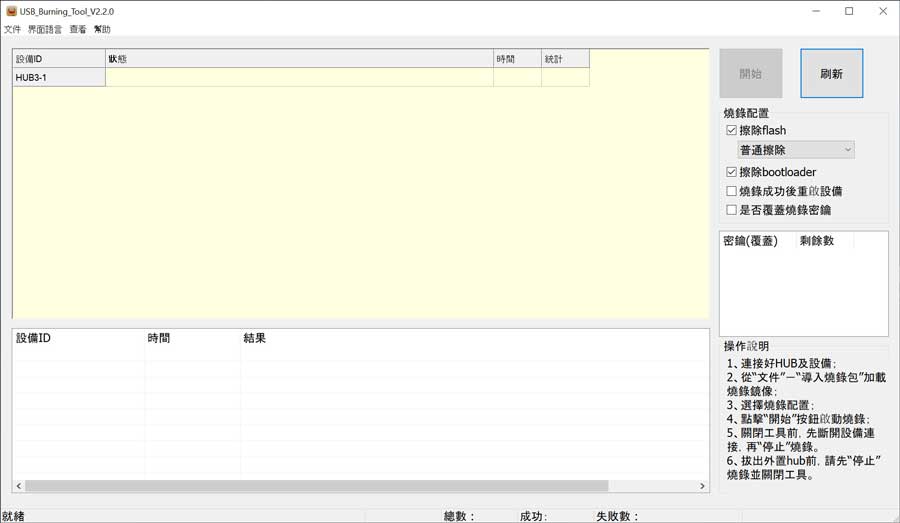
After a few seconds, the burning tool should load. It will look something like this:
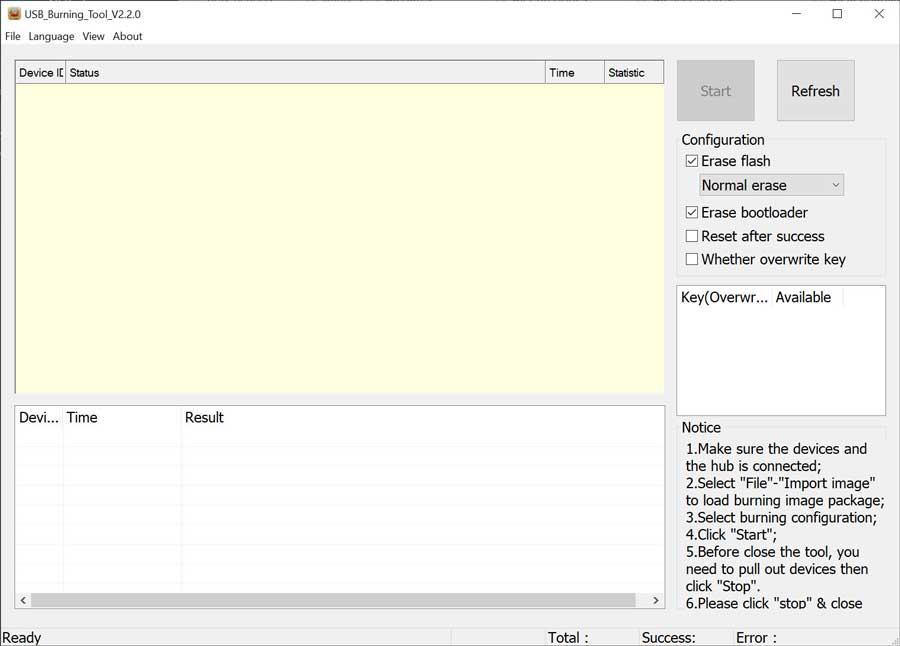
As you can see, there’s nothing listed in the main window under the Device or Status headings.
That’s OK. Since your TV box is powered down, that’s normal.
Reboot Your Android TV Device in Recovery Mode
Recovery mode is a low-level operating system that allows you to perform diagnostics or repair your device if it’s having major problems.
Most operating systems have them (Windows, iPhones, Android, etc.).
It should look something like this.
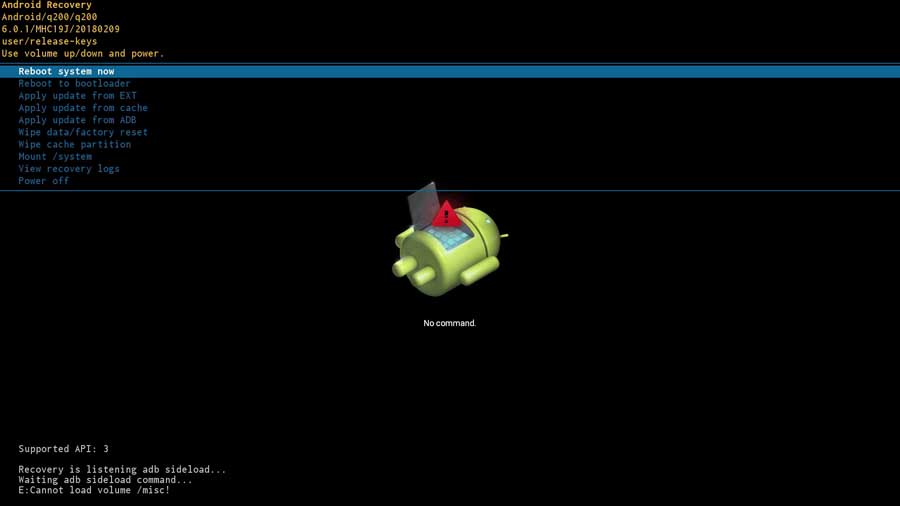
If those menu options look scary, that’s OK.
We won’t be using any of them.
The Amlogic USB Burning Tool will take care of everything from your PC.
The trick is that every device is slightly different, and there are several ways to get into recovery mode. The most common forms are the ‘paperclip method’ and the ‘long-press method.’
The Paperclip Method
You’ll need to use the ‘paperclip method’ to reset older Android TV devices, more often than not. Although, it’s still common to find, even on newer TV boxes like the MINIX NEO U22-XJ that you see below.
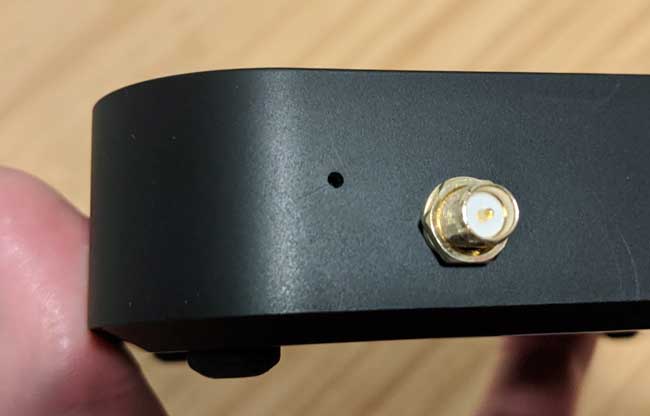
This method got its name because of a small hole in the device with a button deep inside. If you press and hold the button while turning the device on, it boots up in recovery mode.
The hole is so tiny that only a small pin or paperclip would fit, hence the name.
Long-Press the Power Button
Most newer devices have a much easier way to boot into recovery mode.
Locate the power button on the TV box itself. It’s usually on the side of the device, but it could also be on the front or back.

With the device powered off, press and hold the power button until the recovery screen appears.
For most devices, this is around 5-6 seconds. However, it will take a little bit of time.
Verify Connection
Once your Android TV device has safely booted into Recovery Mode, it should be visible to the Amlogic USB Burning Tool.
Verify that you see a message saying Connect Success in the Status column of the main window.
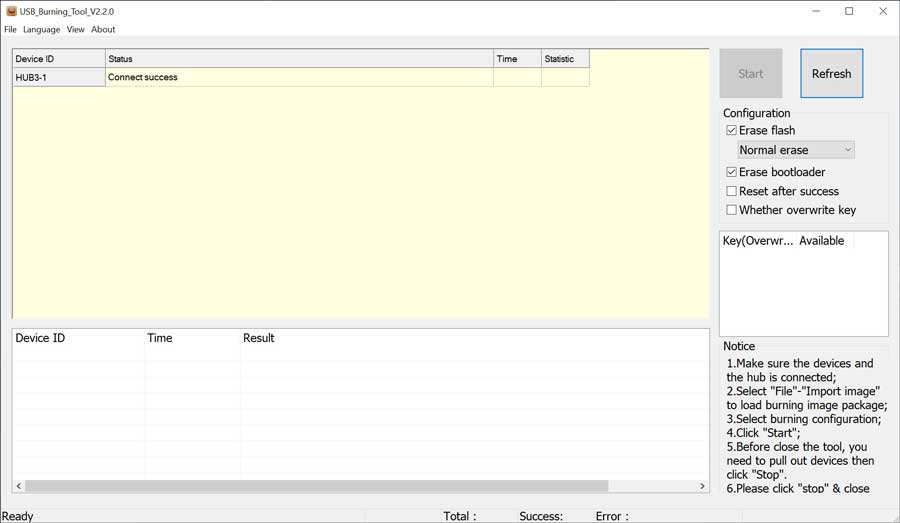
Don’t worry that the Device ID column doesn’t display the correct name of your device. It refers to the name of the port that your TV box is plugged into.
In this case, I’ve attached my TV box to one of my USB 3.0 ports.
All you need to look for is the Connect Success message. Once you see it, we can move on to the next step.
Import the Firmware Image File
Earlier, you downloaded the new firmware file and saved it to your PC. Now it’s time to import that into the Amlogic USB Burning Tool so it can transfer to your Android TV box.
You’ll see the Menu Bar in the app’s upper left-hand corner. Click on File.
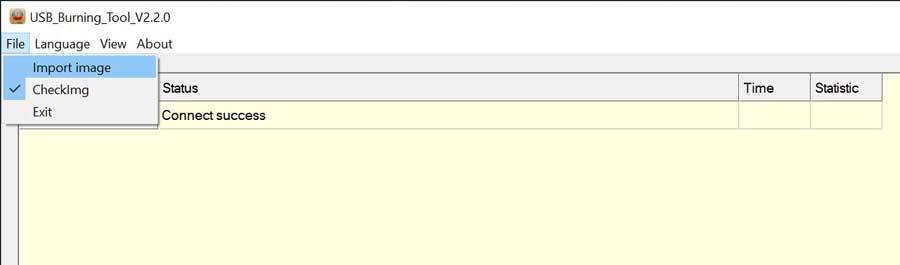
Click on Import Image.
Once you do, a file menu dialog box will open. Navigate to the directory where you saved your new image file.
Note: If the image file is still in a .zip or .rar format, you’ll need to extract it before importing it.
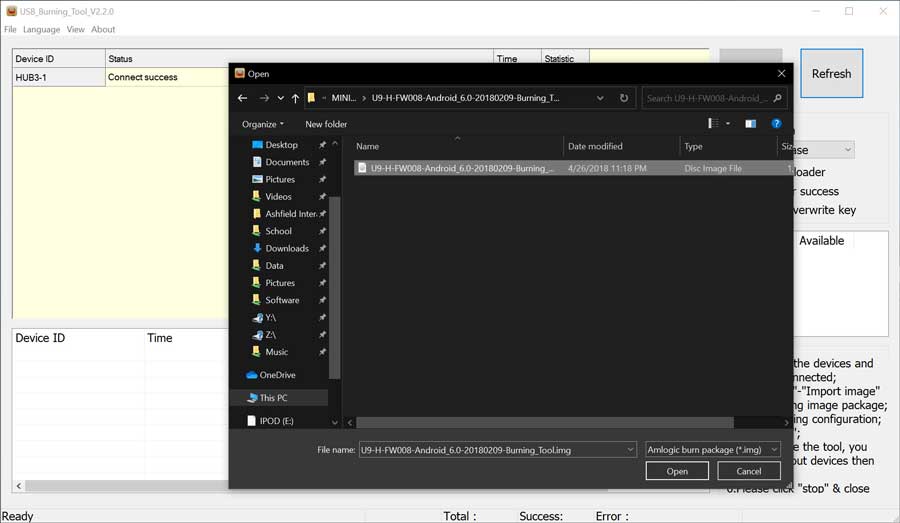
Once you’ve found the file, click Open to continue.
The Amlogic USB Burning Tool will automatically start to verify the file.
Suppose the file was corrupted during the download process or intentionally corrupted elsewhere. In that case, this process should figure that out and throw an error message.
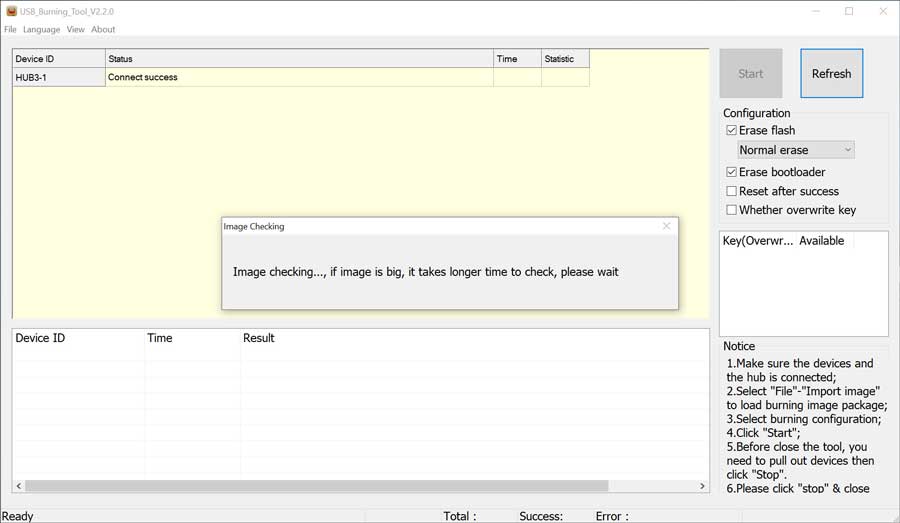
Depending on your computer’s speed and the image file size, this process could take a few seconds to a couple of minutes.
Flash Your Android Firmware
Once it’s complete, the pop-up box in the center of the screen should go away. The Start button in the upper right-hand corner will change from greyed-out to clickable.
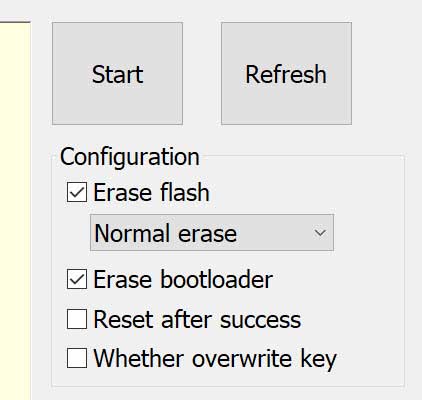
There are only a couple of options that you can change in this tool. Thankfully the default settings are configured, so I’ve never needed to change them.
Verify that both Erase Flash and Erase Bootloader are checked.
This is the point of no return.
Once you click Start, you can’t interrupt the process, and doing so will potentially brick your device.
Click Start to begin the process.
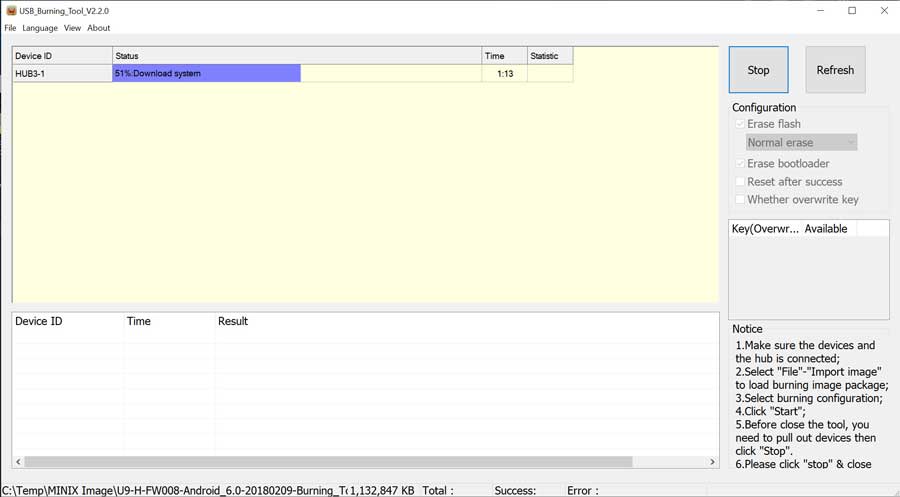
The entire process took exactly three minutes on my device, so you have time to grab a coffee.
If you want to keep tabs on what’s going on, the status bar will slowly increase while it’s working. It will also give you an idea of the specific task it’s working on.
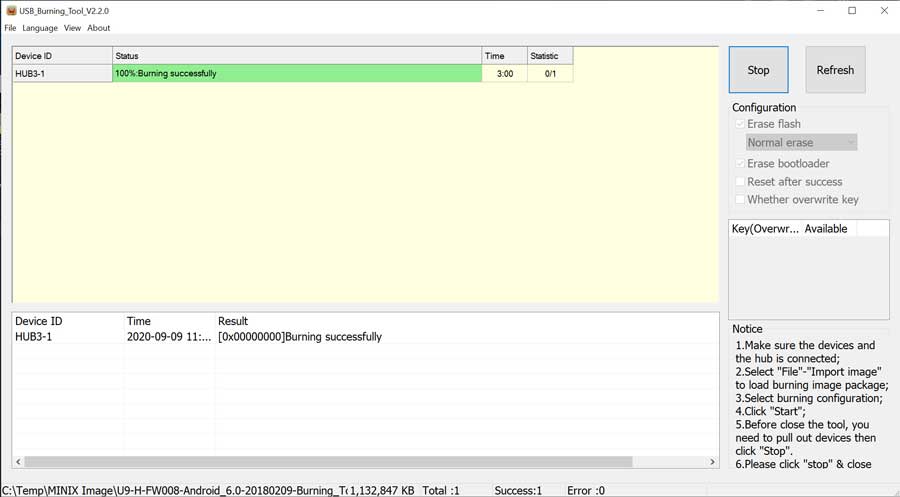
Once the status bar turns green, you’ll see a message saying 100% Burning Successfully.
At this point, you can click the Stop button to safely disconnect your Android TV box and remove the USB-OTG cable.
Congratulations! You’ve successfully flashed your firmware.
Once you reboot your device, you’ll need to go through the setup process again, just as you did when you first purchased the device. We have a great guide on how to set up your Android TV box quickly and easily.

After a brief hiatus from the industry he's back at the helm of AndroidTVNews.com to bring Android TV and TV boxes to the forefront of the streaming world.
When he's not writing, he spends as much time as he can with his beautiful wife and his bulldog.
- How to set up and use Stremio with Real-Debrid on Android TV [2024] - August 18, 2024
- How to Install Kodi Diggz Xenon Plus & Free99 Build [March 2024] - March 3, 2024
- How to Enable Unknown Sources on Chromecast with Google TV [2025] - October 30, 2023