Last Updated on May 8, 2023 by Tim Wells
If your NVIDIA Shield remote stops working, it can be difficult to get it working again. I’ve been using the NVIDIA Shield since 2015, through all three versions, and it’s happened to me on every unit.
Usually, it’s a simple fix that only takes a few seconds, but it can be frustrating when you only want to watch a movie. I keep the NVIDIA Shield remote app on my phone for just such an emergency.
Eventually, you’ll need to get your physical remote working again.
This article will cover how to remove and re-pair your NVIDIA Shield remote control and reset the Bluetooth settings. That way, you can quickly get back to your movie.
Let’s get started.
A great way to help troubleshoot accessories on your NVIDIA Shield TV is to always have another accessory connected as a backup. This can be a universal remote, game controller, or even a wireless mouse or HTPC keyboard.
Most of the steps outlined below will require you to be able to navigate the system menus. So it pays to have a backup ready.
If, after these steps, you still can’t get your remote to work, the only solution may be to look for a replacement. Find out my picks for the best NVIDIA Shield TV replacement remotes in this article!
How to Remove an NVIDIA Shield Remote
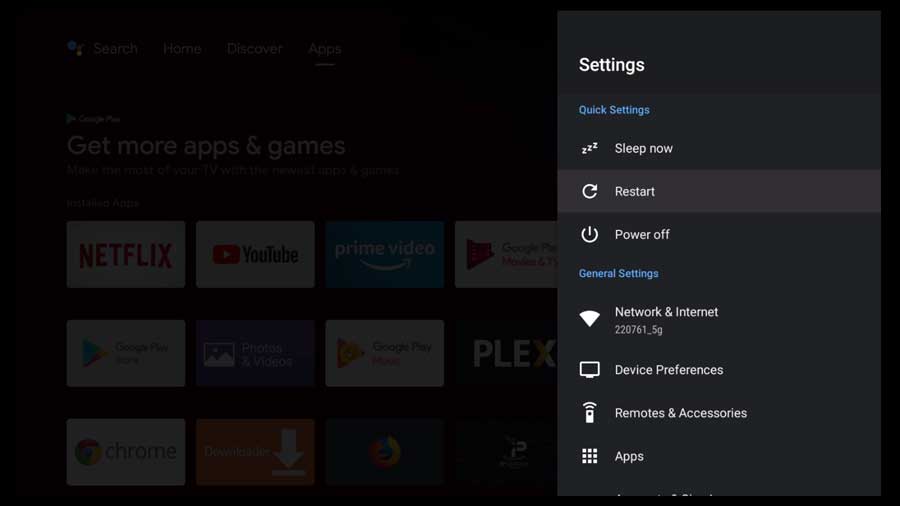
Everything we’re going to do today will be found in the Settings menu.
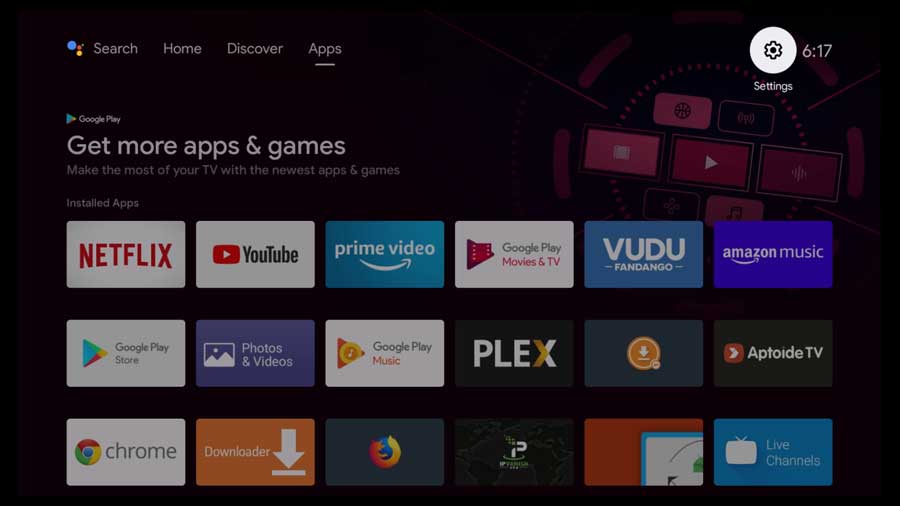
If this is your first time going to the NVIDIA Shield TV Settings Menu, you can get there by clicking on the gear icon in the upper right-hand corner of the home screen.
1. Open the Shield TV Settings Menu.
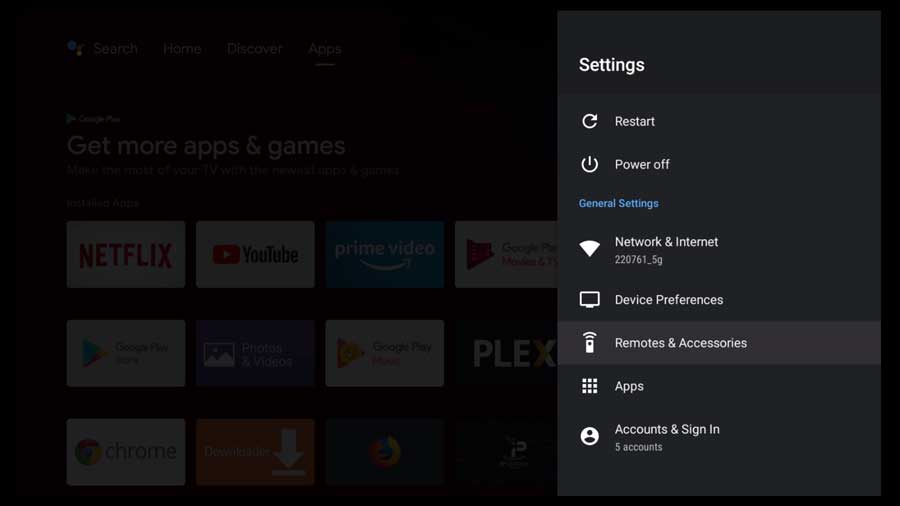
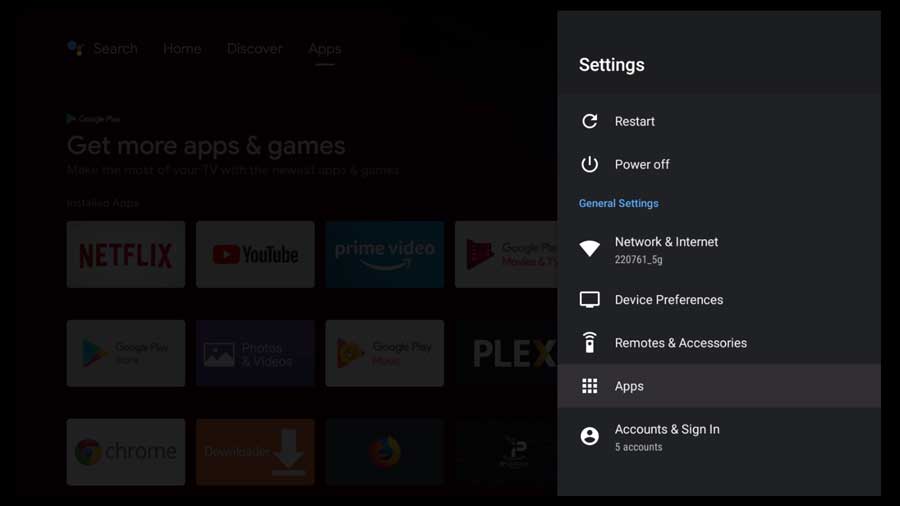
2. Scroll down to the Remotes & Accessories heading.
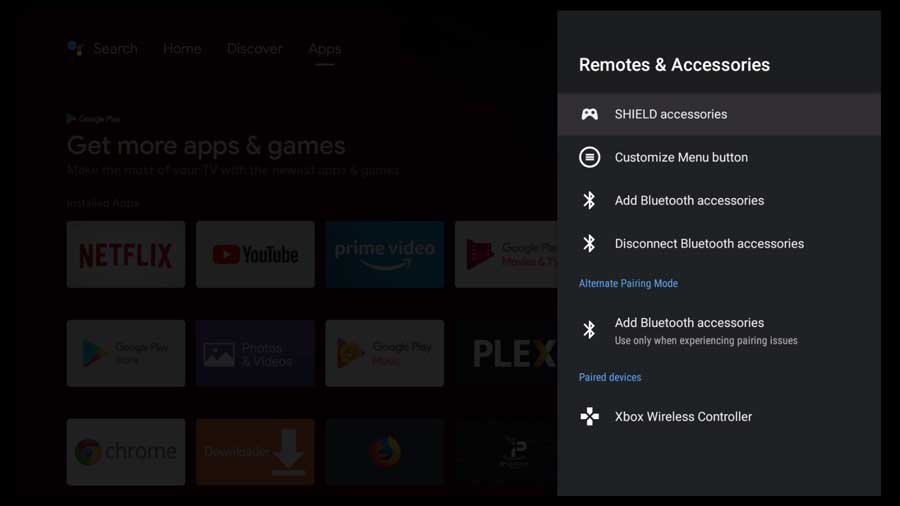
3. Click on SHIELD Accessories.
NVIDIA separates the accessories you’ve connected to your Shield TV into two categories: official Shield accessories and generic Bluetooth accessories.
If your wireless device is connected through a USB receiver, it will not show up on this list, even if it’s working correctly.
For example, on my 2017 Shield TV, pictured here, I have a 2019 Shield Remote, an XBOX wireless gamepad, and a Logitech wireless keyboard when I want to enter passwords or browse the Internet.
For more on why I went with the Xbox wireless gamepad, check out my Shield TV gamepad recommendations here.
This example will focus on my 2019 Shield Remote, listed under the SHIELD Accessories section.
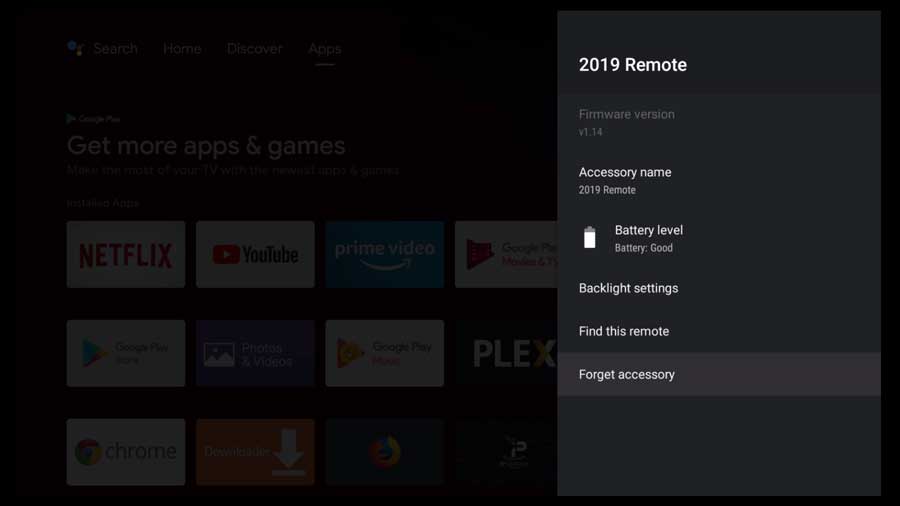
4. Select your Shield Remote from the list.
Here you’ll find a list of all the official NVIDIA Shield accessories (both remotes and game controllers) paired with this device.
This screen is always the first place I look to troubleshoot my remote control because it gives a quick snapshot of the battery level for each device.
Even though the Shield gives you a warning message when the battery level gets critical, there have been a few times when I’ve dismissed the message and forgotten that it was getting low.
If the status bar on your battery is critical, start by replacing the batteries on your NVIDIA Shield remote. Often, that fixes any connectivity problems you’re having without going to another step.
Assuming that’s not the issue, click on your remote to get to its detail page.
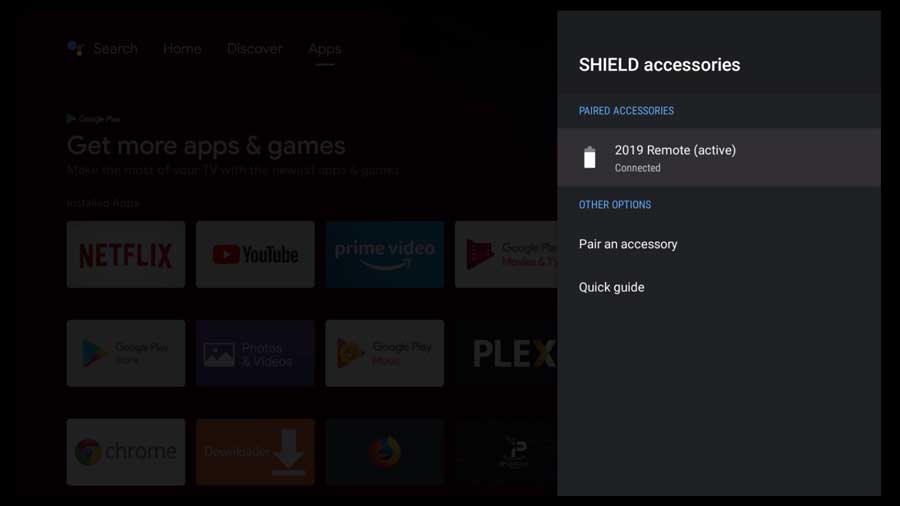
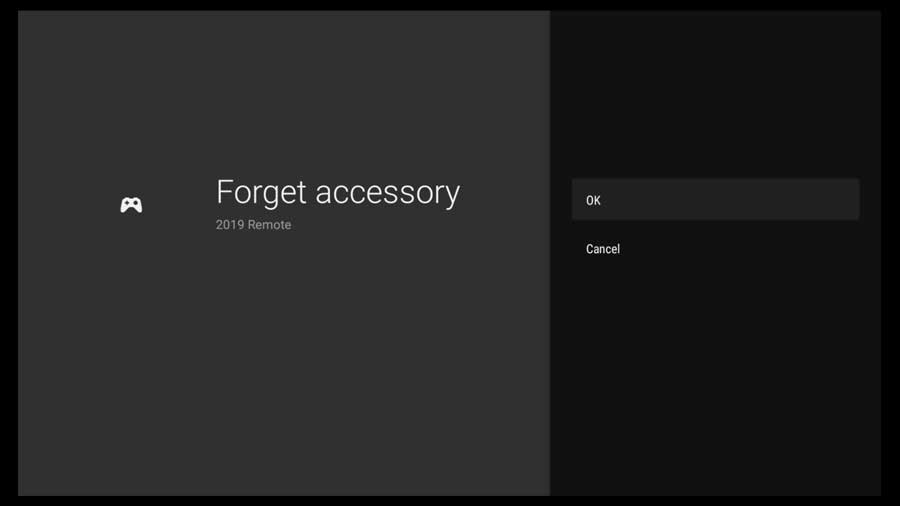
5. Select Forget Accessory.
If the battery isn’t the issue, the easiest way to solve most problems is to re-pair the remote control. IT departments have been troubleshooting computer issues in this way for years, and it’s worked out well.
Most official NVIDIA Shield remotes and controllers will automatically pair with a Shield TV as soon as they sense one nearby.
That’s a great feature that helps make this process easier.
6. Confirm by clicking OK.
Your Shield TV gives you one last chance to back out of this process. Click OK to continue.
In many cases, your NVIDIA Shield remote will re-pair automatically after a few seconds. This is the quickest fix to get your Shield TV remote working again.
If that doesn’t happen, or if you have more than one Shield TV, you may need to manually pair the remote control.
We’ll cover that in the next section.
How to Pair NVIDIA Shield Remote
If your Shield TV remote didn’t pair automatically, you might need to give it a little help.
There are two methods to use, but for official NVIDIA Shield accessories, the most common method is the automatic pairing we’ll describe below.
1. Select Remotes & Accessories from the Settings Menu
Re-pairing your NVIDIA Shield remote is done on the same menu as un-pairing it.
To start, click on the Settings menu and scroll down to the Remotes & Accessories section.
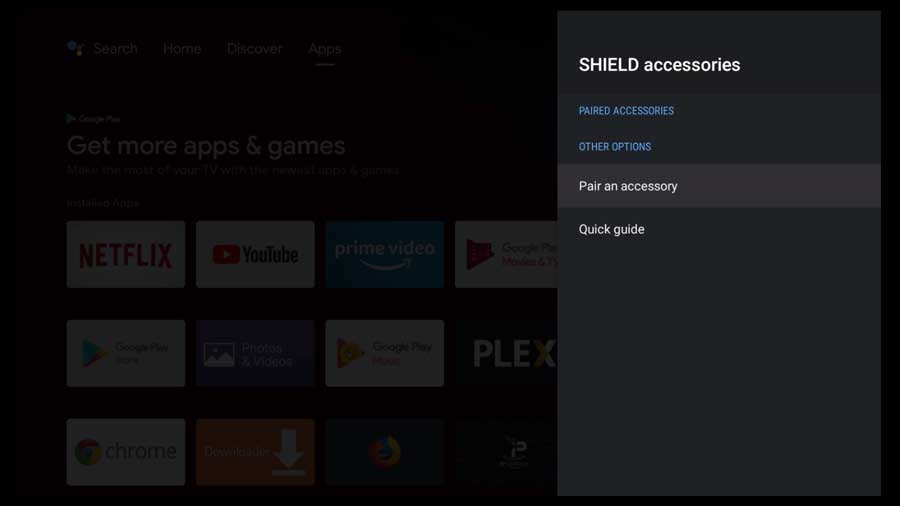
2. Click SHIELD Accessories.
In this example, we will pair an official Shield TV remote, so click on the SHIELD Accessories section.
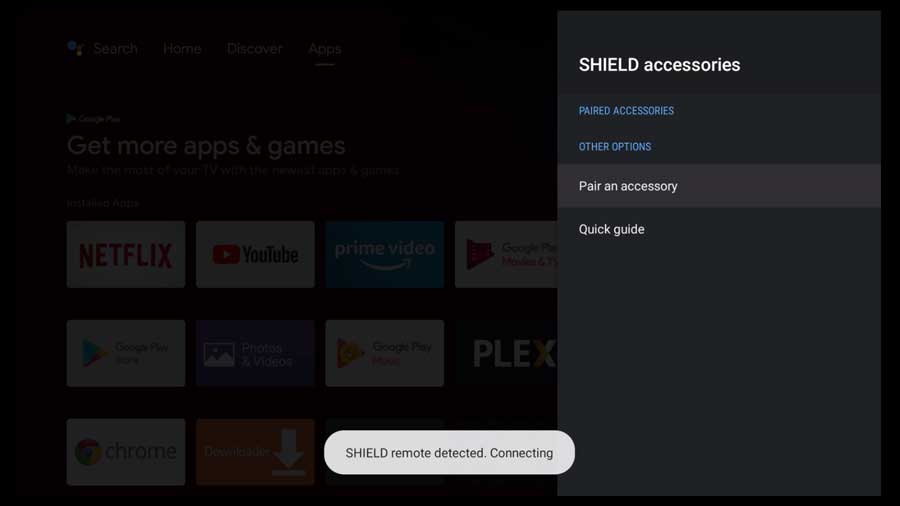
3. Click Pair an Accessory.
Sometimes, your NVIDIA Shield remote will pair as soon as you get to this section.
If that doesn’t happen after a few seconds, click Pair an Accessory to continue.
4. Put your NVIDIA Shield TV into Pairing Mode.
For this next section, place your Shield remote control around 12 inches away from your Shield TV.
If your Shield TV remote is also paired with another Shield TV, press down on the Back button and the OK button simultaneously.
The Back button is the one that looks like a triangle, while the OK button is the inner circle towards the top of the remote.

If your Shield TV remote has not been paired with any other device, hold the OK button (the inner circle near the top of the remote).
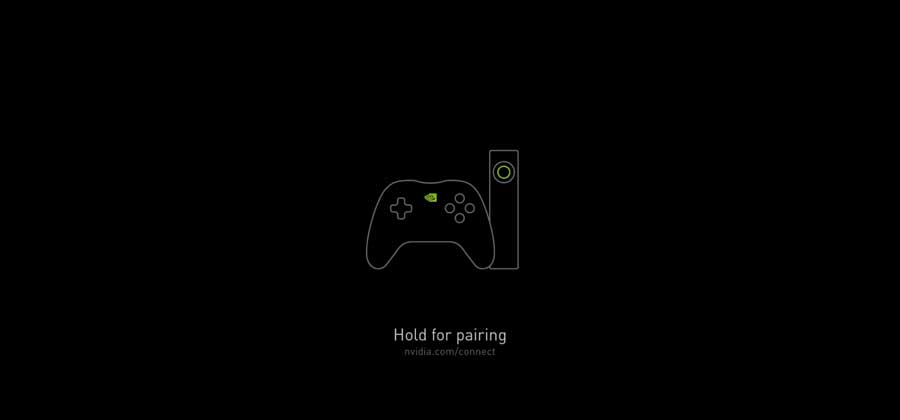
After a few seconds, the button on the remote will start to flash, signifying that it’s in pairing mode.
5. Look for the “SHIELD remote detected” message on screen.
After a few seconds, you should see a message onscreen letting you know that the remote has been detected.
As soon as you do, you can release the buttons.
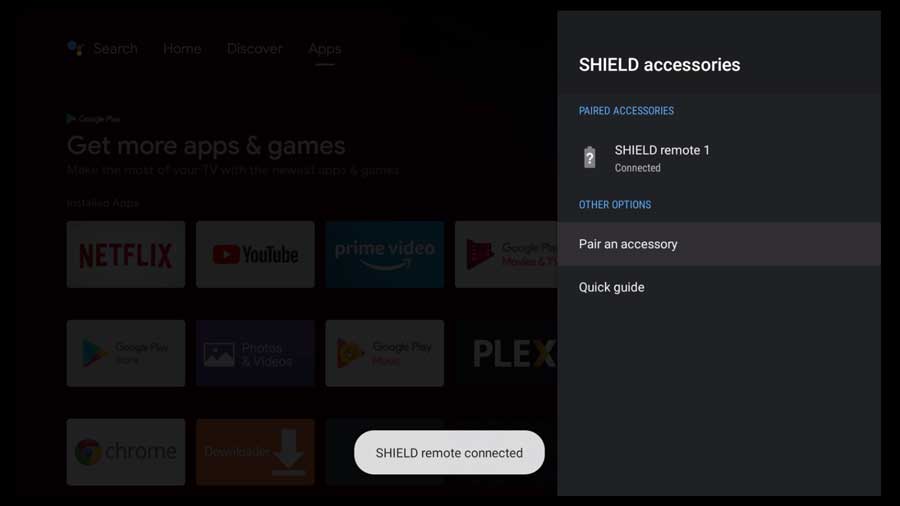
6. The Shield TV remote should appear in the list of Paired Accessories.
After a few seconds, you’ll see another message saying Shield Remote Connected, and the remote will appear in the list of Paired Accessories.
How to Reset NVIDIA Shield’s Bluetooth Settings
If your NVIDIA Shield remote still isn’t working after removing and re-pairing it, the problem might not be in the remote.
It could be in your Shield TV’s Bluetooth settings.
In this section, we will cover how to manually reset the Bluetooth settings on your device.
1. Click on the Apps section of the Settings menu.
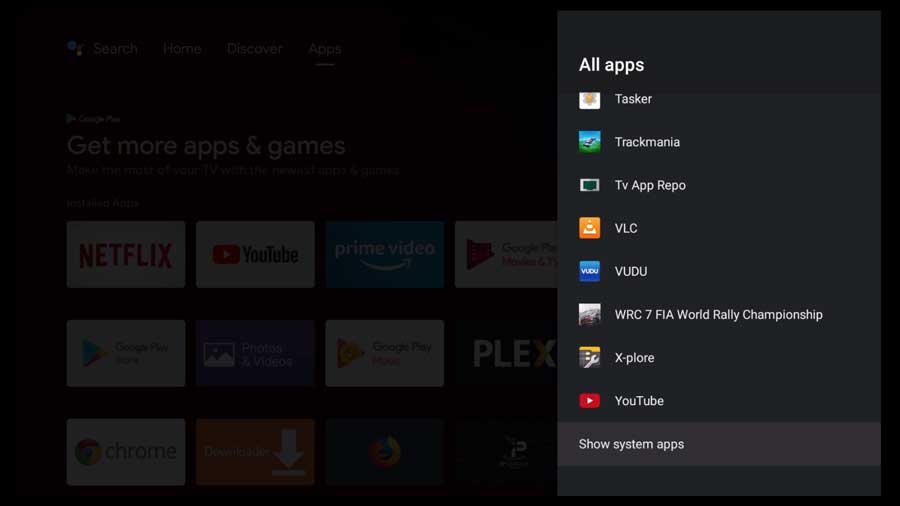
2. Click to See All Apps.
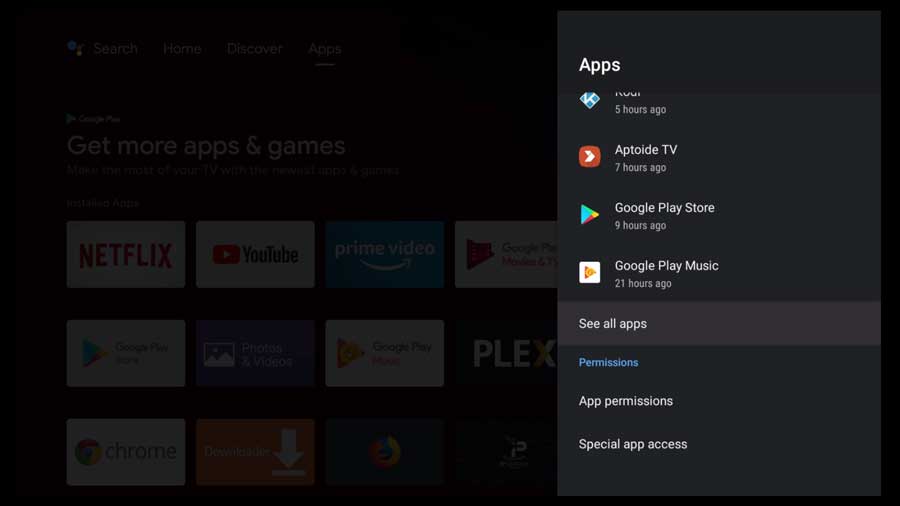
3. Click to Show System Apps
Instead of the Bluetooth settings section, we’re going to look at the app itself.
Like most critical Android components, this is found under the System Apps heading.
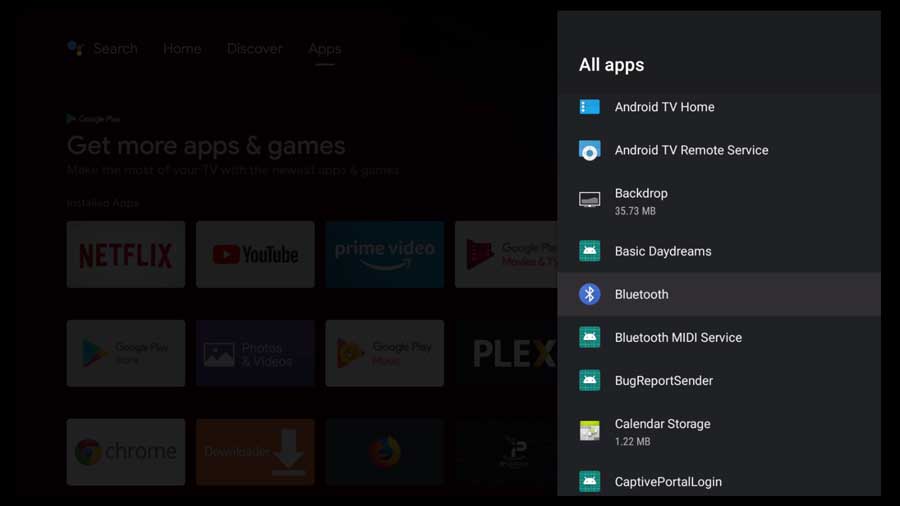
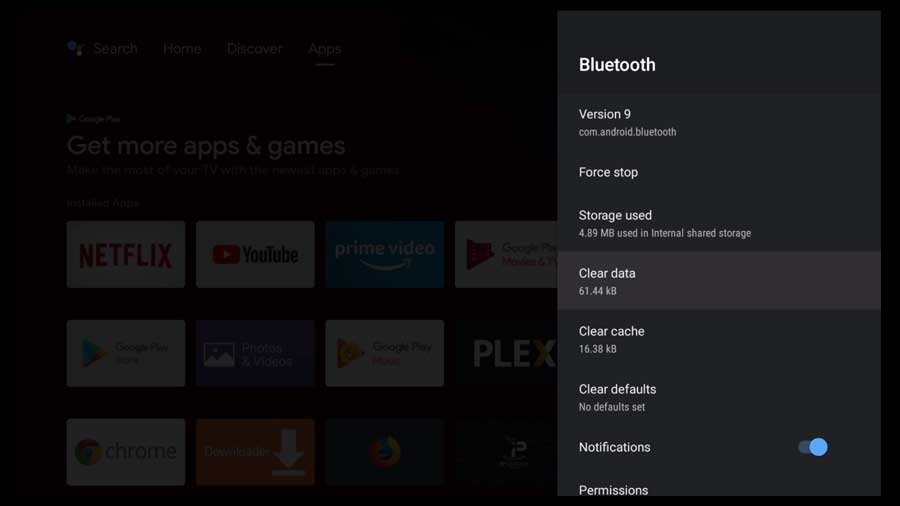
4. Click on Bluetooth.
Scroll down until you see the Bluetooth app. As you can see below, there may be multiple apps for different Bluetooth services.
Here, we’re looking for the main Bluetooth app. You know it’s the right one when you see the official blue Bluetooth icon next to it.
Click on it to continue.
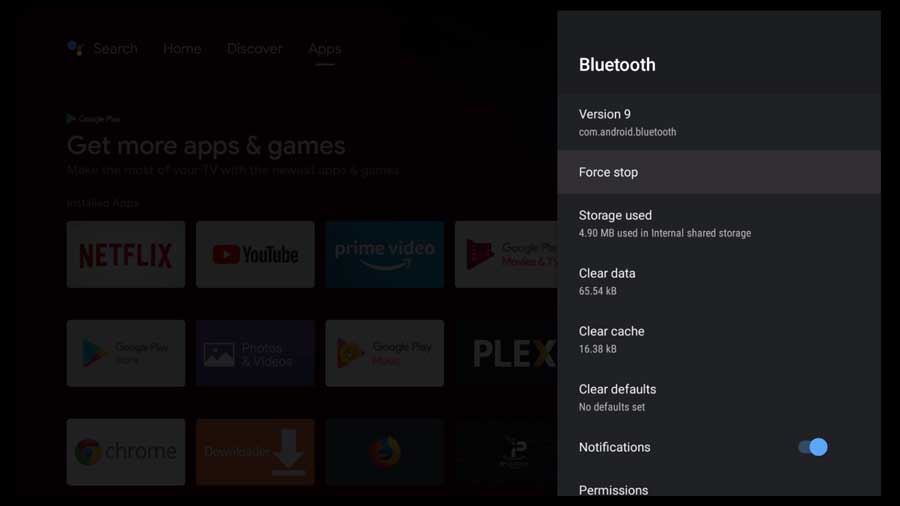
5. Force Stop the Bluetooth App
We’re going to perform three separate steps on this screen.
First, we’re going to Force Stop the app.
Occasionally an Android app will “hang” and stop responding. This kind of thing often happens with Windows PCs, and it’s a similar process to fix it.
You need to force-close the app and restart it.
After you click Force Stop, you’ll be asked to confirm on a separate screen.
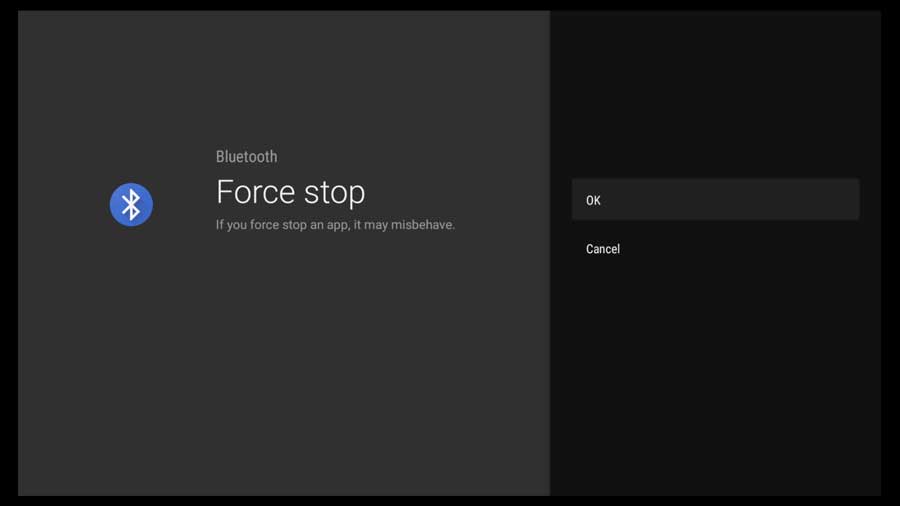
This stops Bluetooth for all connected devices and takes you back to the previous screen.
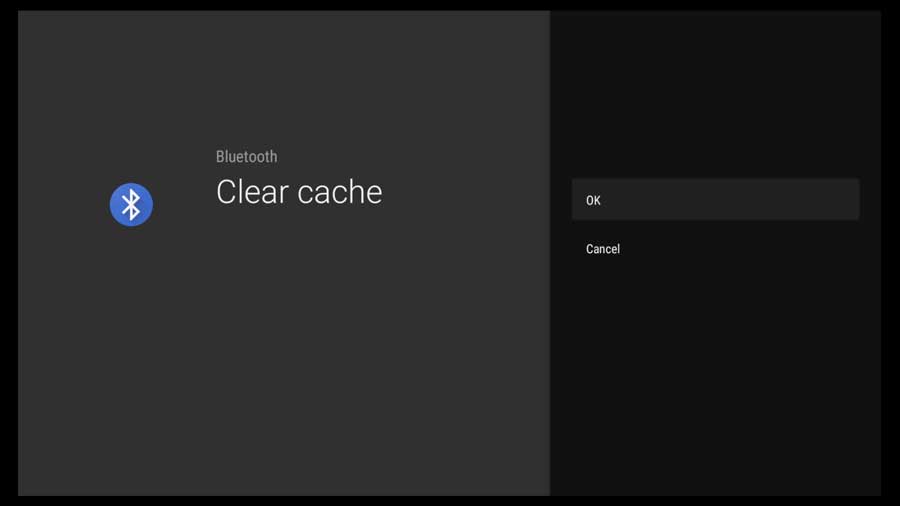
6. Clear Cache.
The next step is to clear out the app’s cache. The cache holds all of the information that the app uses most. Sometimes recent data causes a conflict in the app, so it’s a good idea to clear it out if you’re having problems.
Click Clear Cache to continue.

You’ll be asked to confirm your decision when you click Clear Cache.
Click OK to continue.
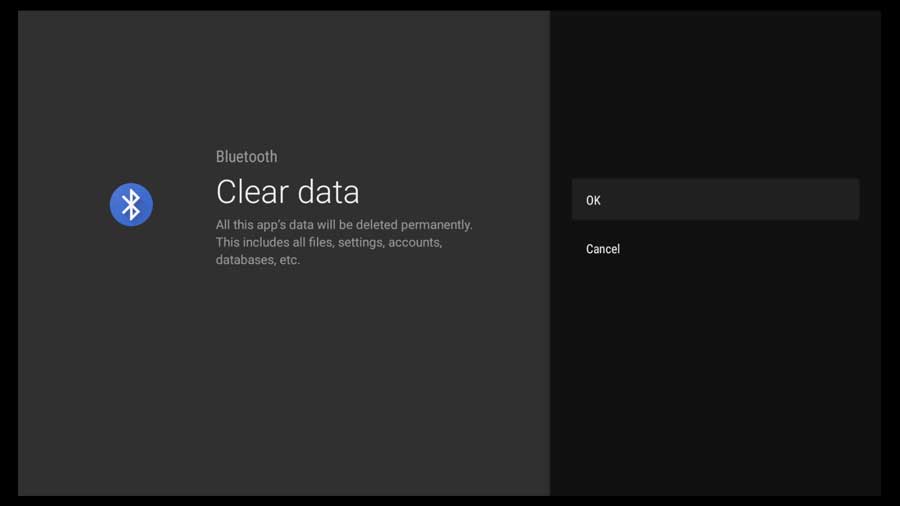
7. Clear Data.
Finally, we’re going to clear the app data itself. This basically resets the app back to the default settings found in the firmware.
Click on Clear Data.
As with the previous steps, you’re asked to confirm your decision.
Click OK to continue.
8. Restart your NVIDIA Shield TV
Finally, restart your NVIDIA Shield. If you’re using the controller that came with your device, it should automatically work once you get back to the home screen.
Replacement remote controls may need to be paired manually to your NVIDIA Shield using the steps outlined in the previous section.
Wrapping It Up
Troubleshooting your NVIDIA Shield remote or gamepad doesn’t have to be complicated. Most problems can be solved with a few simple steps outlined above.
In most cases, removing and re-pairing your NVIDIA Shield remote is enough to get it to work again. If that doesn’t do the trick, try restarting the Shield’s Bluetooth app and rebooting. If all else fails, you may need to reset your NVIDIA Shield back to factory settings.
For more great articles like this, head to my NVIDIA Shield TV resource page. My tips, tricks, reviews, and tutorials will help you get the most out of your NVIDIA Shield.

After a brief hiatus from the industry he's back at the helm of AndroidTVNews.com to bring Android TV and TV boxes to the forefront of the streaming world.
When he's not writing, he spends as much time as he can with his beautiful wife and his bulldog.
- How to set up and use Stremio with Real-Debrid on Android TV [2024] - August 18, 2024
- How to Install Kodi Diggz Xenon Plus & Free99 Build [March 2024] - March 3, 2024
- How to Enable Unknown Sources on Chromecast with Google TV [2025] - October 30, 2023