Last Updated on May 8, 2023 by Tim Wells
I’m not usually a fan of Kodi builds, but then I heard about the Titanium build for Kodi, and I knew I had to check it out.
Usually, I think it’s better to pick one or two really good addons, instead of one big build that has stuff that you don’t want.
However, there’s no denying that having a build makes it super-easy to install. Plus, you might find some great addons that you would have missed otherwise.
In this article, I’m going to give you a brief overview of the Titanium build, what it includes, and how to install it on your own Kodi device.
Let’s get started.
Overview
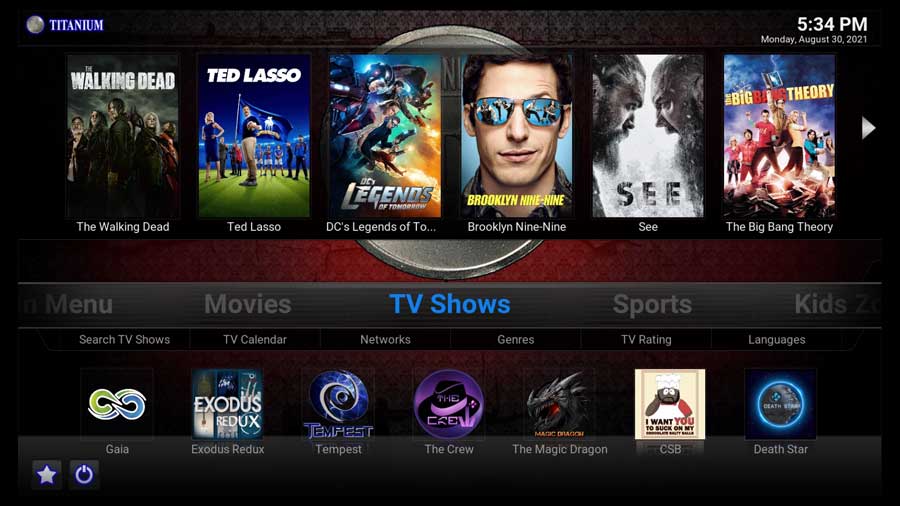
The Titanium Build has some of the most popular addons, like Exodus Redux, The Crew and Magic Dragon. You can check out my overview and installation walkthroughs for The Crew addon the Exodus Redux addon here.
Titanium also includes the Xonfluence custom skin as part of the build. It’s based on the popular Confluence skin, which used to be the default skin for Kodi and XBMC.
Another benefit is Titanium’s small footprint, something you’ll appreciate if you’re installing it on a FireStick or other device with limited storage. The total file size is only around 250MB.
What Your ISP isn’t telling you…
Your ISP knows more about you than you think!
Your IP address is your online fingerprint. It logs everything you do online and is visible to your Internet Service Provider, the apps & addons you use, and even the government.
Kodi Builds & Addons offer unlimited free streaming content, but there are risks.
Stream safely with Surfshark.
The Best VPN hides your identity and bypasses geo-blocked content and government surveillance while letting you stream your favorite movies buffer-free.
I’ve tested all the major VPNs on Android TV boxes and recommend Surfshark. It’s the fastest VPN for streaming and gives you access to the most geo-blocked content!
SAVE 81% ON Surfshark!!!
Try it risk-free for 30-days on unlimited devices at the same time.
How to Install Kodi Titanium Build
When installing the Kodi Titanium Build, you need to follow the steps below.
In this tutorial, we’re going to start with a clean installation of Kodi 18.9 Leia and install the Titanium Build.
Because this is a clean installation, there are no other addons installed, and no media library in place.
So even if this is the only thing you want to use Kodi for, just follow these instructions and you’ll be up and running with the Titanium build in no time.
Step 1: Enable Addons from Unknown Sources
The only repository that Team Kodi includes by default is their official repository. Although it includes hundreds of different addons to change the look & feel, add new video sources, backgrounds, or utilities, it doesn’t include many of the most popular addons.
In order to install addons from other repositories, need to enable addons from unknown sources.
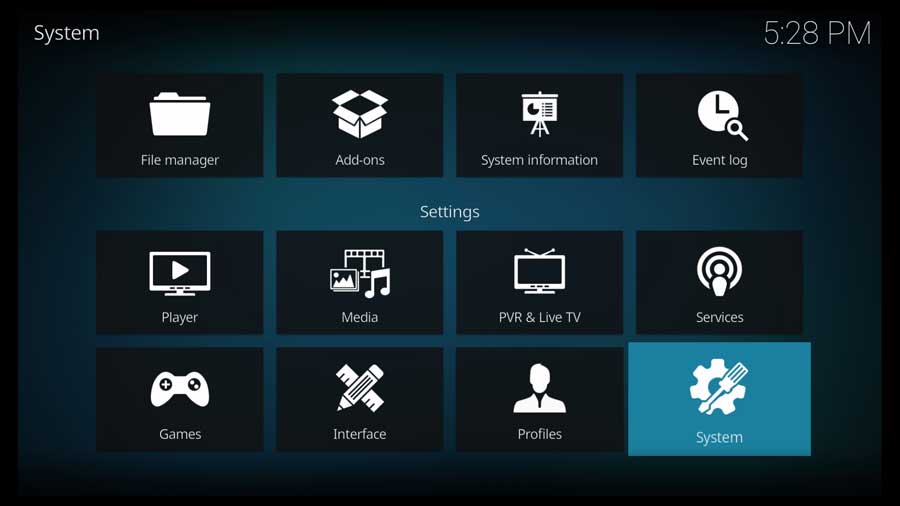
First, go to the System\Settings menu. To get there, click on the gear icon at the top of the left-hand side menu.
Then click on the System icon in the lower right-hand corner of the screen.
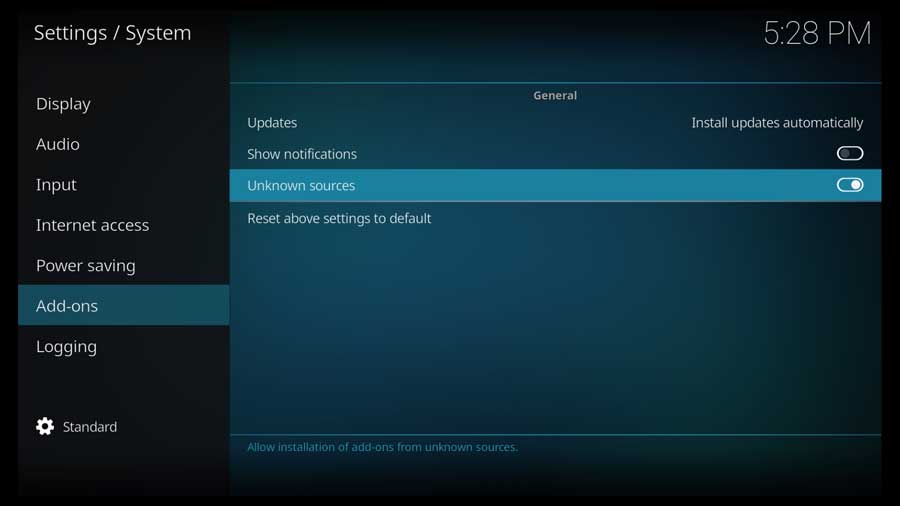
Scroll down to the Add-ons section and select Unknown Sources from the main part of the screen.

As soon as you enable this setting, a message box appears warning you that add-ons get the same permissions as Kodi itself has.
So because Kodi has read\write access to your device, any addons will have that ability too. Any personal information stored on your device is potentially at-risk. So be sure you trust the addon creator!
Click Yes to continue.

Once you do, the toggle turns white and the setting is enabled. We can move on to the next step.
Step 2: Add The Supreme Builds File Source
The first step to actually installing the Titanium build is to tell Kodi where to find the repository.
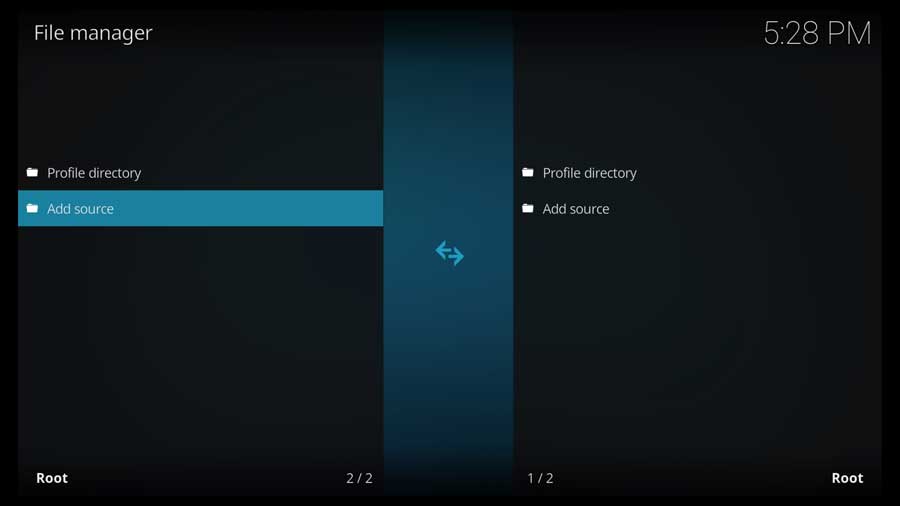
First, go to the Settings/System menu and click on the File Manager icon.

File Manager is where we usually go to tell Kodi where to find our media libraries. In this case, we’re going to give it the URL for the Supreme Builds repository.
Click on Add Source to continue.
Highlight <None> and click on it to continue.

Here you can enter a specific path to a directory on your local network, or a URL on the Internet. In this case, we’re going to be using the developer’s official repository.
Type in the following URL and click OK:
httpssss://repo.supremebuilds.com
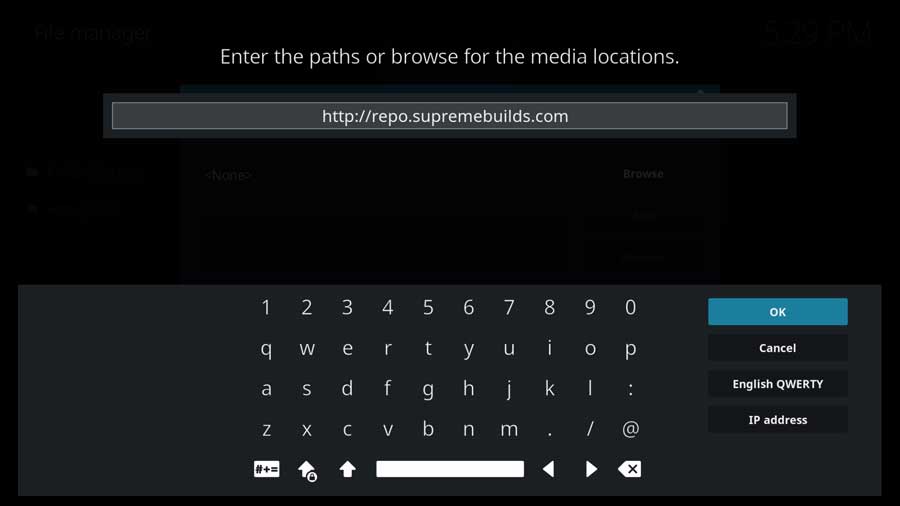
Next, create a name for this media source. You can type in anything you want, but I recommend something that will help you remember what it’s for.
In my case, I named mine SupremeBuilds.
Click OK to continue.

If everything looks good, click OK to continue.
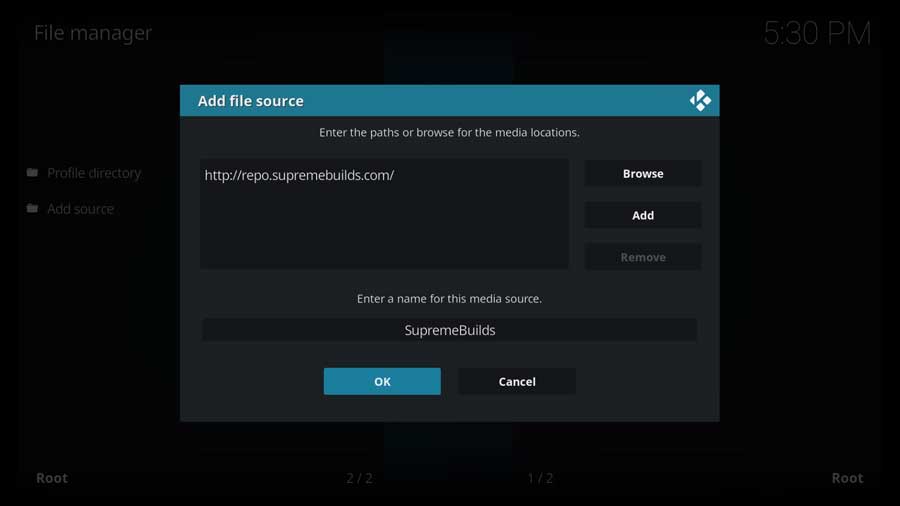
Kodi will do a quick check to make sure it can access the location. If that’s successful, the new file location appears in a list with any other custom file locations you’ve created on this device.

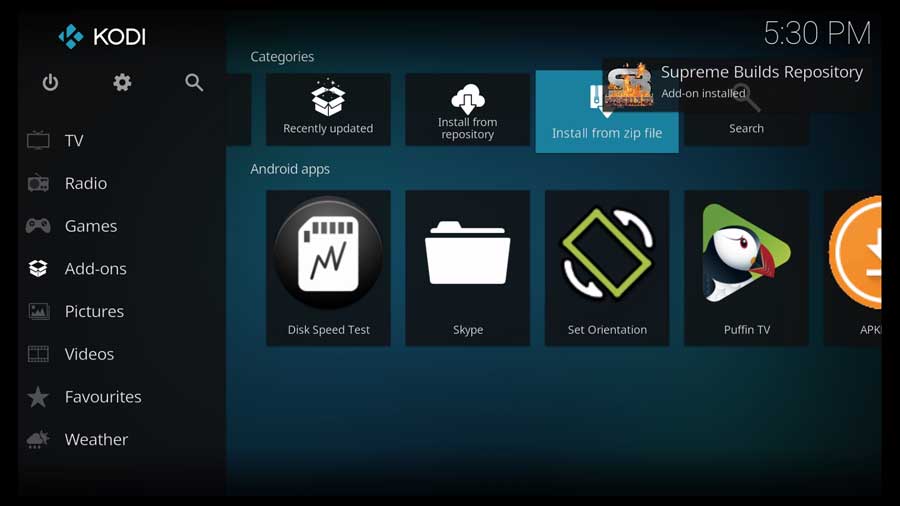
Step 3: Install Supreme Builds Repository from Zip File
Now that Kodi knows where to find the repository, let’s go ahead and install it.
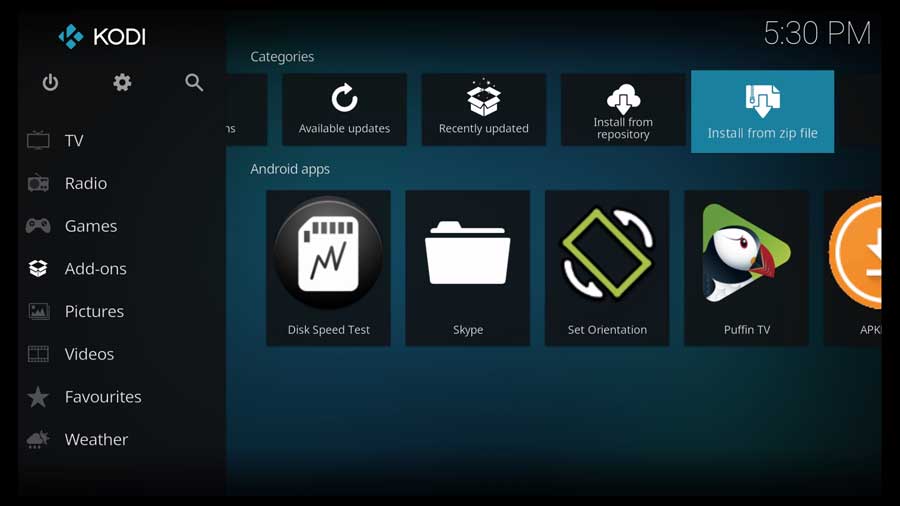
On the left-hand side menu, scroll down to the Add-ons section. Then, click Install From Zip File.
A menu box pops up with all of the file sources available on your device, including the custom file location we created in the previous section.
Scroll down until you see the name you entered previously, then click on it to continue.
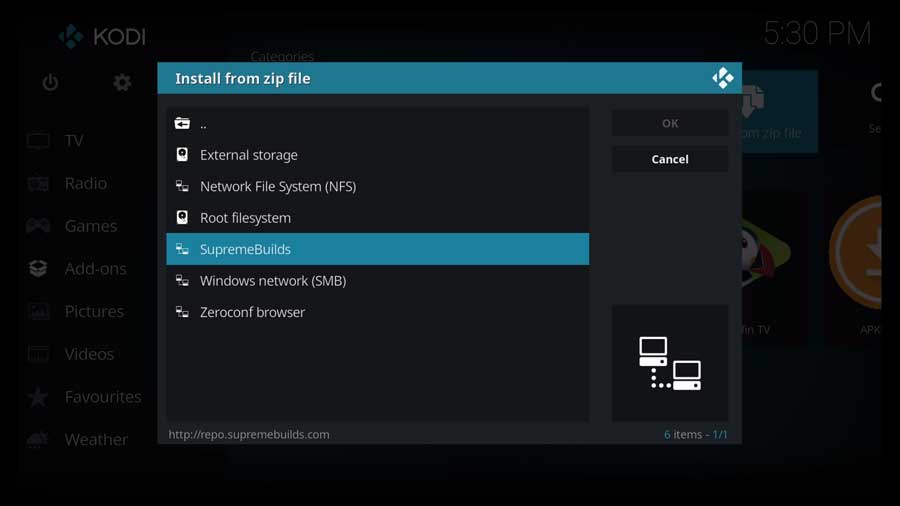
Next, click on repository.supremebuilds-1.0.2.zip.

Kodi will automatically take you back to the main menu. After a few seconds, a message will pop up that the Supreme Builds Repository has been installed successfully.
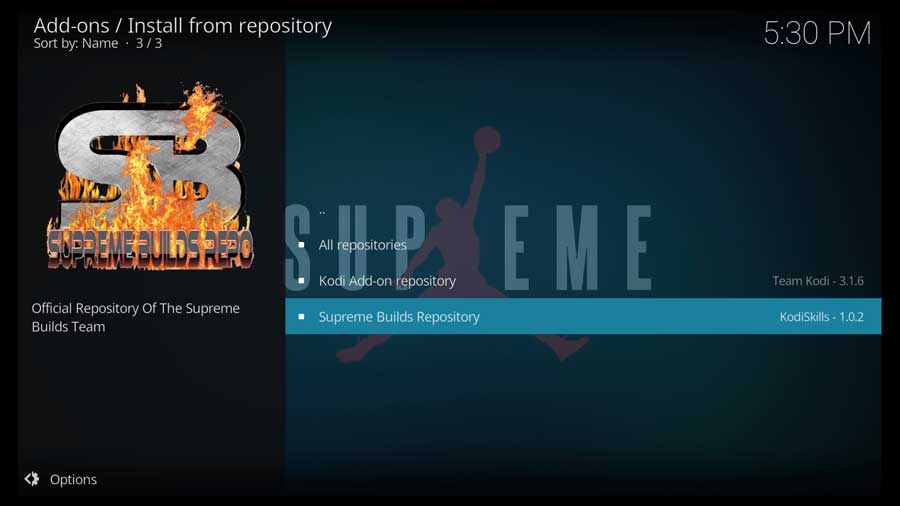
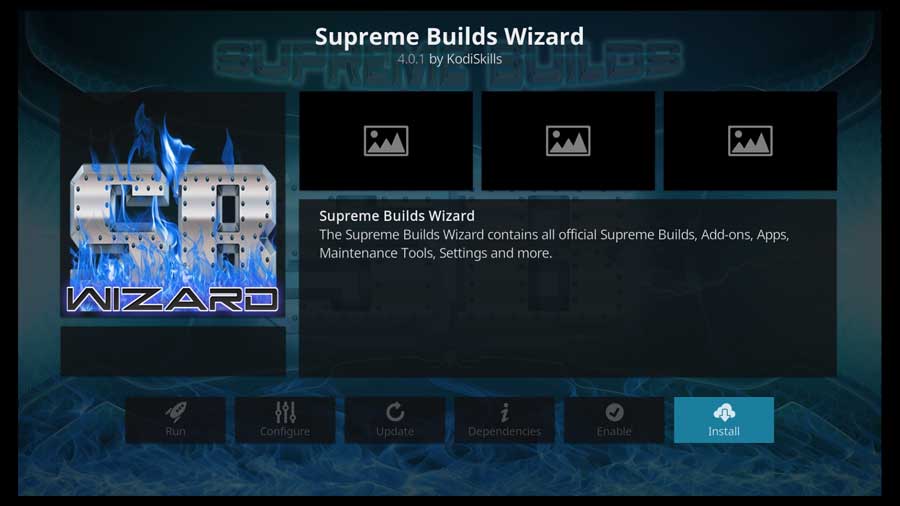
Step 4: Install Supreme Builds Wizard Addon from the Repository
The next step is to install the SupremeBuilds Wizard from their repository.
Click on Install From Repository to continue.

As I mentioned earlier, I’m doing this on a clean installation of Kodi 18.9. The only repositories I have access to are the official Kodi repository, and the one we just installed.
Click on the Supreme Builds Repository to continue.
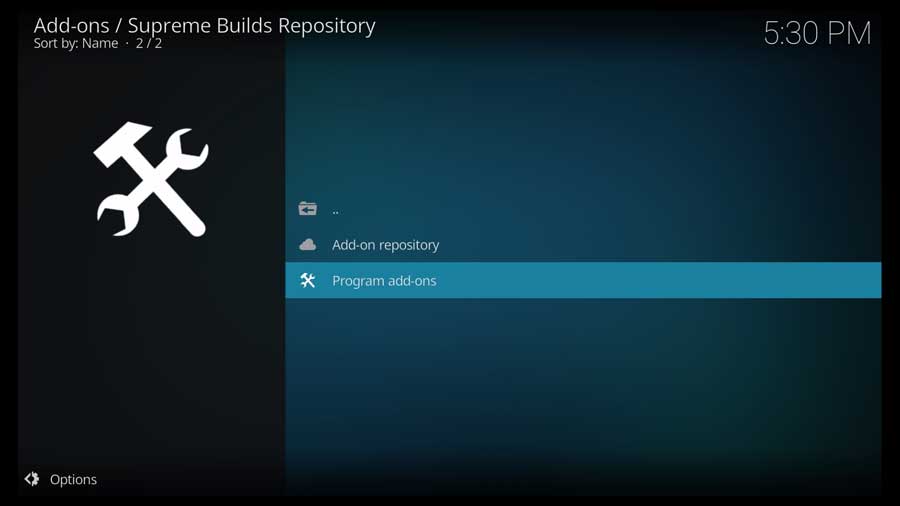
Then, click on Program add-ons to continue.
Then, click on the Supreme Builds Wizard to go to it’s app detail page.
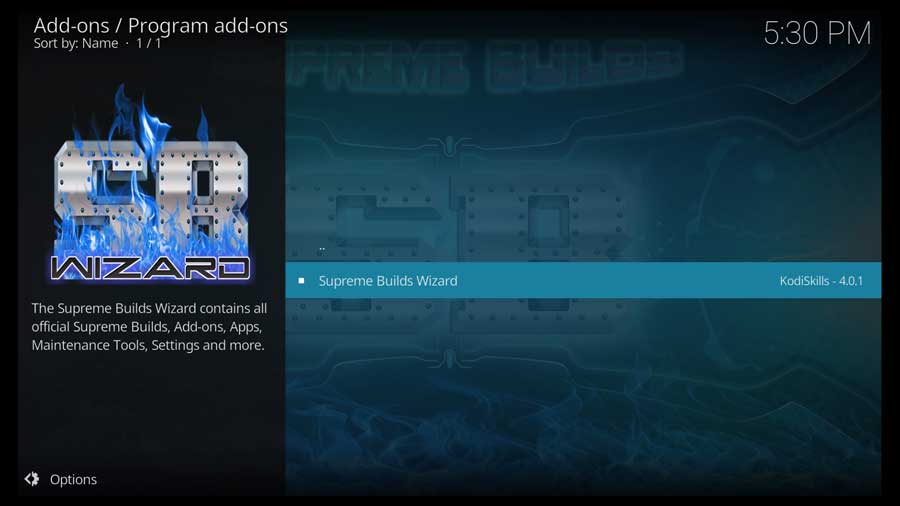
Usually an add-on’s detail page will give you a lot more information than what you see here. But because this is a wizard, there are no dependencies that you’ll have to install, and nothing to configure.
Once you install the wizard, it immediately starts the configuration process. We’ll go through that in more detail in the next section.
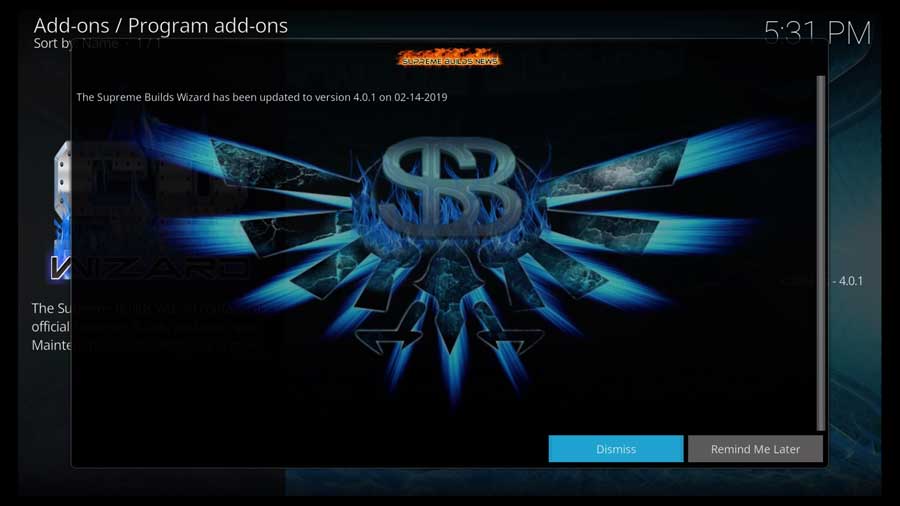
Step 5: Run the Supreme Builds Wizard
If you’ve never installed a Kodi build before, here’s where things might get a little different. Like most builds, Titanium has an installation wizard that will walk you through the process that launches as soon as you install it.
The entire process is pretty straightforward, but there are some menu options that might trip you up. Don’t worry though. We’ll walk you through the entire thing.
The first thing you see is a splash-screen telling you the last time that the wizard has been updated. Note: this isn’t the last time the Titanium build itself was updated, just the installation wizard.
Click Dismiss to continue.
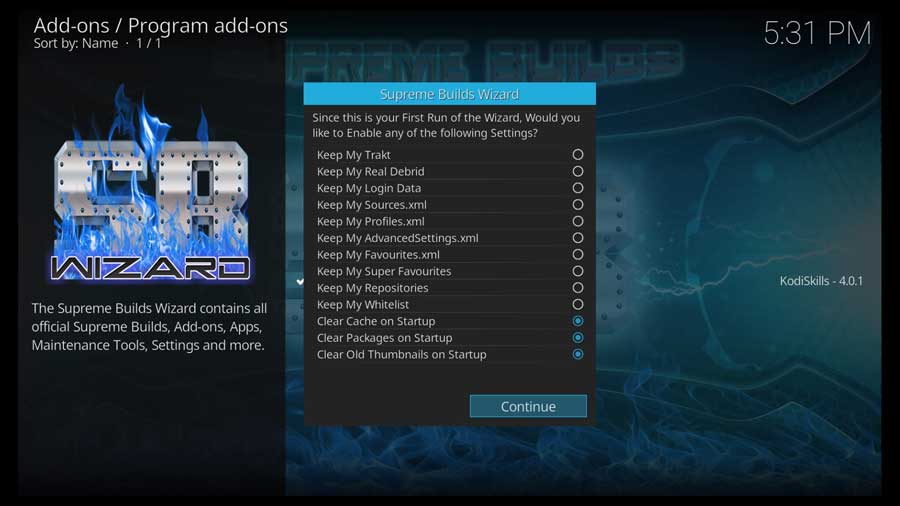
Here you can change or enable some of the installation options.
At the very minimum, I recommend enabling the following:
- Clear Cache on Startup
- Clear Packages on Startup
- Keep My Real Debrid (if applicable)
- Clear Old Thumbnails on Startup
On this device, I don’t have Real Debrid, and I haven’t made any changes to my AdvancedSettings.xml file. If either of those apply to you, go ahead and enable them as well.
Click Continue when everything looks the way you like it.
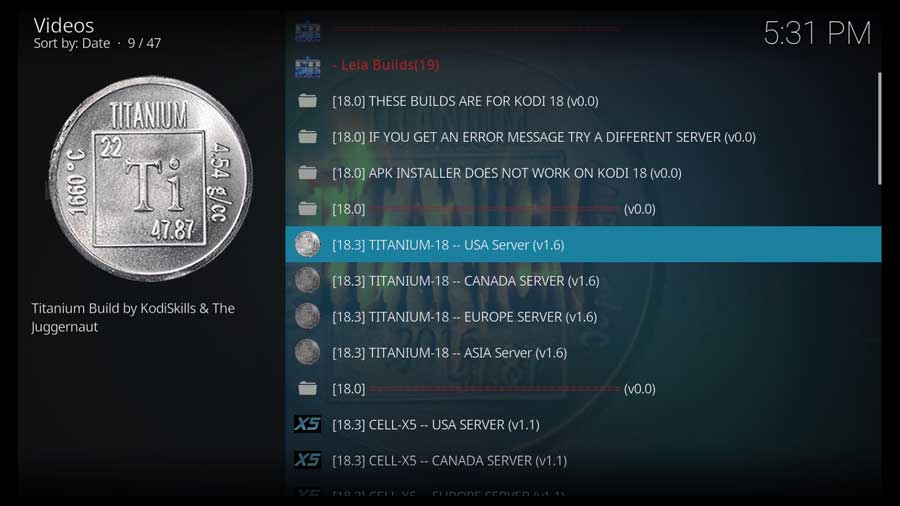
If this is your first time installing a build from Supreme Builds, you’ll get a message asking you to go to the Build Menu. There you can choose what build you want to install.
Click Build Menu to continue.

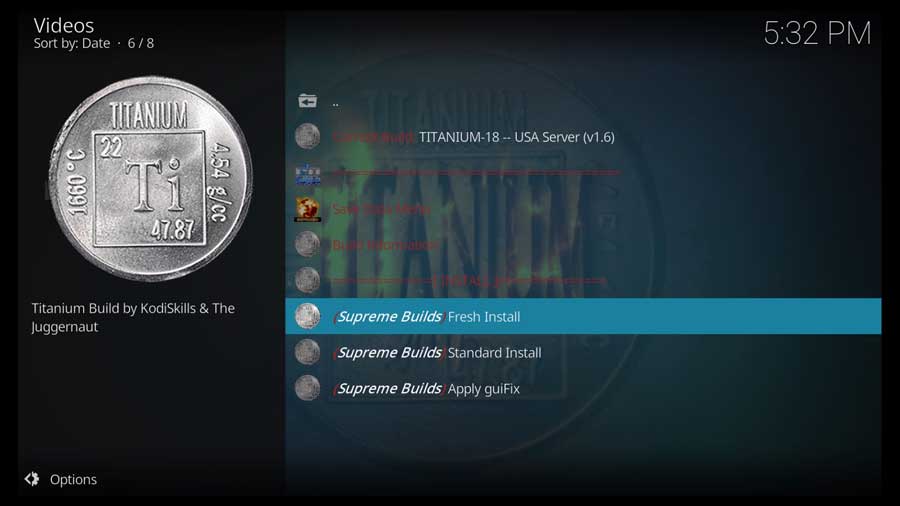
OK…the first thing you’ll probably notice is that there are a lot of builds here!
Builds are sorted by the version of Kodi that they were designed for. In my case, I’m installing the Titanium build on Kodi 18.9. So I scroll down to the 18.0 section and select the USA server.
For this step, scroll down until you see the version of Kodi you’re using.
Then, choose the build from the server closest to where you live. For example, if you live in Europe, choose the European server.
Next, you have the option to do a Fresh Install, a Standard Install or just apply a fix for the user interface.
In most cases, you’re going to want to choose to perform a Fresh Installation.
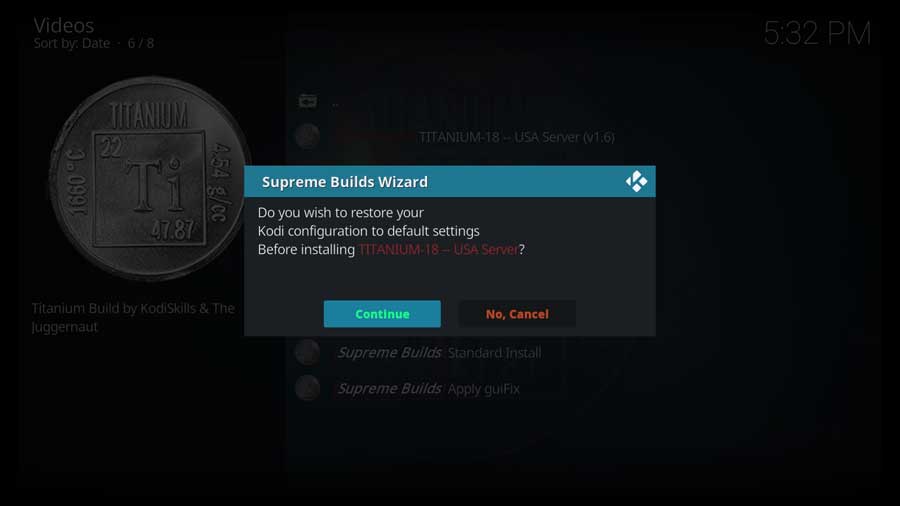
Finally, you’re given the option if you want to restore Kodi to it’s default settings before installing the Titanium build.
Click Continue to…continue.
The installation process takes a few minutes, since there’s a lot to it. The size of the Titanium build is around 250 MB, so the time will depend on your internet connection and the speed of your device.
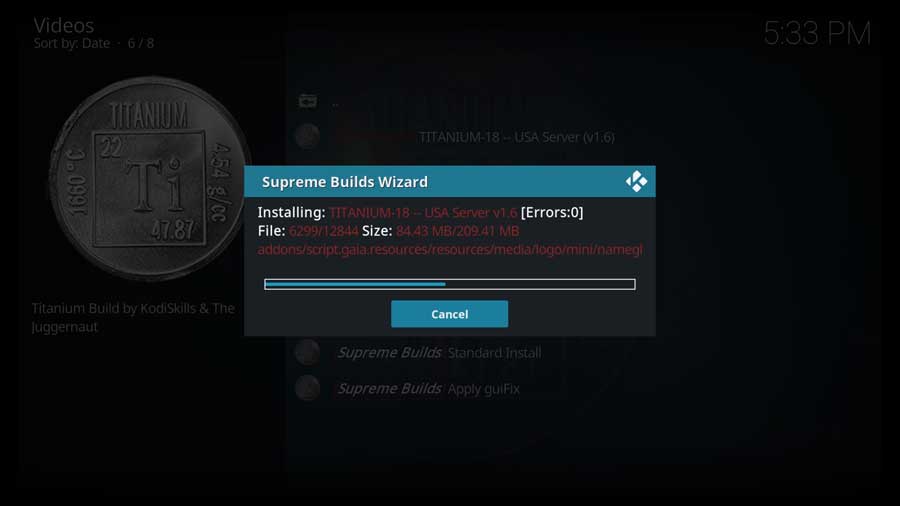
As soon as the installation completes, Kodi will close and you’ll be taken back to your device’s home screen.
Once you reopen Kodi, you’re greeted with the brand new Titanium build skin.
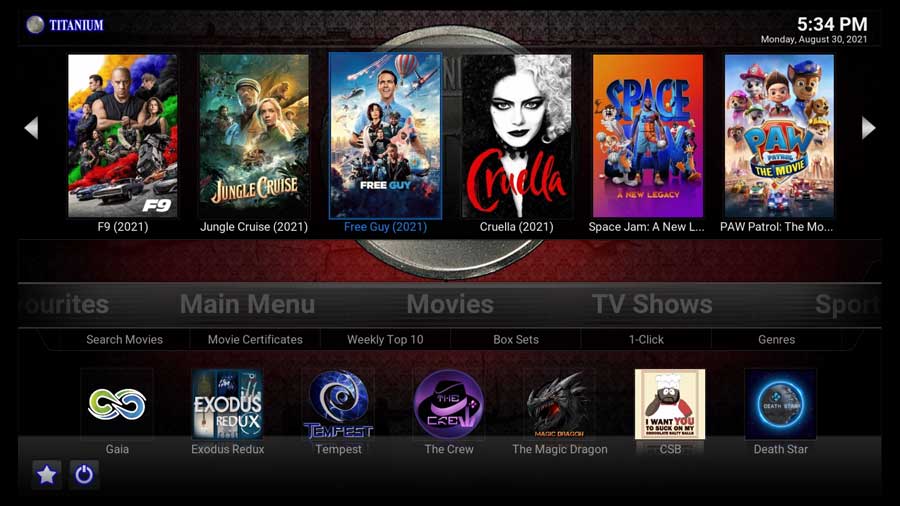
At this point, you’re done and it’s time to watch some content. Go pick a movie on the Kodi Titanium Build or find a TV add-on to begin watching your favorite television show.
Frequently Asked Questions (FAQs)
Does the Titanium Build Work With Kodi 19?
Unfortunately not. While you can install Titanium on Kodi 19 (Matrix), many of the addons were programmed with Python 2, which Team Kodi has deprecated in the newest version of their media center.
Does the Kodi Titanium Build Have Exodus? What Other Types Pre-installed Add-ons Come with This Build?
This build does come pre-installed with Exodus. Some other pre-installed add-ons that are available on this build include IT, Exodus Redux, SportsDevil, DeathStar, Uranus, Seren, and Gaia. Furthermore, you’ll be able to enjoy Sports and Live TV apps on this build.
Why Does Titanium TV Not Work?
It may not be working if you do not have the latest version of this application. Update your Titanium TV app to the newest version. Also, you can clear the cache from your Titanium TV app settings.

After a brief hiatus from the industry he's back at the helm of AndroidTVNews.com to bring Android TV and TV boxes to the forefront of the streaming world.
When he's not writing, he spends as much time as he can with his beautiful wife and his bulldog.
- How to set up and use Stremio with Real-Debrid on Android TV [2024] - August 18, 2024
- How to Install Kodi Diggz Xenon Plus & Free99 Build [March 2024] - March 3, 2024
- How to Enable Unknown Sources on Chromecast with Google TV [2025] - October 30, 2023