Last Updated on August 12, 2023 by Tim Wells
Setting up a VPN may seem pretty straightforward. However, the best ones, like IPVanish, have a few options that most “how to install” articles and videos never discuss.
With that in mind, I’ve created this setup guide to help you install and connect to IPVanish VPN on Android TV. This article focuses on installation and how to use the app. I have a separate article explaining each setting and my recommendations for the best IPVanish settings here.
Definitely check it out!
You’ll need to sign up for an IPVanish account to follow along.
I’ve written this tutorial as an essential step-by-step guide.
You’ll see blue boxes like this with important information or recommendations throughout this guide.
How to Install IPVanish on Your Android TV
The first thing you need to do is to download the IPVanish app from the Google Play Store or Aptoide TV app store.
We’ll first cover the Google Play Store method and touch on the Aptoide TV app store.
Install IPVanish From the Google Play Store
To get to the Google Play Store, click on the red ‘Apps’ icon on the home screen, then click ‘Get more apps.’
Once you’ve opened the Google Play Store, click on the magnifying glass icon in the upper right-hand corner of the screen.
This will open the Search window.
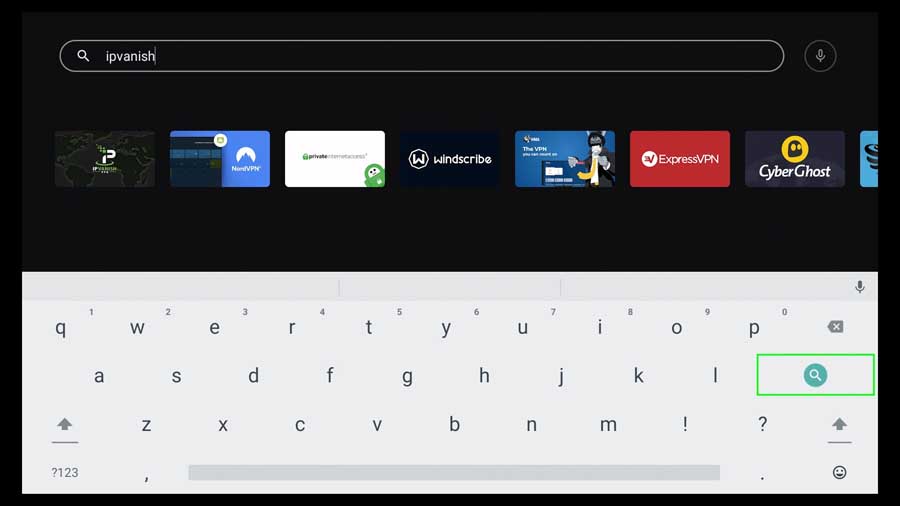
Search for IPVanish.
It should be the first result you see.
Click on the app icon to continue.
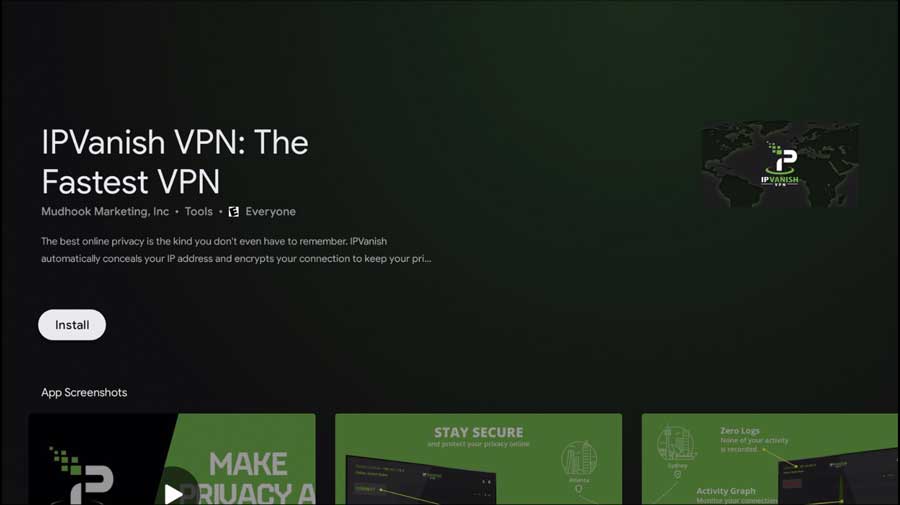
You’ll know it’s the right app when you see “IPVanish VPN: The Fastest VPN,” as shown in the image above.
Click Install to continue.
Once installation is complete, you can either Open the app from this screen or the App Drawer on your device’s home screen.
We’ll pick up the process immediately after the next section discusses installing IPVanish from the Aptoide TV app store.
Install IPVanish from Aptoide TV
If you use the Aptoide TV app store instead, click on the res ‘Apps’ icon, then find the Aptoide TV icon in your app drawer.
Once you’ve started Aptoide TV, click on the magnifying glass icon in the upper-left-hand corner of the screen to pull up the Search menu.
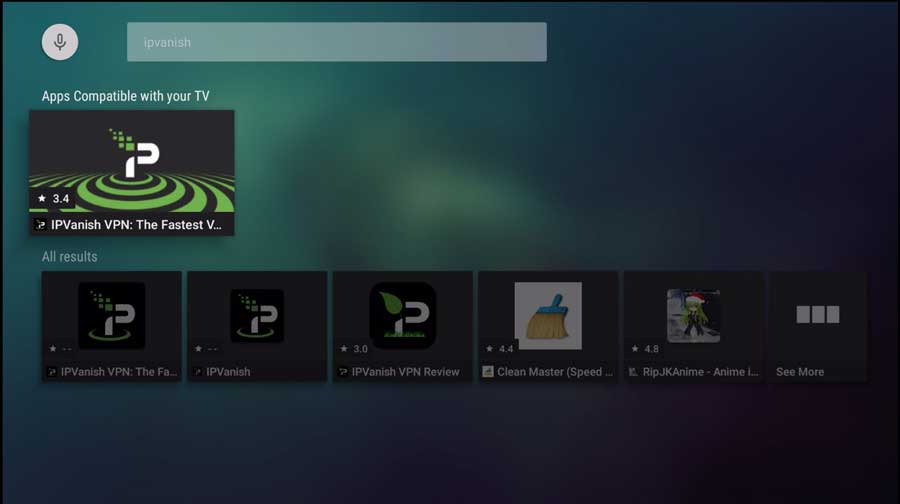
Search for IPVanish.
Similarly to Google, Aptoide TV shows the official IPVanish VPN app for Android TV as the first result.
Click on it to continue.
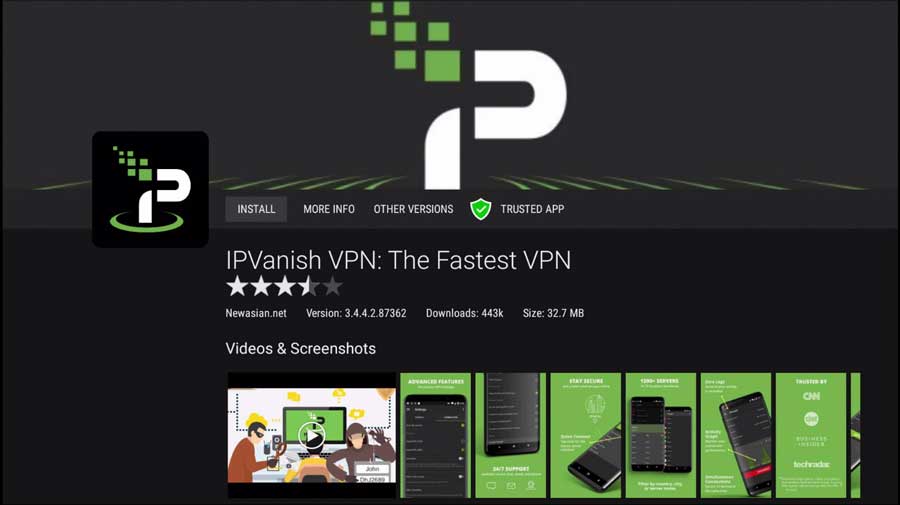
Click Install to continue.
Once installation is complete, you can either Open the app from this screen or the App Drawer on your device’s home screen.
How to Use IPVanish on Android TV
When you first start the IPVanish Android TV app, you’ll see a splash screen with the logo while the app loads.
Once it’s finished, you’ll see a screen where you can enter your username and password to Log In to your IPVanish Account.
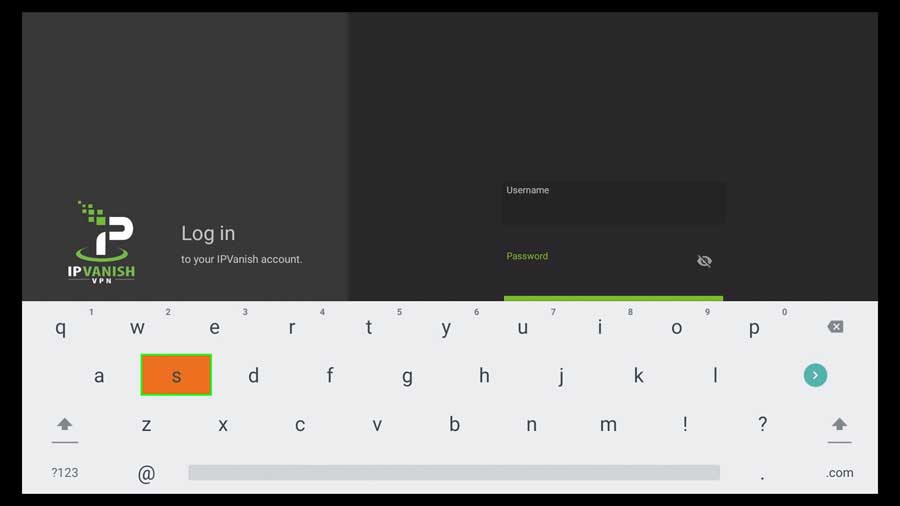
Enter your username and password to continue. If you haven’t set up your account with IPVanish yet, you’ll have to do that first.
Once you’ve successfully logged in, you’ll see another splash screen before being dropped off at the main screen.
You can see that screen in the image below.

The design of the app is intuitive to understand and use.
There are two menu options in the upper right-hand corner. They take you to your Account information and the Settings menu.
We’ll discuss the Settings menu in more detail in the next section.
The Account icon provides essential information on your account, such as your email address, account status, whether your subscription is active, and when it’s up for renewal.
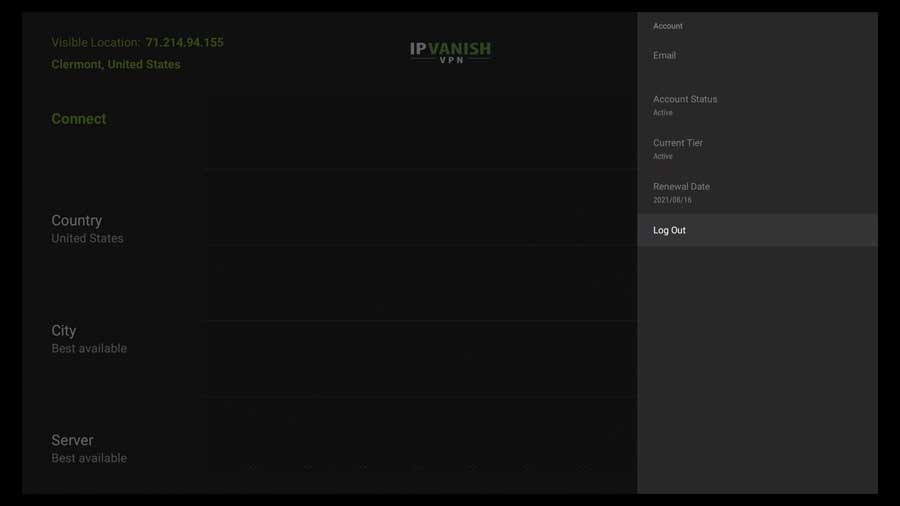
You can’t change any information on this tab, but it’s an excellent way to quickly glance at your account without going to IPVanish’s website.
The left-hand menu is broken down into four primary tabs:
- Connect
- Country
- City
- Server
The most important is the Connect tab, so let’s look at that one first.
Connect Tab
The simplest way to connect to a VPN is by clicking on the Connect tab on the home screen of the IPVanish Android TV app.
Clicking on the Connect button without changing any Country, City, or Server options will cause IPVanish to automatically connect to the best available server, no matter where it’s located worldwide.
Once you click Connect, the app’s home screen changes, and the other tabs disappear.
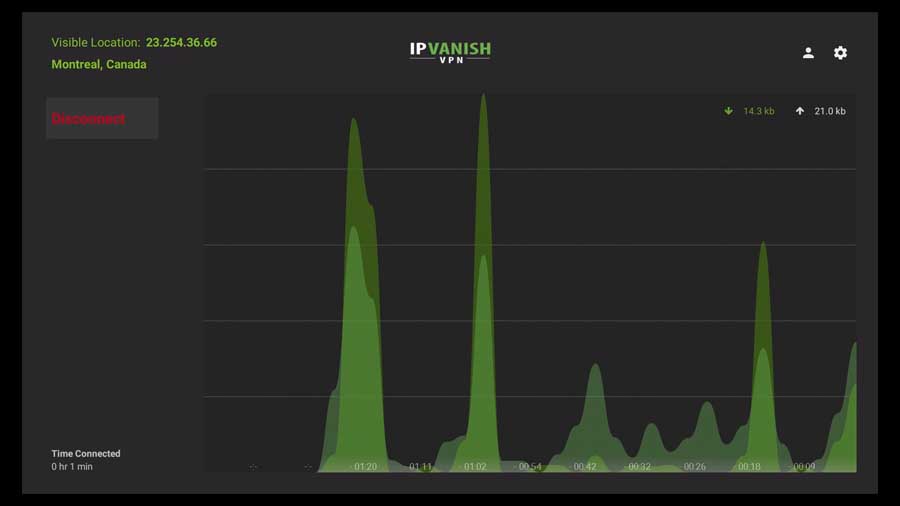
In their place is a graph that visually shows your upload and download performance in real time. The most recent data is on the right-hand side of the screen and gradually scrolls to the left as time passes.
In the image above, you can see the first few seconds of my connection to a server in Montreal. Seeing these spikes and valleys is normal, so don’t be alarmed when it looks like this.
In the upper right-hand corner of the graph, you’ll see the upload and download speeds of the data packets being transmitted right now.
As you see here, these numbers will be low when you first connect. As you start doing things on the VPN (especially streaming), these numbers go much higher.
Once connected, you can minimize the IPVanish app and return to your Android TV home screen to open another app.
When you’re finished with the VPN connection, or if you want to change to a different server, click the red Disconnect button on the left-hand side of the screen.
The following sections cover how you specify which country, city, or server you want to connect to.
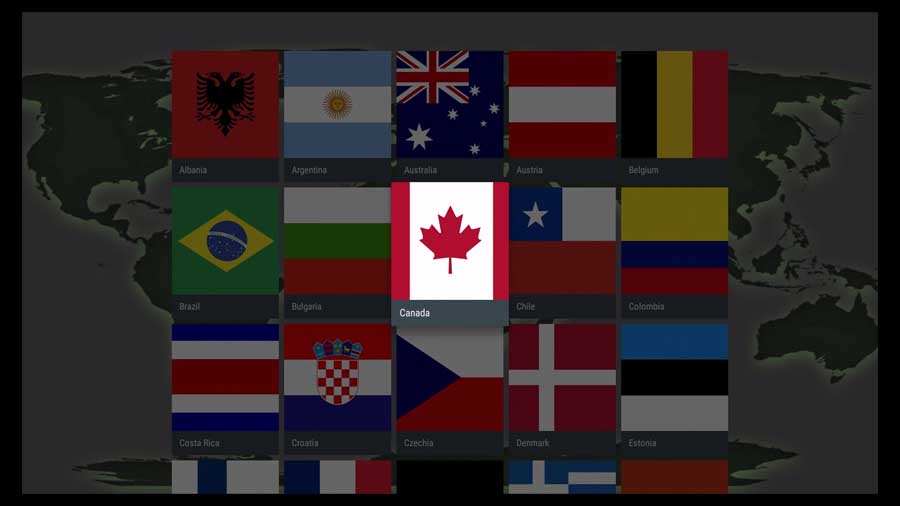
Country Tab
In this menu, you can select the country you want to connect to by selecting their flag. Don’t worry about choosing different regions at this point. We can get more specific on the Cities tab.
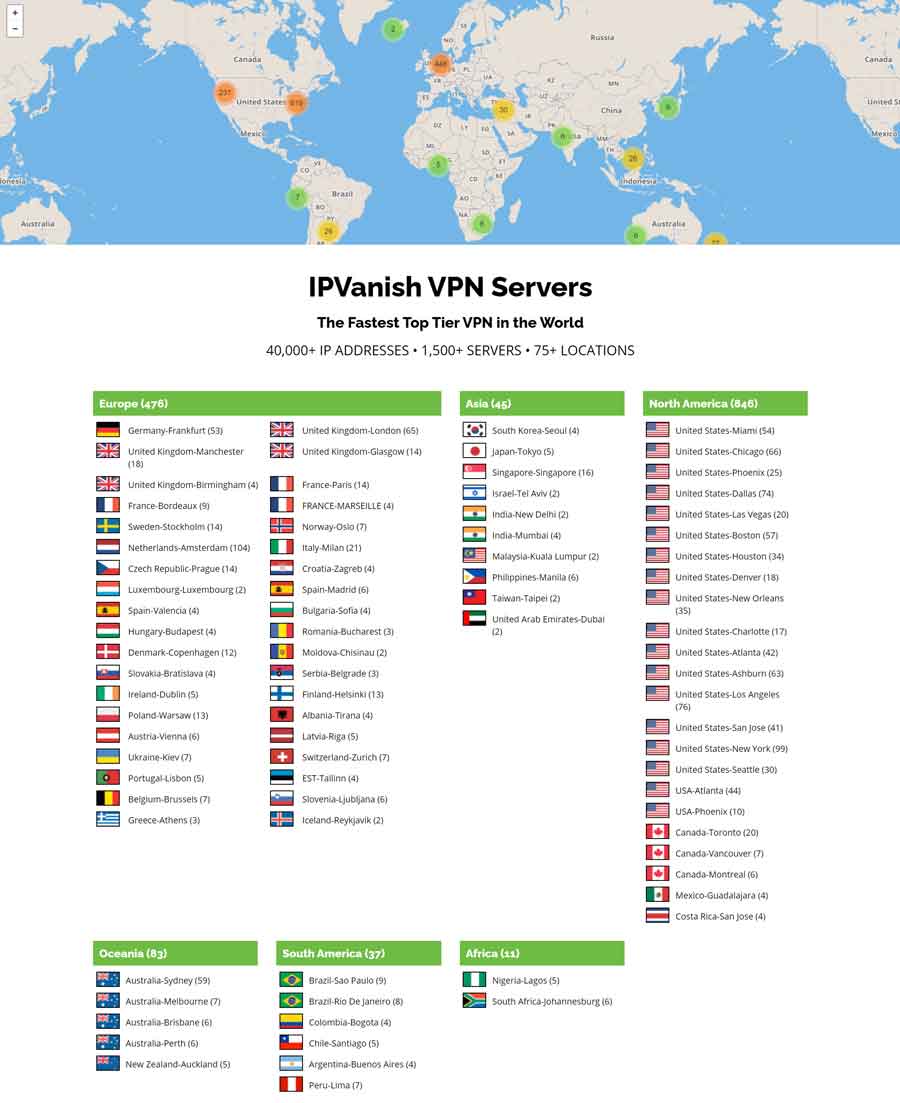
IPVanish has over 1,500 servers in seventy-five different locations around the world. At the time of this writing, there are:
- 476 servers in over 30 countries in Europe
- 45 servers in Asia
- 846 servers in North America
- 83 servers in Australia and New Zealand
- 37 servers in South America
- 11 servers in Africa
Here’s a current list of server locations (not the servers themselves) straight from IPVanish’s website.
Which Country Should You Connect To?
Choosing which country to connect to in your VPN seems straightforward. Any country you choose will keep your data private and secure, right?
Not necessarily.
There are a couple of schools of thought to choosing the correct country in your VPN app.
Geo-Restrictions
You’ve probably seen an error message telling you the content you want to watch isn’t available in your country.
In fact, the main reason I use a VPN is to get around geo-restrictions.
To bypass streaming restrictions in your country, connect your VPN to a country that can view the content you’re trying to watch.
Privacy
The most popular reason people use VPNs is to keep their activities private on the Internet. However, choosing the wrong country to connect to can be as bad as not having a VPN.
Several countries have agreements to share intelligence and data with each other. These agreements are called the Five Eyes, Nine Eyes, and Fourteen Eyes Alliances. (source)
If privacy is your main concern, you’ll want to choose a country outside the reach of those agencies. The two security professionals recommend most are Switzerland and Romania.
For private browsing, connect your VPN to a country with solid Internet freedom policies, like Switzerland, Romania, or Iceland.
P2P Torrents
If you download movies or music using torrents, choosing the right country is critical.
Here, you want to connect your VPN to a country where torrenting is legal and has a good network infrastructure.
Connect your VPN to Spain, Switzerland, or Mexico for safe, Peer-to-Peer torrenting.
Security on public networks
Finally, if you’re connecting to a network you don’t explicitly control, you can secure your data with a VPN.
This isn’t usually the case at home unless your WiFi is provided by your neighbor, apartment complex, or school dorm.
In this case, feel free to choose a server in the United States or whatever country you live in.
Alternatively, you could skip selecting a country and connect to the fastest server.
For security on public networks, connect to a server in your home country or the Fastest Server option.
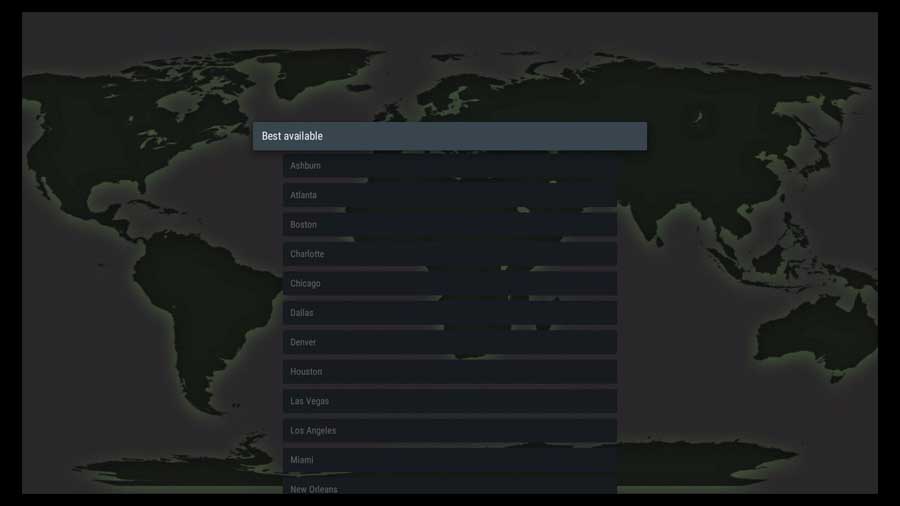
City Tab
The City Tab can help you narrow down your servers to specific cities.
Once a country is selected, the list will filter down to only cities in that country.
If no country has been chosen, IPVanish will show an alphabetical list of every city where they have VPN servers.
If you’re connecting to a server in your own country, you’ll want to connect to a server in a city close to your home. The less physical distance your data travels, the faster the connection should be.
Another reason to select a specific city is that it opens up local search options since you’ll appear to be browsing from that city.
In my experience, it’s usually not worth selecting a specific city to connect to unless you’re interested in those local results.
It’s better to choose the fastest server in the country and search for whatever you want.
Server Tab
We’ve seen how to connect to a VPN server in a specific country or city.
The Server Tab takes this one step further by letting you choose which physical server to connect to.
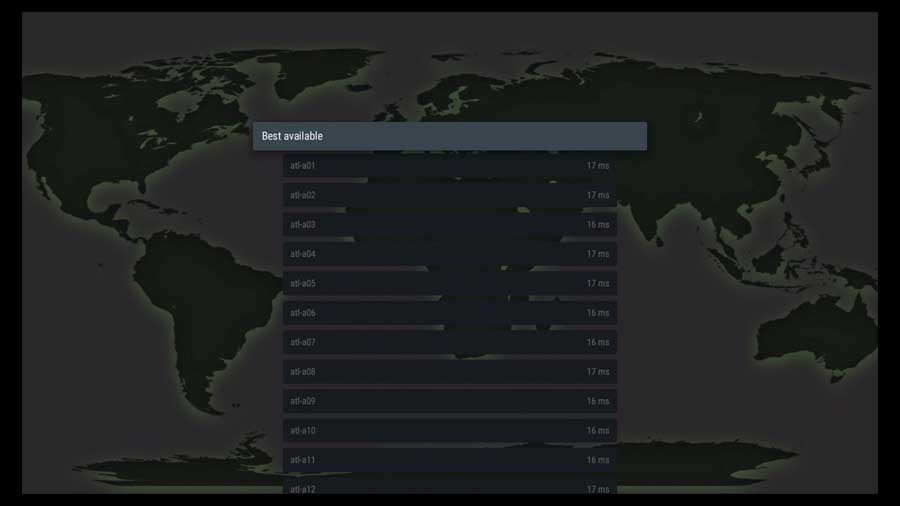
By default, the Server Tab defaults to the best available server. Usually, this is the server with the lowest ping response time and overall capacity. However, some VPNs have servers dedicated to specific tasks (streaming or torrenting, for example).
In most cases, it’s best to leave this as ‘Best Available.’ However, if you want to have a little more control, there are two ways to see which VPN servers will be the fastest.
In the Server tab, you’ll see numbers along the right-hand side for each server name. These are the ping response times.
Without getting too technical, this is the time (in milliseconds) it takes to send a small packet of information to the server and back again.
Lower numbers are better.
Another way to tell which server to connect is on the IPVanish web page.
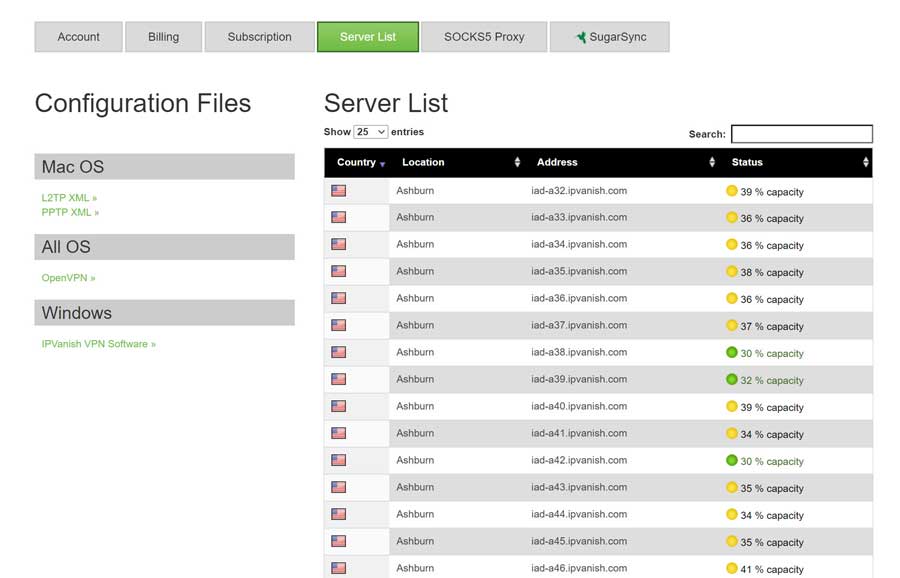
When you log in to your IPVanish account, one of the buttons along the top row will read Server List. Clicking on it will show a list of the servers, as seen in the image above.
Instead of showing server ping response times, you’ll see the overall load of the server. In this case, most servers are between 30%-40% capacity. However, you can see there are three servers (colored green) that have the lowest utilization.
In theory, fewer users on the servers mean they should be faster than servers with a lot of users.
The great thing about the IPVanish Android TV app is that it looks at the server ping times and utilization when figuring out the best available server.
Unless you’re having trouble connecting to a specific server, I recommend leaving this tab alone.
The Verdict
I’ve been using IPVanish as my personal VPN for several years. Since then, I’ve been pleased with the performance and the results.
With the default settings, IPVanish is extremely simple to use. What I like about it is that it also gives you some great configuration options if you want more control.
Overall, IPVanish is a great choice and the best VPN for the NVIDIA Shield and Android TV.
For more great articles like this, visit my NVIDIA Shield TV resource page. You’ll find all of my tips, tricks, reviews, and tutorials to help you get the most out of your NVIDIA Shield.

After a brief hiatus from the industry he's back at the helm of AndroidTVNews.com to bring Android TV and TV boxes to the forefront of the streaming world.
When he's not writing, he spends as much time as he can with his beautiful wife and his bulldog.
- How to set up and use Stremio with Real-Debrid on Android TV [2024] - August 18, 2024
- How to Install Kodi Diggz Xenon Plus & Free99 Build [March 2024] - March 3, 2024
- How to Enable Unknown Sources on Chromecast with Google TV [2025] - October 30, 2023