Last Updated on September 6, 2023 by Tim Wells
If you ever wished for an addon that gives you an easy way to watch Netflix content right from within Kodi, the Kodi Netflix addon is here.
And in this tutorial, I will show you how to install the Kodi Netflix addon on your Android device. All screenshots were taken on my NVIDIA Shield TV, running the Android TV OS.
First, let’s get some important stuff out of the way. This is not an official Kodi addon, developed by Netflix. It’s also not included in the official Kodi repository, so you must enable unofficial addons to install it.
Most importantly, this Kodi addon will not give you free access to Netflix. You’ll still need an active Netflix subscription to stream content. Moreover, if your Android device isn’t certified by Netflix, you’ll still be limited to SD content.
With all those limitations, why would you want to watch Netflix through Kodi and not just through their app?
Simple.
If you’re like me, you probably hate switching between your different streaming apps.
With the right addons installed, Kodi can let you go from watching Jupiter Rising on Netflix directly to watching The Boys on Amazon Prime Video. If you have Kodi managing your media library, you truly have all your content in one place.
Check out our list here for a complete list of working Kodi repositories!
What Your ISP isn’t telling you…
Your ISP knows more about you than you think!
Your IP address is your online fingerprint. It logs everything you do online and is visible to your Internet Service Provider, the apps & addons you use, and even the government.
Kodi Builds & Addons offer unlimited free streaming content, but there are risks.
Stream safely with Surfshark.
The Best VPN hides your identity and bypasses geo-blocked content and government surveillance while letting you stream your favorite movies buffer-free.
I’ve tested all the major VPNs on Android TV boxes and recommend Surfshark. It’s the fastest VPN for streaming and gives you access to the most geo-blocked content!
SAVE 81% ON Surfshark!!!
Try it risk-free for 30-days on unlimited devices at the same time.
How to Install the Kodi Netflix Addon
Installation of the Kodi Netflix addon is pretty straightforward, especially if you’ve already installed an addon from a zip file before. However, there are some additional steps that you need to do first if you’ve only ever installed addons from the official Kodi repository.
We’re going to go through everything step-by-step, with a lot of screenshots, so you don’t get tripped up along the way.
Before we start, figure out what version of Kodi you’re running. CastagnaIT (link to his GitHub page), who developed the Netflix addon, has a different version for Kodi 18 Leia and Kodi 19 Matrix. You’ll need to download the correct version, or it won’t work correctly.
First, go to the System menu by clicking on the gear icon in the upper-left-hand corner of the screen.
Then click on the System Information icon on the top row.
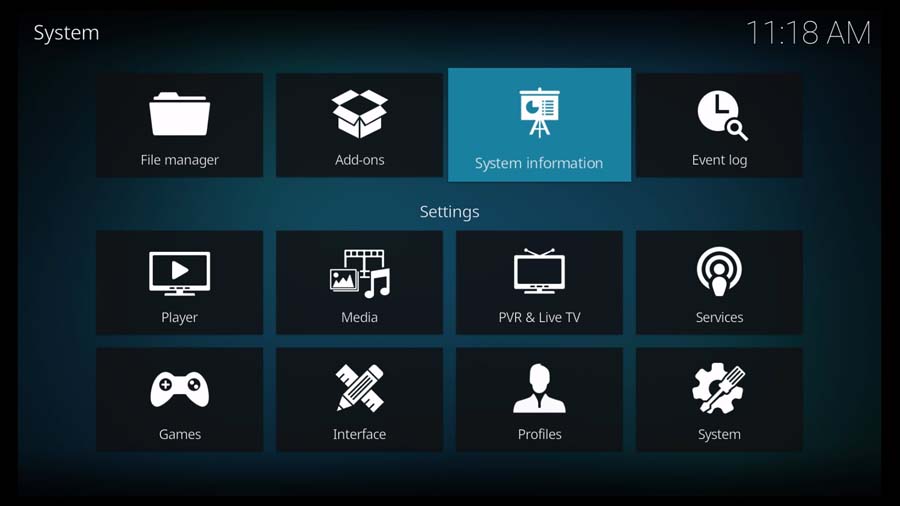
The System Information screen has valuable information on the device you’re running Kodi on, like the screen resolution, available memory, storage, and even your IP address.
In this case, we will look at the bottom of the Summary Tab.
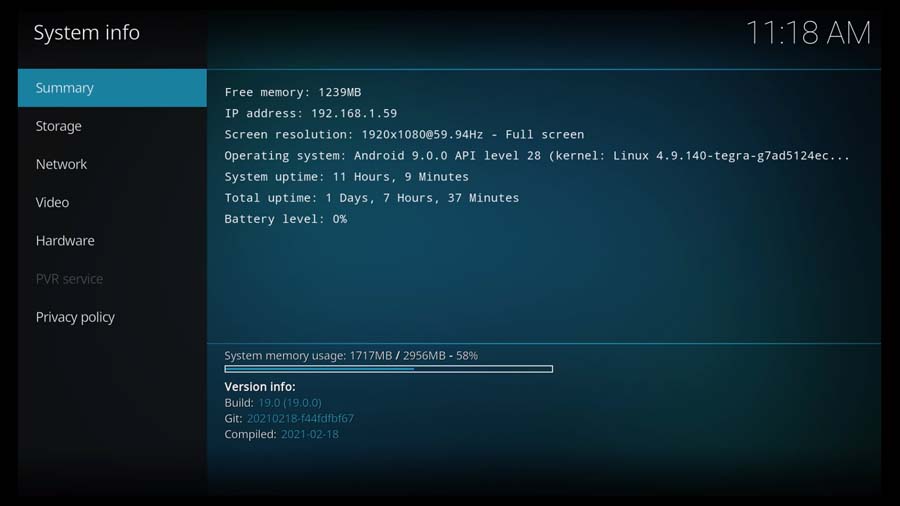
Under the Version Info heading, you’ll see the Kodi version (build) that you’re running.
In my case, I’m running version 19.0.0.
Now that I have my Kodi version, I know which version of CastagnaIT’s Netflix addon to download and install.
Allow Unofficial Addons
The first step is to allow Kodi to install addons from Unknown Sources. Kodi has an official repository of addons developed and maintained by Team Kodi. This is similar to what Google does with apps on the Google Play Store.
If you’ve already enabled addons from unknown sources, skip to the next section.
To start, go back to the System menu, and scroll down to the System icon in the bottom right-hand corner of the screen.
This takes you to the Settings\System menu.
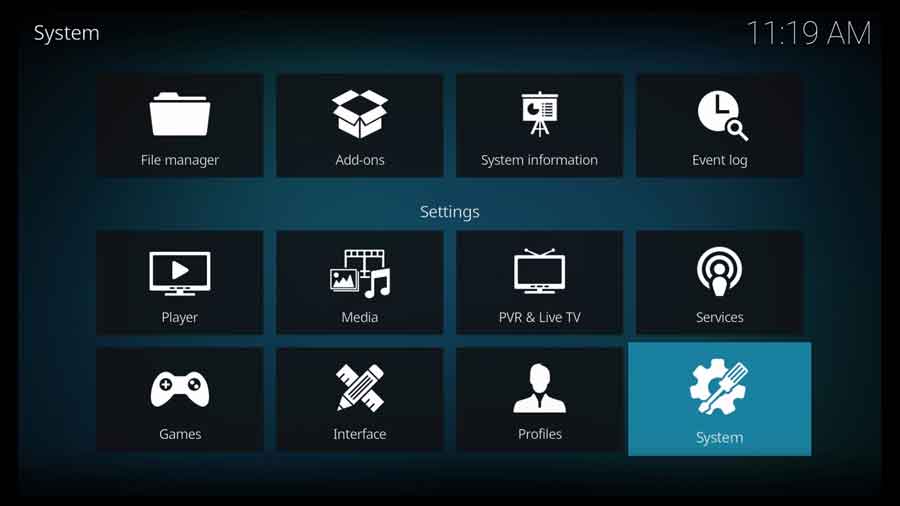
From here, scroll down on the left-hand side until you get to the Add-ons menu, and click on it.
Note: There are four settings levels in Kodi, ranging from Basic, Standard, Advanced all the way up to Expert. In the screenshot below, you’ll see that I have the Expert settings enabled on my device. However, even the Basic settings level will allow you to enable addons from unknown sources.
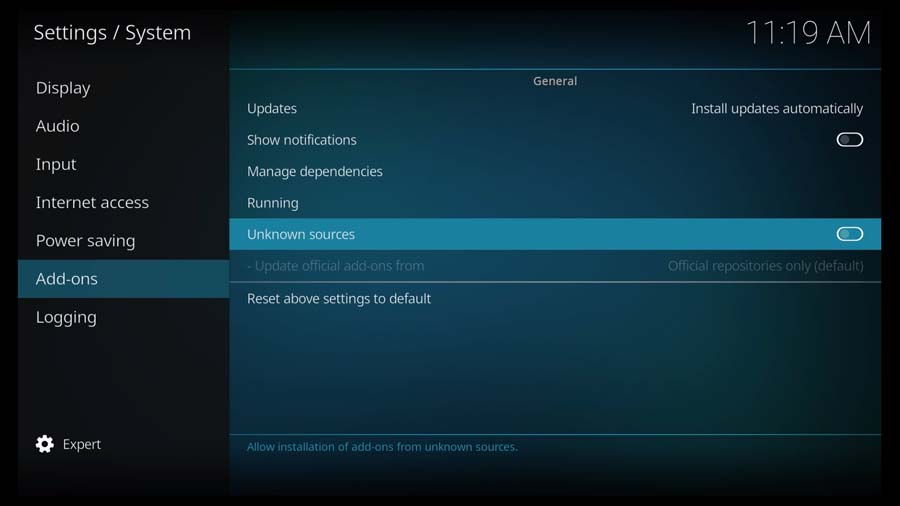
Scroll down to the Unknown Sources setting and flip the toggle from blue (off) to white (on).
Once you do, a warning box appears. Since the Team Kodi developers don’t have direct control over addons that aren’t in their official repository, they want to ensure you’re aware of the risks.
I recommend only installing addons from trusted sources with a good reputation in the Kodi community – like CastagnaIT’s Netflix addon.
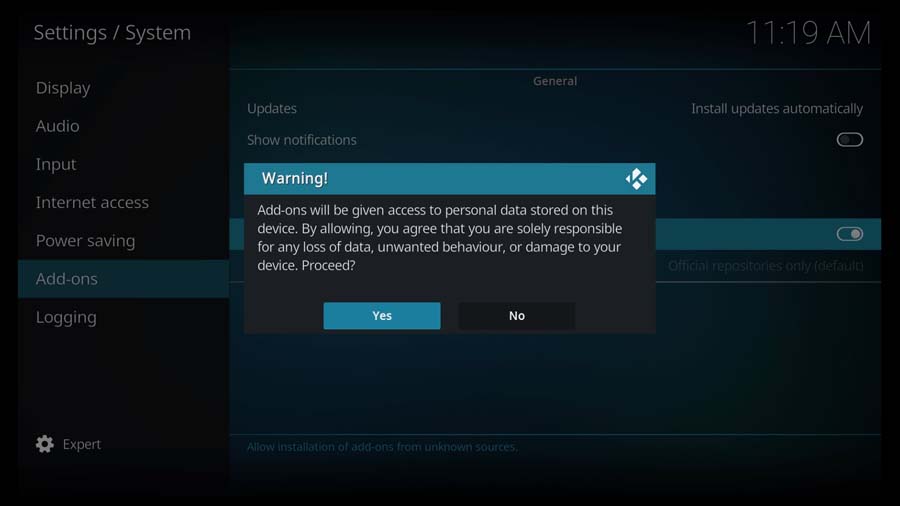
Click yes to proceed. Now, we’re ready to download and install the Netflix addon.
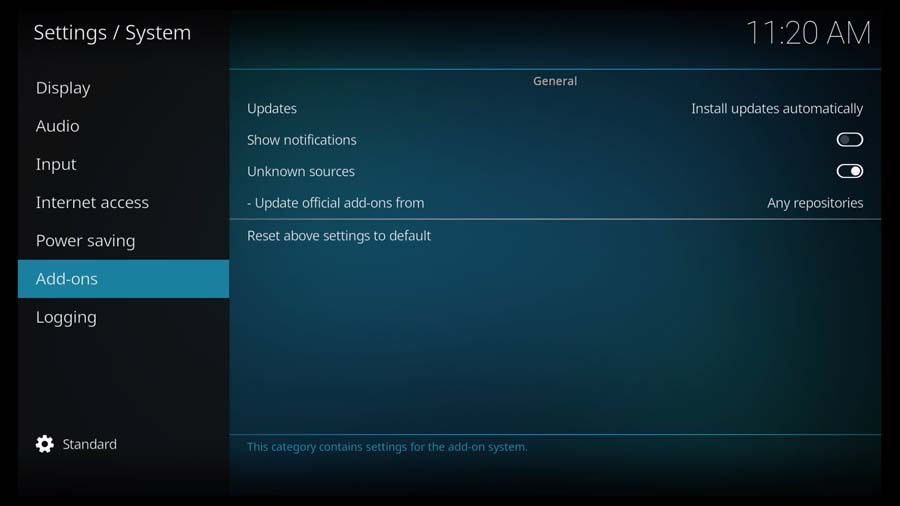
Download CastagnaIT Repository
I recommend going directly to the source when possible. In this section, we will go directly to CastagnaIT’s GitHub page for the Netflix Kodi addon.
I’ll show you two ways to get the files: either a direct download through the links below or through your web browser so you can install it later.
Both take you to the same GitHub page, but using the links below lets you skip a few steps.
Option 1: Direct Download (The Quick Way)
Here are the direct download links for CastagnaIT’s Kodi repository.
Team Kodi updated the underlying code in Kodi 19 to Python 3, so the Kodi 18 version of the Netflix addon won’t work on Kodi 19, and vice-versa. Be sure to download the correct version.
Either version gets installed from his repository, so you can enable automatic updates and always run the latest version.
- CastagnaIT Repository for KODI 18.x LEIA – repository.castagnait-1.0.1.zip
- CastagnaIT Repository for KODI 19.x MATRIX – repository.castagnait-1.0.0.zip
Option 2: Download Using Web Browser (The Long Way)
If you don’t want to download the files directly for whatever reason, you can still get the files from your web browser.
You can use whatever internet browser you like to download the files. In this example, I will be using the Downloader App, but it’s just as easy to use another browser – as long as they haven’t disabled file downloads.
In the search box or URL window of your browser, type the following:
https://github.com/CastagnaIT/plugin.video.netflix
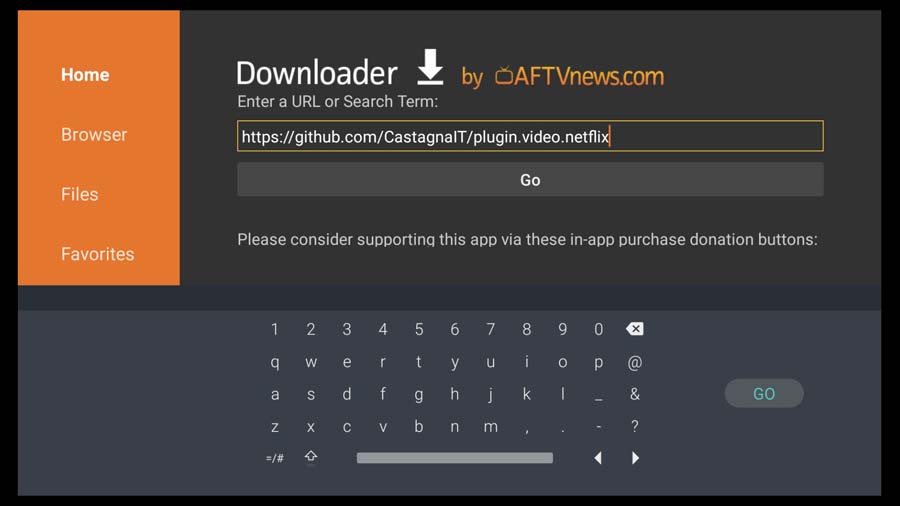
Depending on what browser you use, it’s going to look different.
For example, if I look at the page on Firefox, it shows up in a dark theme (light text on dark background). However, I see a white background with black text in the Downloader App.
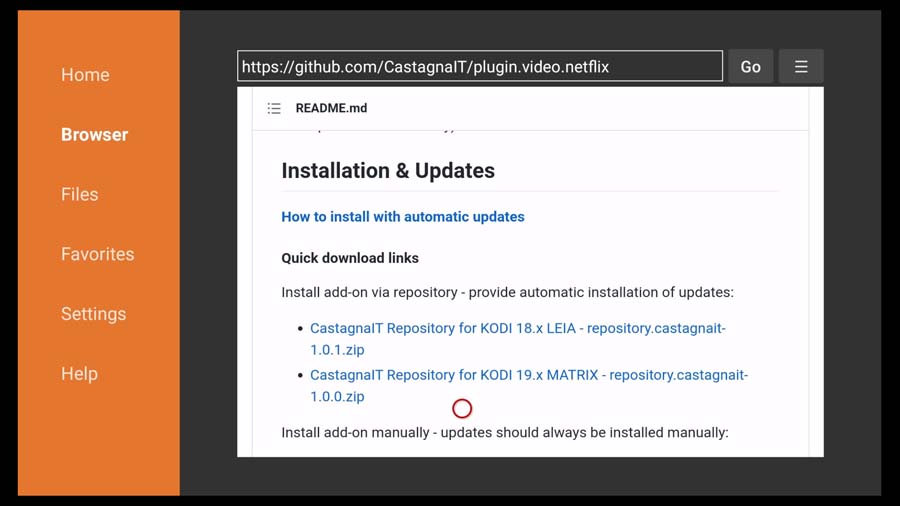
Scroll down to the Installation & Updates section to find the download links for each file. Remember to only download the version of the Netflix addon that works for your specific version of Kodi.
Install Netflix Addon in Kodi
After downloading the zip file with CastagnaIT’s Kodi repository, the next step is to open and install it.
Scroll down the left-hand side menu until you get to the Add-ons section.
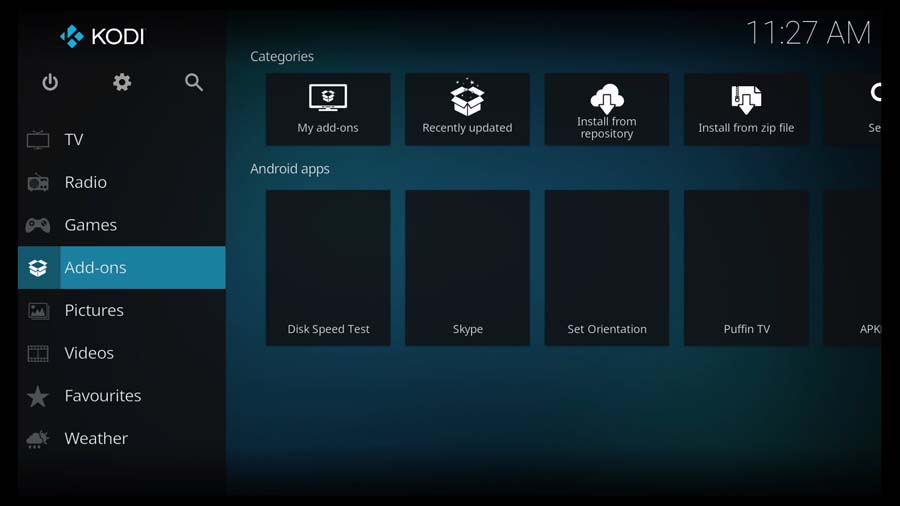
Along the top row, you’ll see several options. We will use “Install from zip file” and “Install from repository.”
The file we just downloaded isn’t just the Kodi Netflix addon. It’s a repository file, which also enables automatic updates.
First: Install from Zip File
So, we will start by clicking Install From Zip File to install the repository.
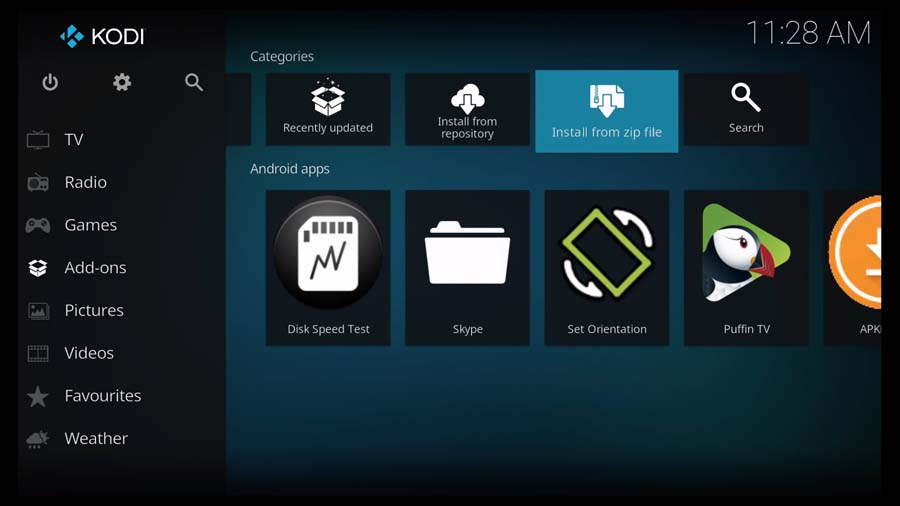
When you click on it, a warning box says, “Add-ons installed from a zip (excluding served repositories) will not auto-update and must be manually updated.”
The way we’re downloading the Netflix addon is one of those served repositories.
If you don’t want this addon to automatically update, there’s an alternate installation method on CastagnaIT’s GitHub page.
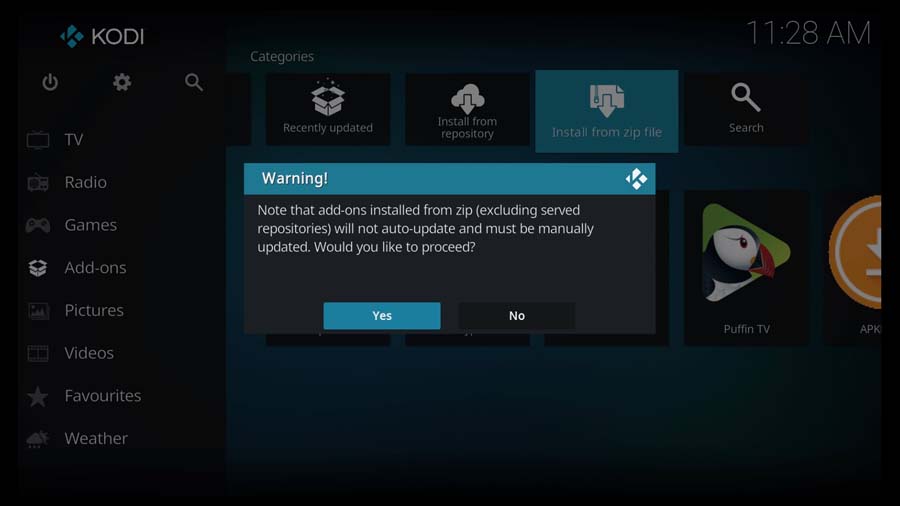
Next, navigate to the location where you downloaded the zip file in the previous section.
In my case, the Downloader App saves all files in /storage/emulated/0/Downloader, but this may differ for your device or web browser.
Once you locate the file location, select the correct version and click OK. Remember, version 1.0.0 is for Kodi 19, while version 1.0.1 is for Kodi 18.
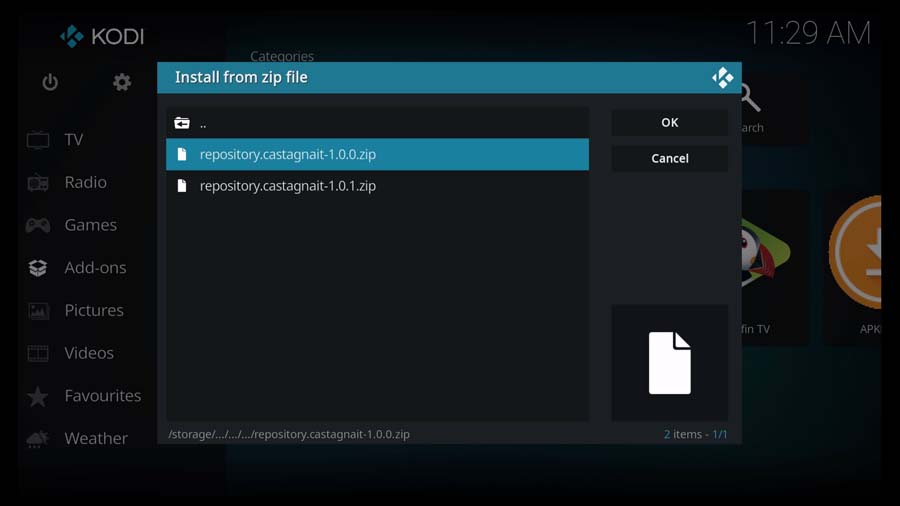
When you click OK, you’ll see a pop-up box in the upper right-hand corner letting you know that the CastagnaIT Kodi addons repository has been installed.
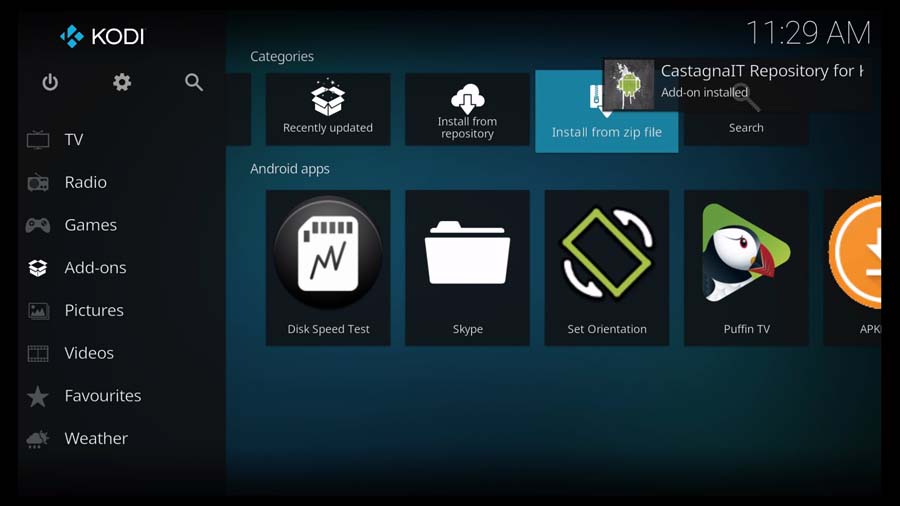
Second: Install from Repository
Now that the repository is installed, we can install and enable the Kodi Netflix addon. Click on Install from Repository in the top-row menu.
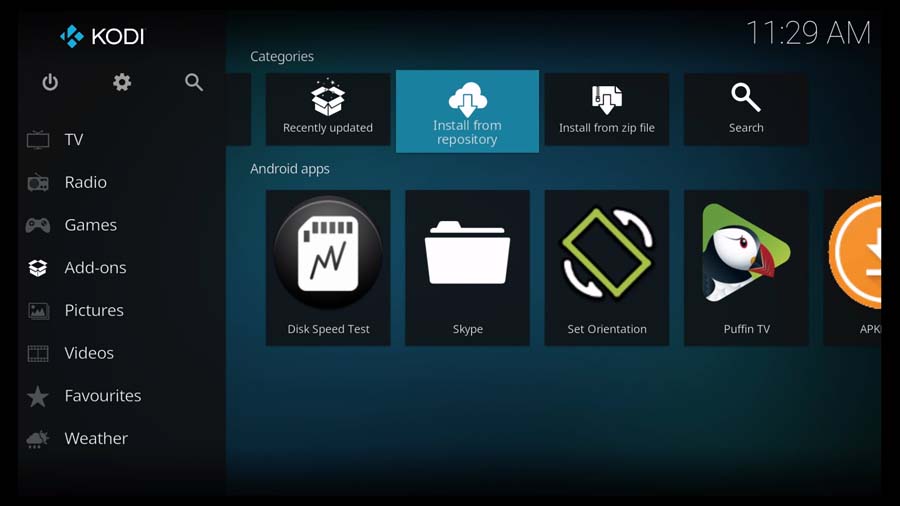
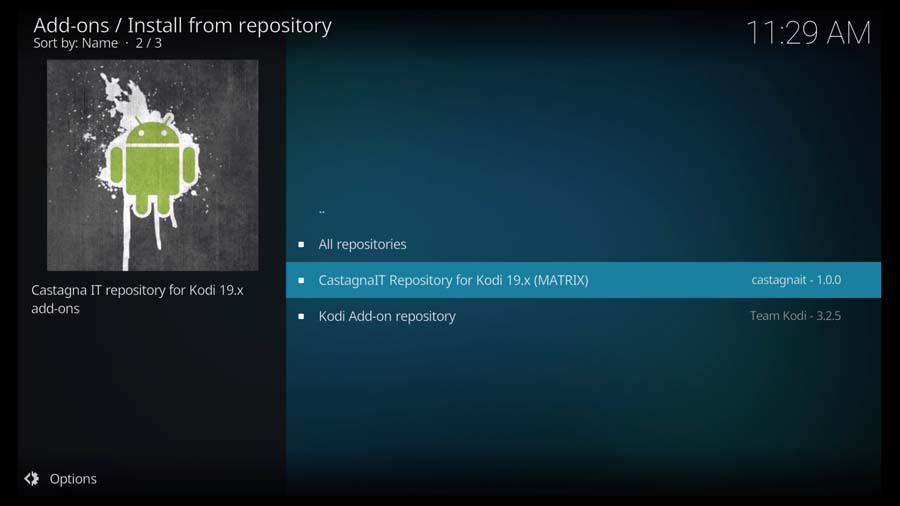
This takes you to a list of all repositories that you’ve installed on your Kodi device. I only have two repositories installed to keep it simple for this example.
If you have more repositories installed, scroll down until you find the CastagnaIT Repository for Kodi 19.x (MATRIX) listing, or CastagnaIT Repository for Kodi 18.x (LEIA) if you’re running Kodi 18.
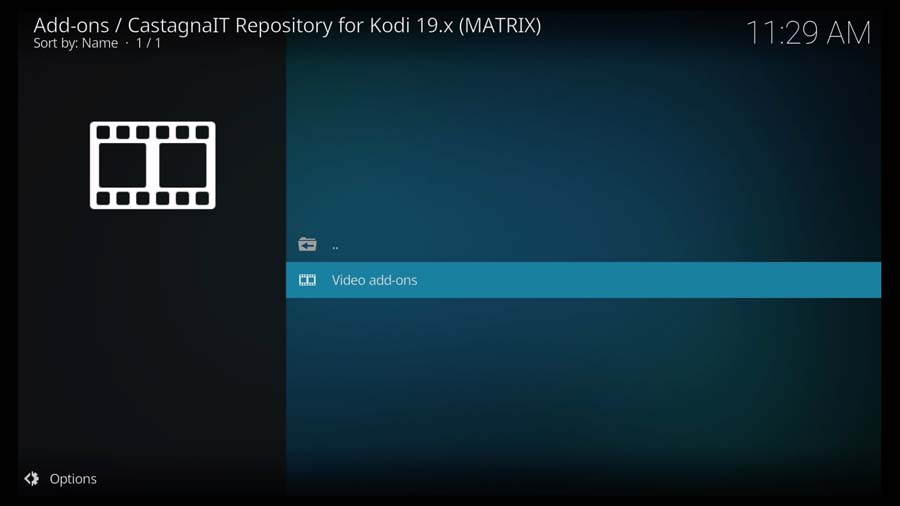
Next, select Video Add-Ons.
Select the Netflix Kodi addon.
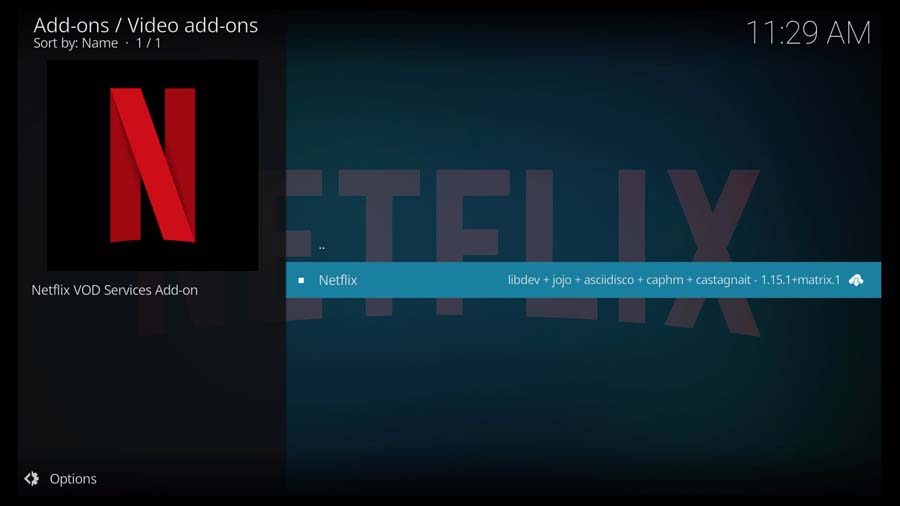
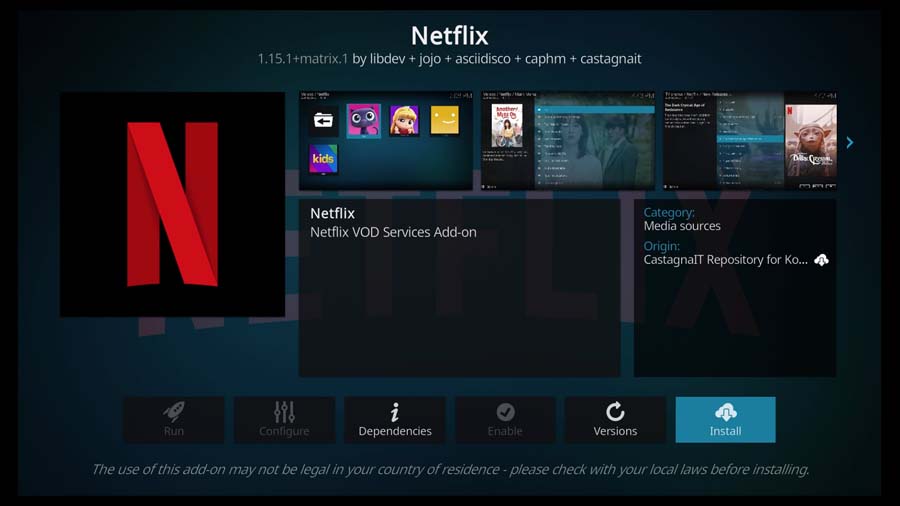
This takes you to the addon detail page, where you can see more information. Click Install to continue.
Depending on what’s already installed on your device, you’ll probably have some dependencies that need to be installed.
In my case, I needed to install the InputStream Helper, but you may have others in addition to this.
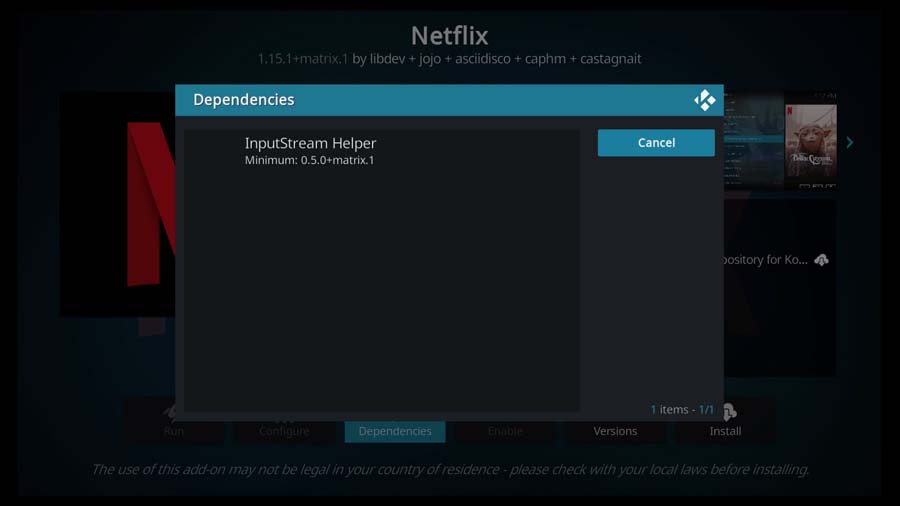
Any dependencies you do need will be installed automatically, so there’s nothing additional that you need to do.
Once the installation is complete, you’ll see a pop-up window in the upper right-hand corner of the screen telling you the Kodi addon has been installed and Netflix background services have started.
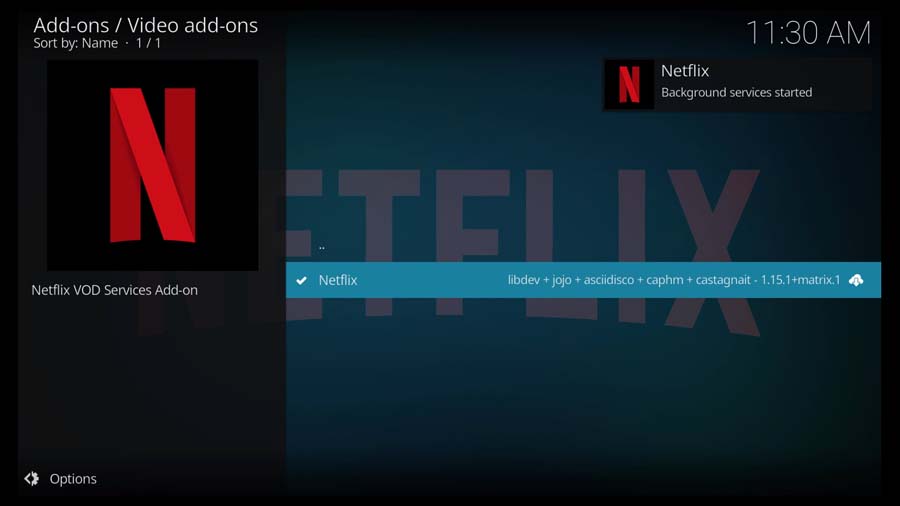
With that complete, we can return to the Kodi Add-ons menu and log in to our Netflix account.
Set-up Netflix Account
You’ll need an active Netflix subscription to use the Kodi addon. This will not give you access to content you wouldn’t have otherwise.
However, using a VPN from within Kodi is easier to access the content you might be locked out of otherwise.
From the Kodi Add-ons tab in the side menu, click on Netflix.
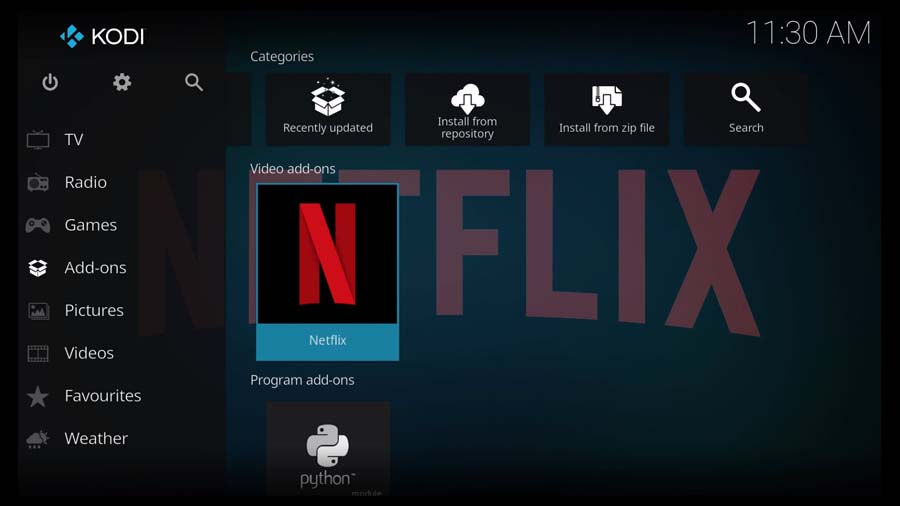
The first time you run the addon, it will ask you to authenticate your Netflix account.
You can do this in two ways, either with your email and password or through an authentication key.
I recommend starting with the username\password method and switching to the authentication key method if you encounter issues.
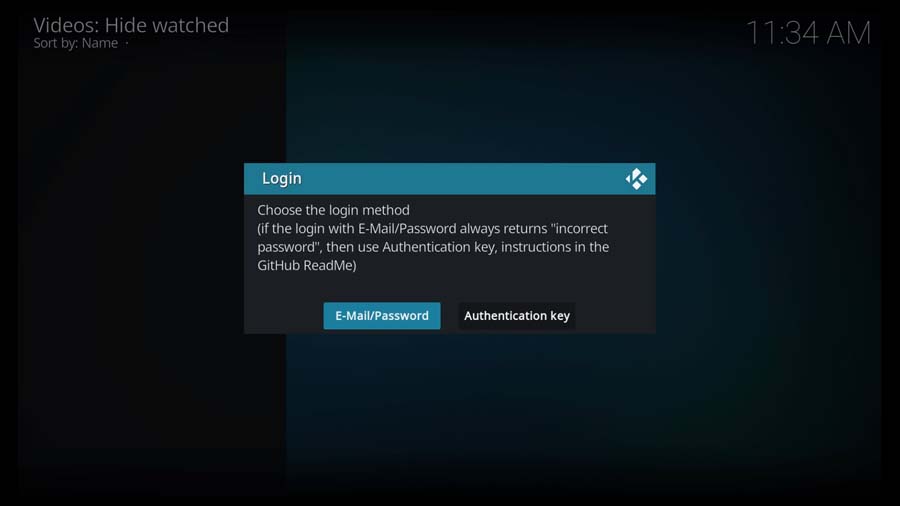
In rare instances, you could get an “Incorrect Password” error, even when you’ve entered your credentials correctly.
This method is a little more involved, however. If you need to log in this way, the developer has set up some detailed instructions that can help.
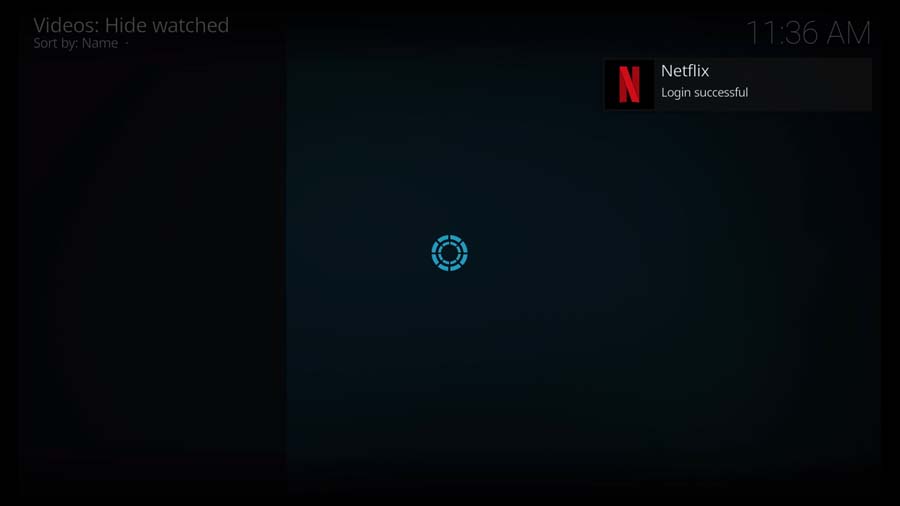
Once you’ve entered your credentials, you’ll see a pop-up window and a Login Successful message.
Using the Netflix Kodi Addon
Once installed, the Kodi Netflix addon works a lot like the Netflix app. If you have multiple users on your Netflix account, you have to select a user as soon as you log in.
From there, the menu system should look familiar.
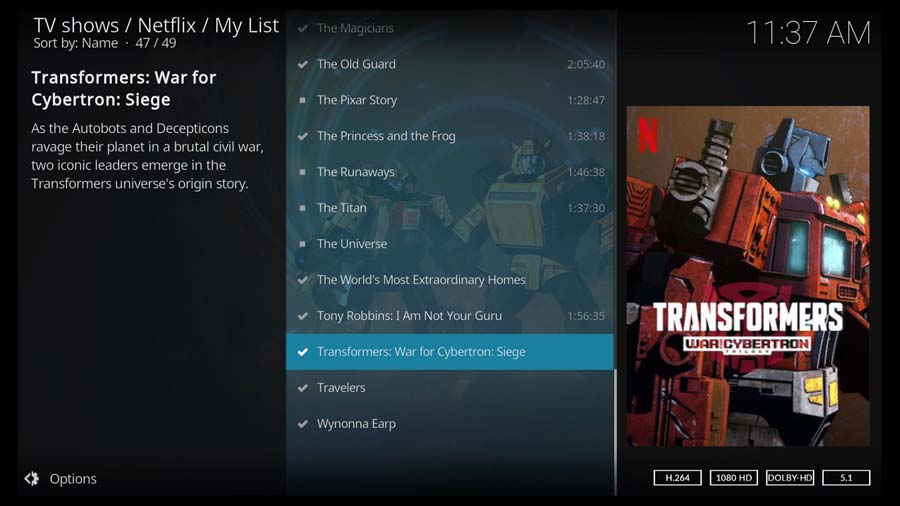
Here I am on my personal Netflix account, and you can see all of the same options, just adapted for the Kodi interface.
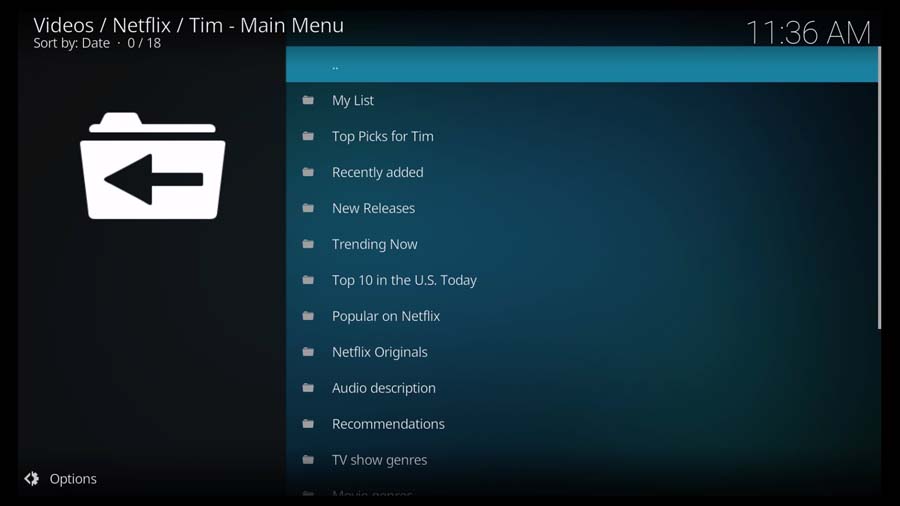
That means your movies and TV shows are organized in a list format instead of the full-motion icons we’re used to seeing.
However, you get background and full-height poster art on the right-hand side. I scrolled through my entire watch list and didn’t find anything that didn’t have great, professional-quality artwork.
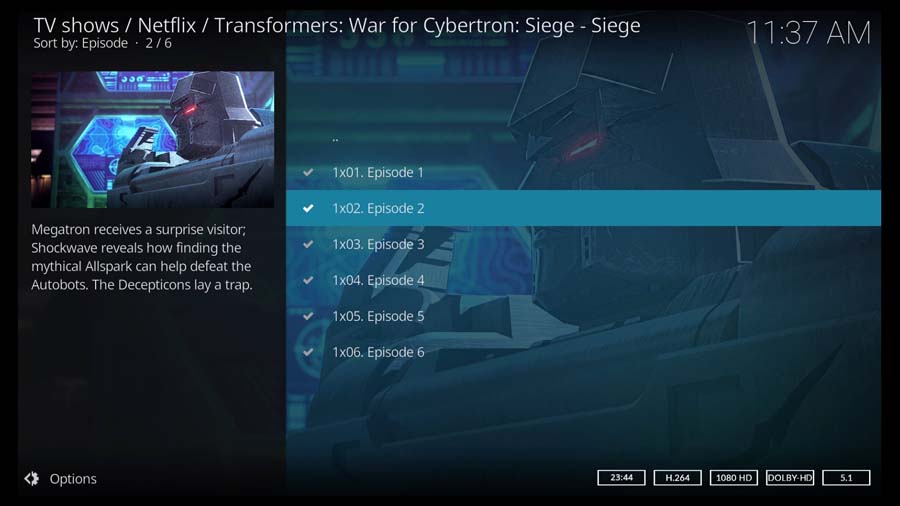
When you select a show, each episode has its own artwork and an episode synopsis on the left-hand side.
The Verdict
If you’re a Kodi user with a subscription to Netflix, then the Netflix addon is a no-brainer.
It’s incredibly well done by a developer actively involved with the Kodi community. More importantly, Team Kodi fully supports asking questions about the addon on their official website – which isn’t typical for many apps.
It’s not a perfect solution, however. The main advantage of using the Kodi addon for Netflix is that you have everything in one place. If you don’t use Kodi for everything, you’ll probably not get as much of a benefit from this addon as you would otherwise.
If you run into any issues, Kodi has detailed log files that will usually point you in the right direction. My tutorial shows you how to access the Kodi log files here.
- How to Install Kodi Diggz Xenon Plus & Free99 Build [March 2024] - March 3, 2024
- How to Enable Unknown Sources on Chromecast with Google TV [2024] - October 30, 2023
- How to Install the Seren Kodi Addon [2024] - October 29, 2023

