Last Updated on May 8, 2023 by Tim Wells
Even though Kodi is one of the most popular media players in the world, it’s a bit tricky to install or update Kodi on the Amazon FireStick and Fire TV.
Even worse, most of the tutorials online are either very vague, out of date, or both. In fact, while I was working on my review of the latest Amazon Fire TV Cube, I couldn’t find a single tutorial that showed the correct way to install Kodi on the new Amazon FireStick UI.
In this article, I’m going to show you step-by-step how I installed Kodi 19 (Matrix) on the new FireTV interface. I’m using the Fire TV Cube, but the process is the same for the FireStick and FireStick Lite as well.
It’s worth noting that even though I’m detailing the process for installing Kodi on the FireStick and Fire TV Cube, it’s exactly the same steps you’ll need to take to upgrade an existing Kodi installation.
How to Install Kodi on Amazon FireStick & Fire TV Cube
Before we start, there are two things that you’ll need to do first. We’ll be using the Downloader App from AFTVNews, so if you haven’t already, make sure you’ve got it installed on your FireStick.
It’s one of my favorite apps, not only for my Amazon FireSticks, but also for all of my Android TV devices as well. It makes sideloading APK files super-easy.
Best of all, you don’t need to use ADB (Android Debug Bridge), so no PC is required!
Second, you’ll need to give Downloader permission to install apps from unknown sources. So let’s do that now.
Enable Apps from Unknown Sources
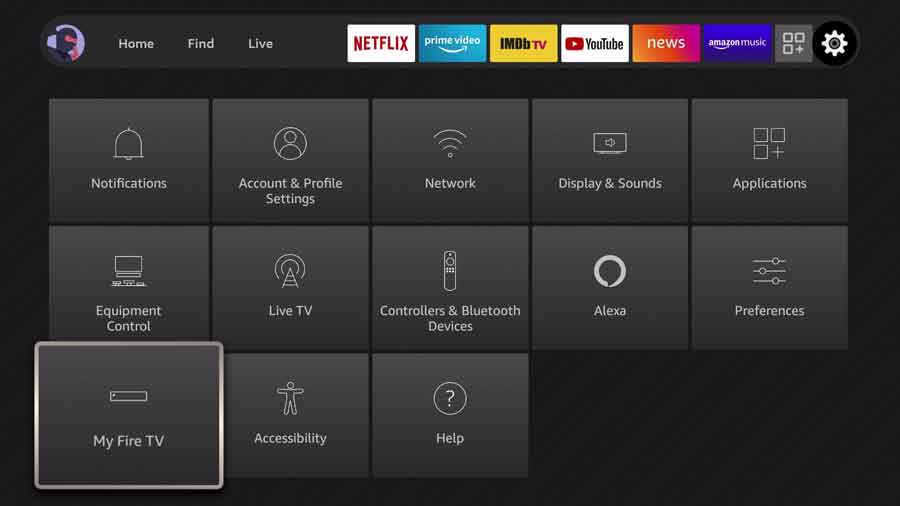
In the new Fire TV UI, scroll all the way to the right on the center menu. You’ll see a gear icon, which will take you to the Settings menu.
Scroll down and click on the My Fire TV icon.
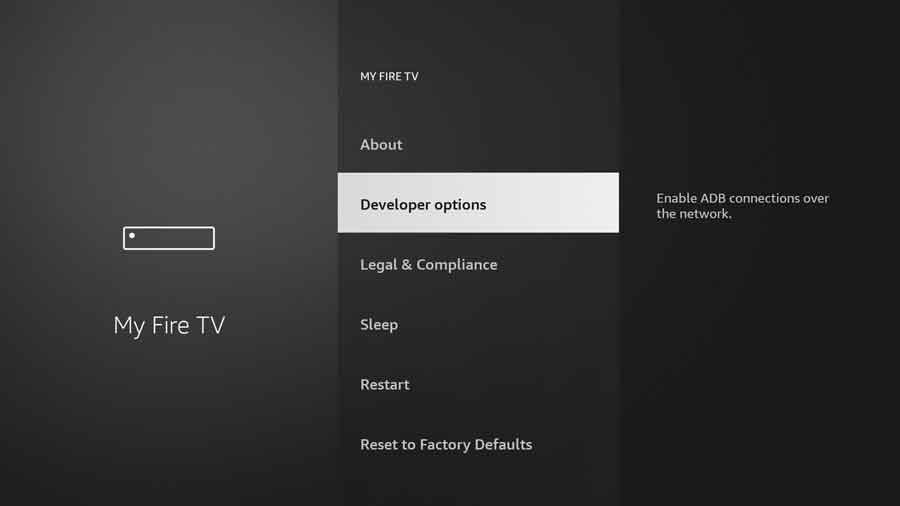
Click on the Developer Options menu.
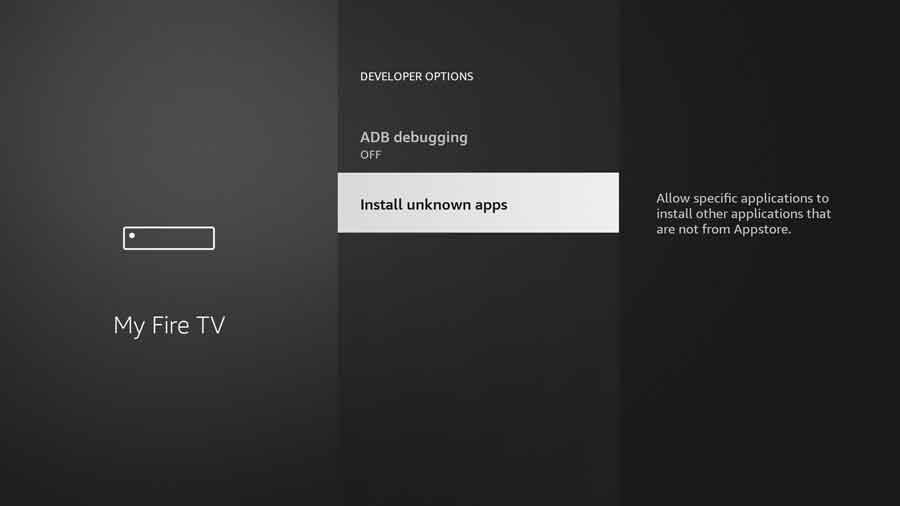
Then click on the Install Unknown Apps setting.
Previous versions of the Fire TV OS only allowed you to turn this setting on or off for all apps globally. That presented a security risk, since it was easy for an unscrupulous developer to take advantage of this loophole.
Allowing the permission at the app level is much more secure.
In my case, I enable Install Unknown Apps permissions for Downloader and the X-Plore file manager, and leave it disabled for everything else.
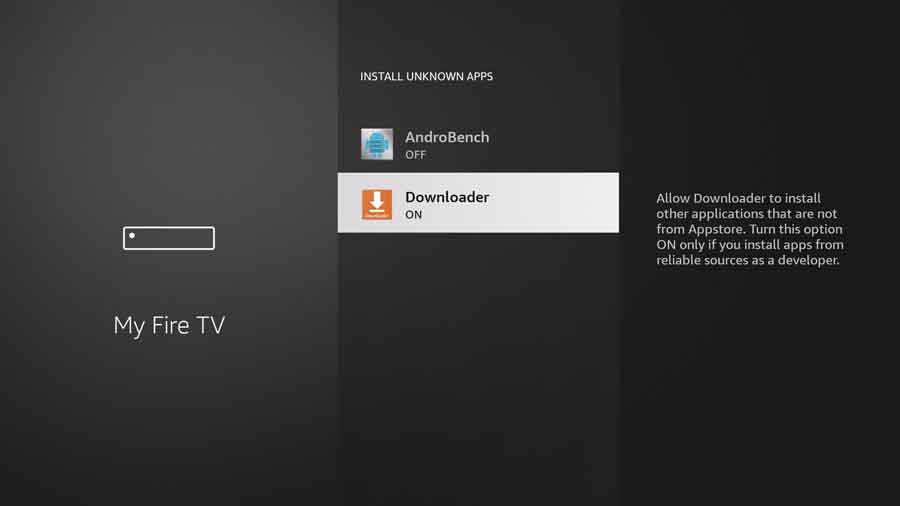
Once the permission is enabled for Downloader, head back to your home screen.
Downloading Kodi on FireStick
We’ll complete the rest of the installation with the Downloader app. However, if you prefer another web browser to download your APK files, you can use that instead.
In my experience, the Downloader App is by-far the easiest method to sideload an app on your device.
Open the Downloader App by clicking on the icon in the Your Apps & Channels tab of your FireStick.
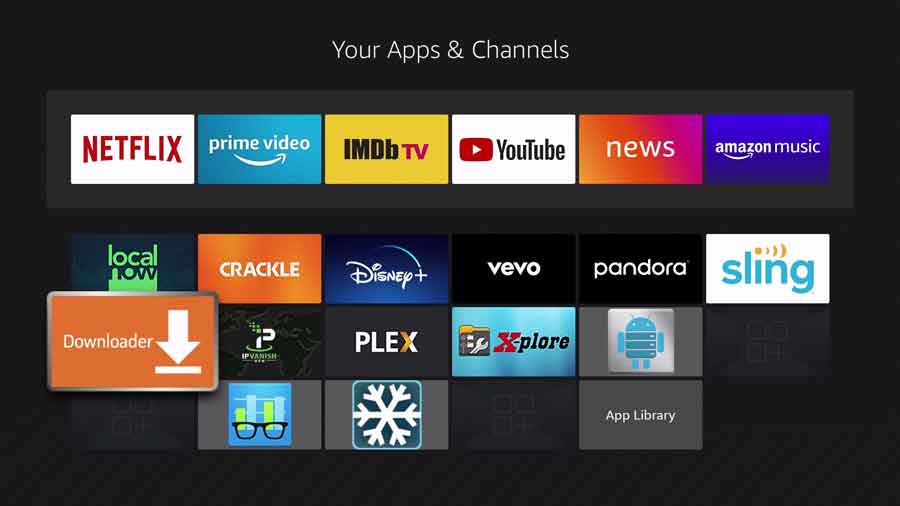
In the center of the Home tab is a URL\Search bar.
Click into it and type in kodi.tv.
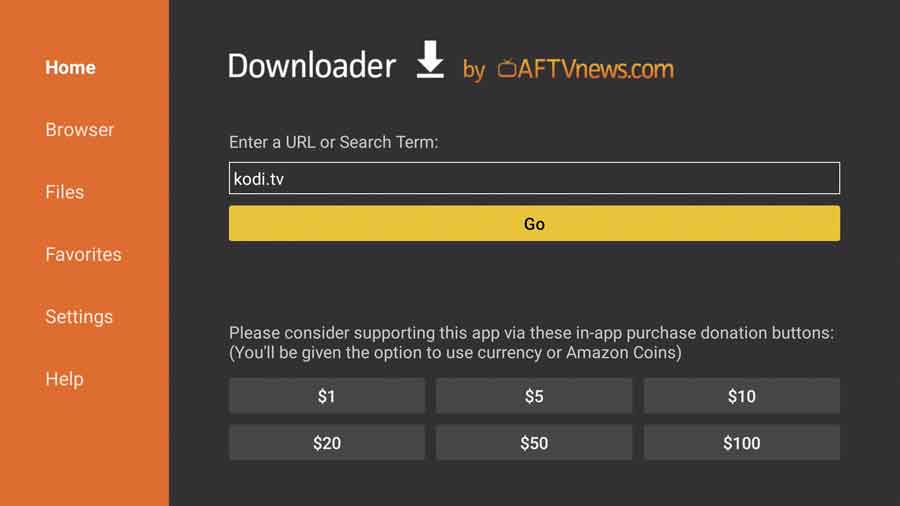
This takes you directly to the official Kodi website.
Depending on when you’re reading this tutorial, it may look slightly different than the image you see below. However, there will always be a Download section on the menu, or a Download Now button.
Click on either to continue.
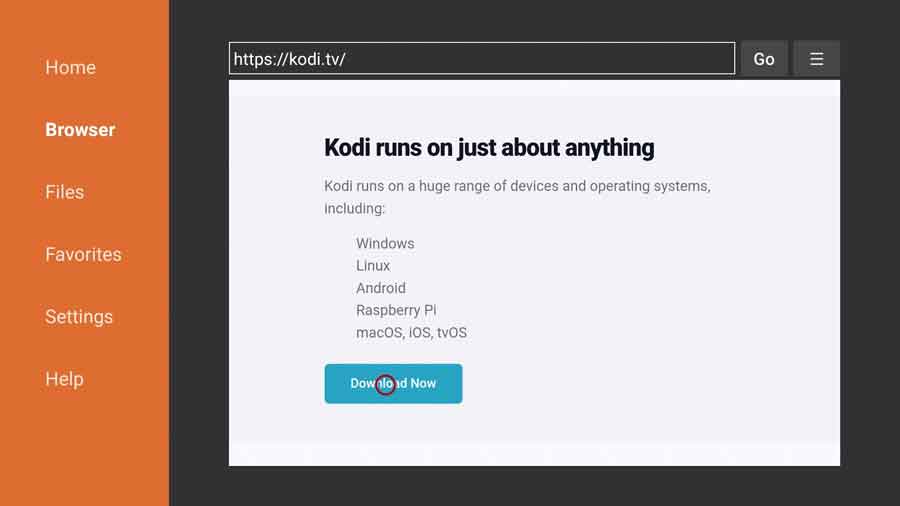
They’ll both take you to a page where you can select your operating system.
Since Fire TV OS is based on Android, click on the Android icon to continue.
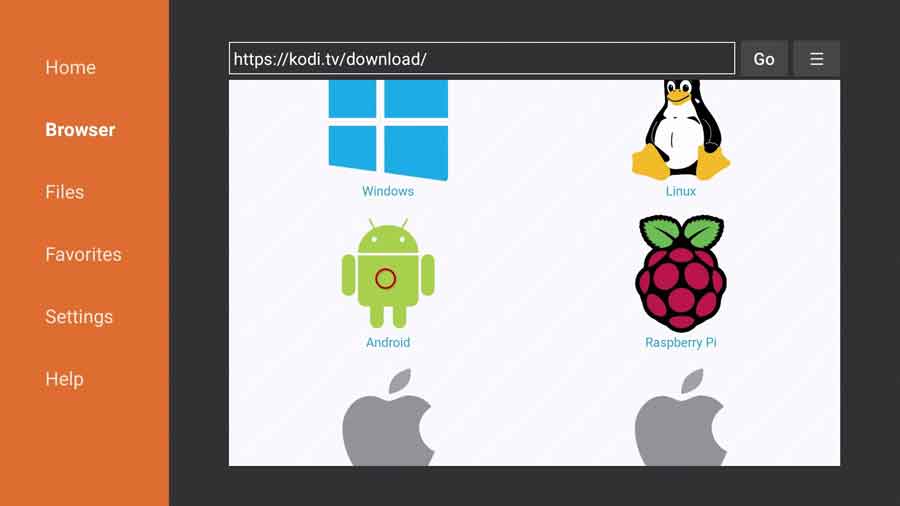
This gives you a couple of different options, so let’s narrow it down a bit.
The first two are easy. The Amazon FireStick and Fire TV Cube don’t have the option of downloading from the Google Play Store or the Huawai App Gallery by default, so we can rule those out.
That leaves the 32bit and 64bit versions of Kodi.
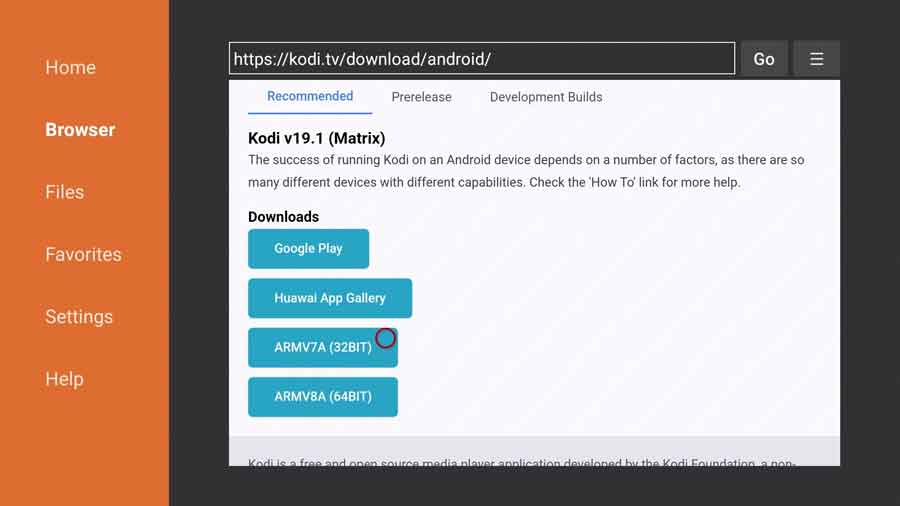
A quick check of the official Amazon Fire TV Device Specifications shows that all current FireSticks and the Fire TV Cube are 32-bit devices, so that rules out the ARMV8A (64Bit) download file.
Click on the ARMV7A (32Bit) button to continue.
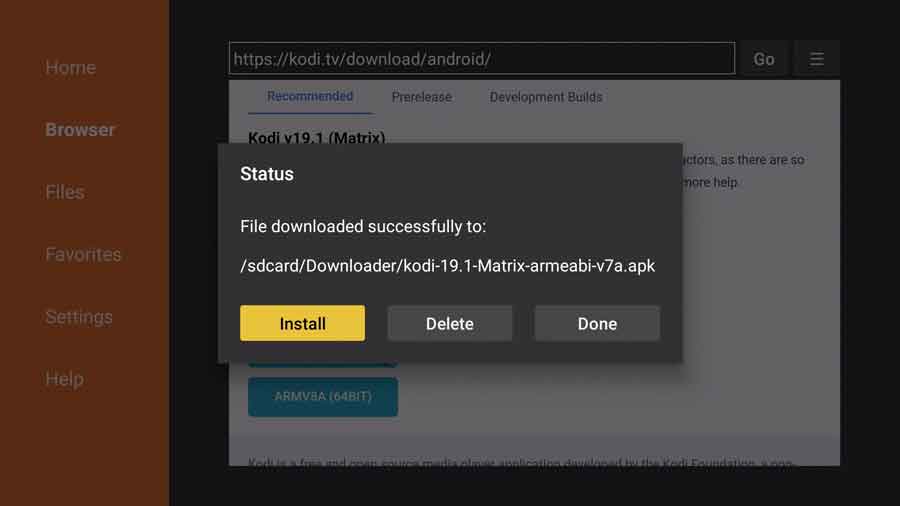
This starts the download process. The Kodi APK file is only around 75MB, so it should only take a few seconds to download.
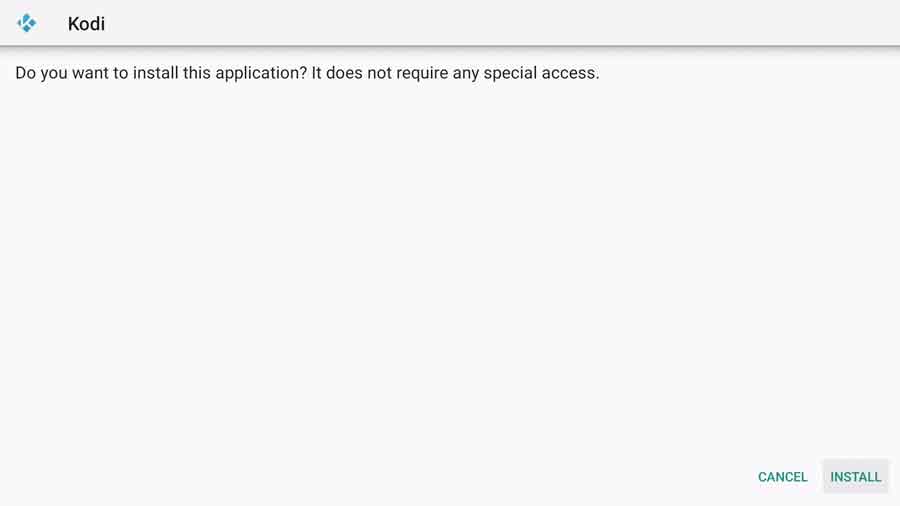
The installation process should begin automatically. If it doesn’t, click on the Install button to continue.
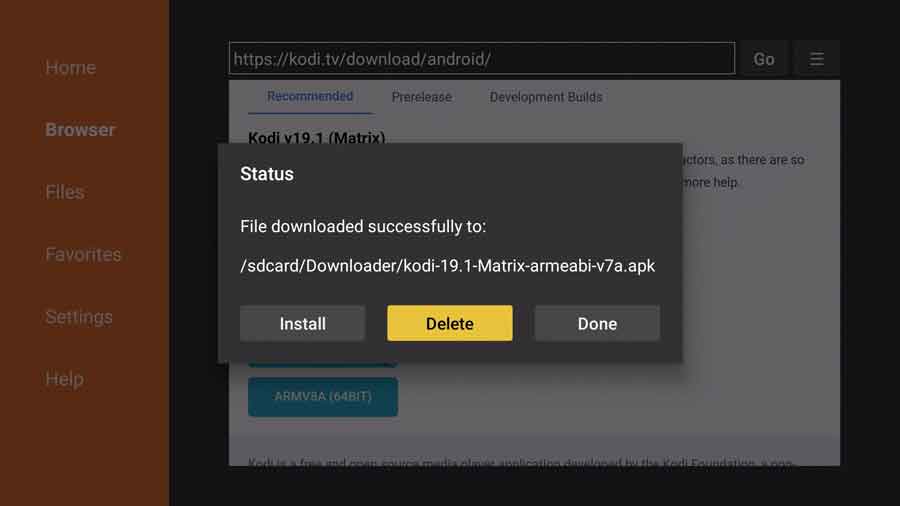
Once the installation process has finished, remember to delete the Kodi APK file to save space on your FireStick.
Opening Kodi on FireStick
In a perfect world, Kodi will add an icon to the Your Apps & Channels tab, just like any other app would.
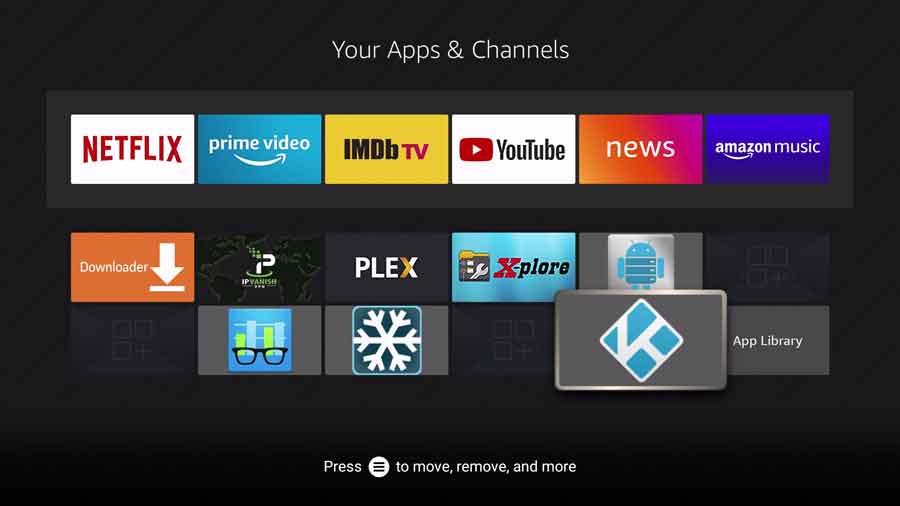
Sometimes, that doesn’t happen. Actually, it didn’t for me when I was taking screenshots for this tutorial.
Here’s how to open Kodi on your FireStick when there’s no icon shortcut.
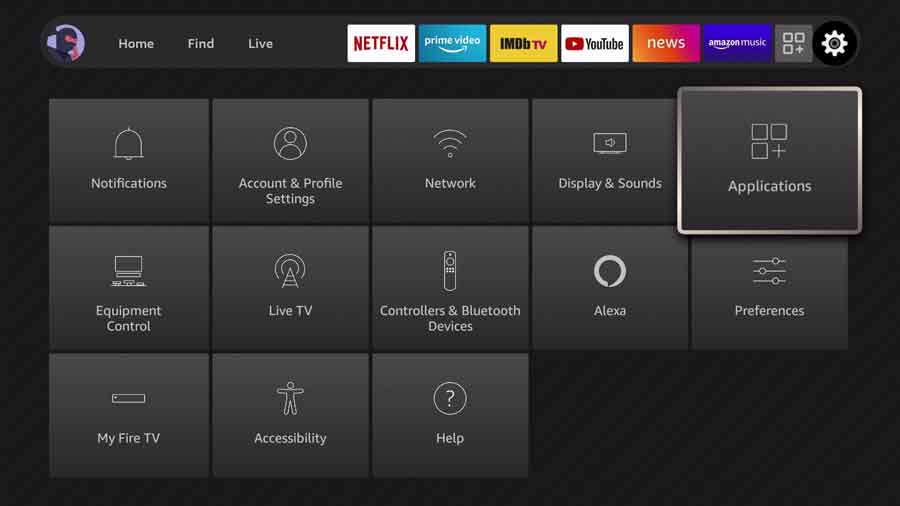
On the Settings tab, click on the Applications icon.
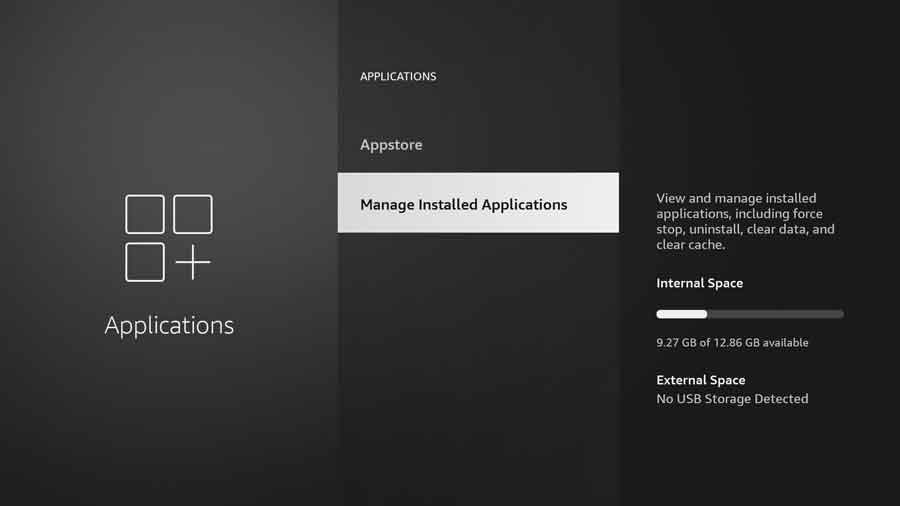
Then click on Manage Installed Applications.
Scroll down until you find Kodi.
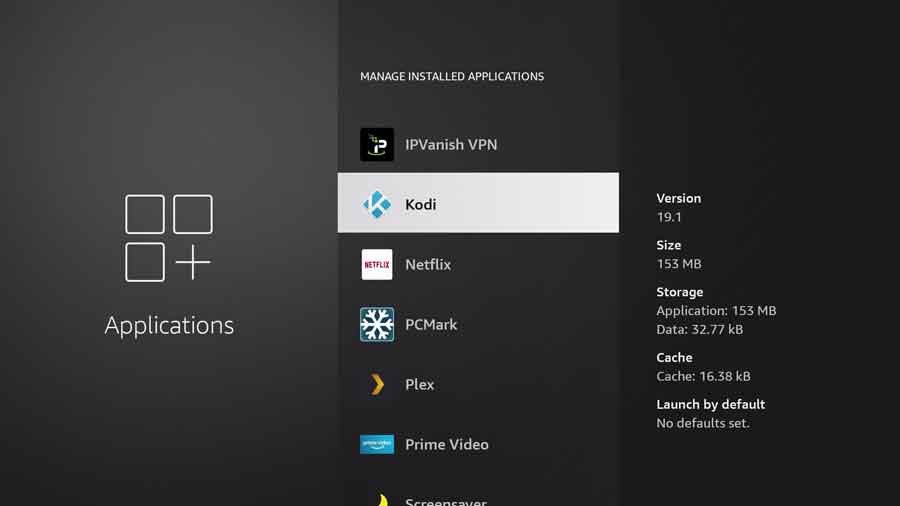
Once you click on Kodi, you’ll see a sub-menu where you can change permissions, uninstall the app, or clear the data or cache if you’re having problems.
But we’re going to click on Launch Application to open Kodi directly from the FireStick menu.
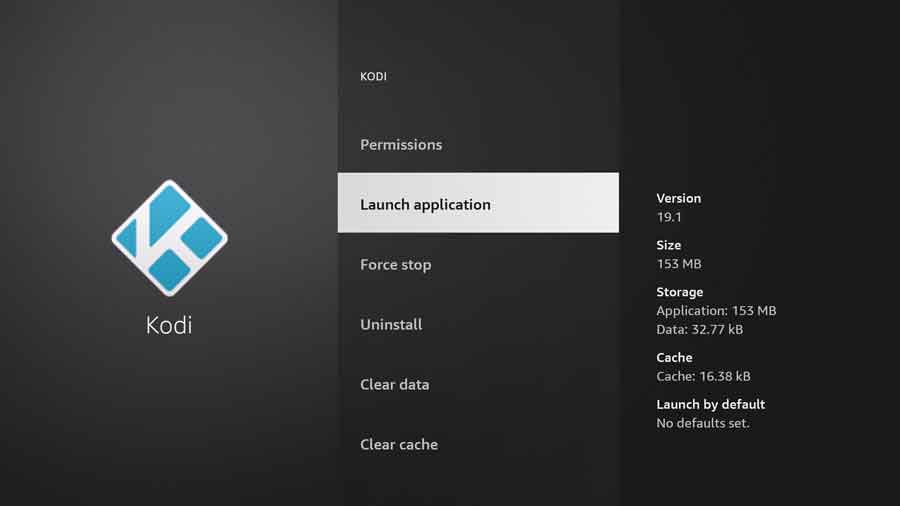
This should take you directly to the Preparing for First Run splash screen, before launching into the Kodi UI.
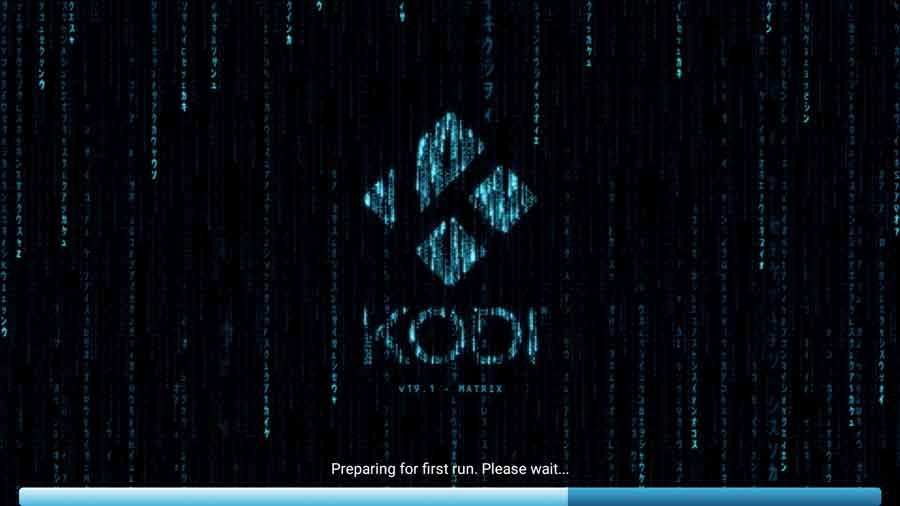
Once you go through this process once of manually force-starting Kodi from the FireStick menu, an icon will appear on the Your Apps & Channels tab.
In my case, I did have to reboot my device before it appeared, but you may not have to. If you run into any issues, Kodi has pretty detailed log files that will usually point you in the right direction. You can find out how to access the Kodi log files in my tutorial here.
- How to Install Kodi Diggz Xenon Plus & Free99 Build [March 2024] - March 3, 2024
- How to Enable Unknown Sources on Chromecast with Google TV [2024] - October 30, 2023
- How to Install the Seren Kodi Addon [2024] - October 29, 2023

