Last Updated on May 8, 2023 by Tim Wells
When I set up a brand-new Android TV box, the first app I install is always the Downloader app.
Every. Single. Time.
Some apps aren’t available on the Google Play Store. The Downloader app is the easiest way to get around those restrictions and sideload them on your system.
If you’re new to the Downloader app, don’t worry. I will give you an in-depth tour in this article and walk you through how to install it on your TV box or Android TV.
What is the Downloader App for Android?
Initially, the Downloader app wasn’t for Android at all. In 2016, Elias from AFTVNews.com created it to install Kodi on his Amazon Fire TV.
Amazon was known for having a very restrictive app store – even more than Google’s. Some apps like Kodi had an APK (Android Application Package) that would install on the Fire TV.
However, there was no easy way to download and install it on the device.
Because the Amazon Fire TV OS is an offshoot of Android, the Downloader app will work flawlessly on both Fire TVs and Android TVs and TV boxes.
Where to Find the Downloader APK for Android TV & TV Box
These days, you can find Downloader or its APK on most of the major app stores: Google Play, Amazon, Aptoide TV, and APKPure.
As I said at the beginning, I always install Downloader as my first app. This is because I can’t install any other app store, like Aptoide TV, directly through Google Play. Google doesn’t really allow competition on the Google Play Store.
Google won’t let us download another app store directly. But they were nice enough to leave the Downloader app on the Play Store.
It may take a bit longer, but we can make it work.
What Your ISP isn’t telling you…
Your ISP knows more about you than you think!
Your IP address is your online fingerprint. It logs everything you do online and is visible to your Internet Service Provider, the apps & addons you use, and even the government.
Kodi Builds & Addons offer unlimited free streaming content, but there are risks.
Stream safely with Surfshark.
The Best VPN hides your identity and bypasses geo-blocked content and government surveillance while letting you stream your favorite movies buffer-free.
I’ve tested all the major VPNs on Android TV boxes and recommend Surfshark. It’s the fastest VPN for streaming and gives you access to the most geo-blocked content!
SAVE 81% ON Surfshark!!!
Try it risk-free for 30-days on unlimited devices at the same time.
How to Install Downloader on Android TV & TV Box
Google Play Store
The easiest way to install Downloader is to search for it in the Google Play Store.
In fact, it’s so popular that it was one of the first apps to come up just by searching for ‘d’.
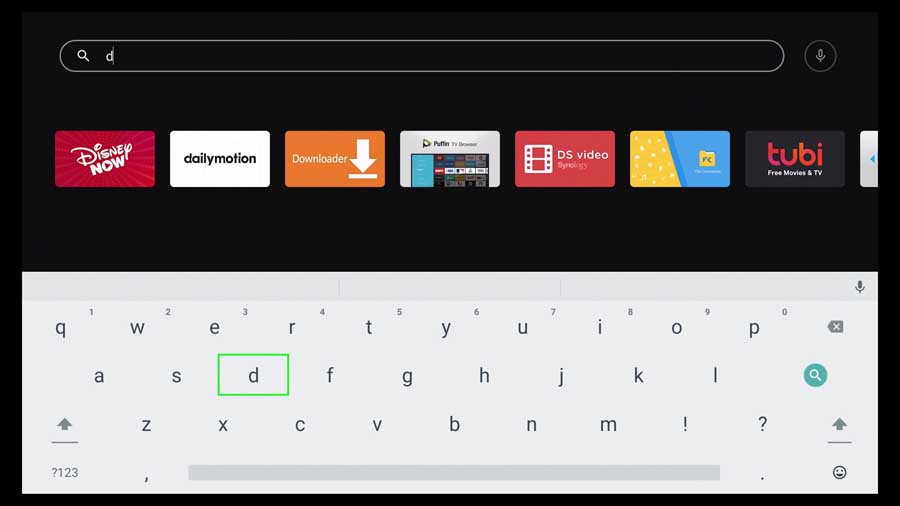
There are several downloader-type apps. The one you want is “Downloader by AFTVNews.”
It’ll have the bright orange icon that you see here.
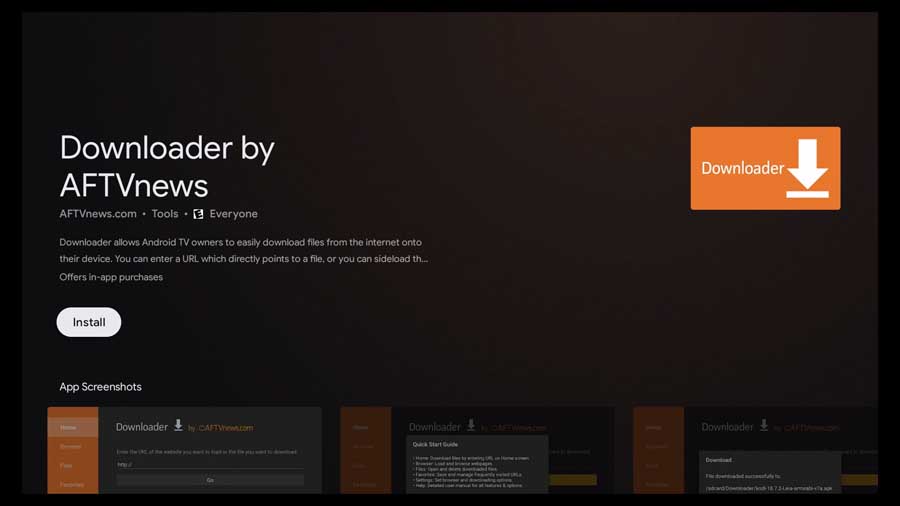
Once you’ve found the right app, click on the white Install button to start the installation.
APKPure
The Downloader app is easy to find on APKPure as well. Just search for “downloader,” and it’ll be the first app listed.

From here, you can click on the Install button on the right-hand side or click on the icon to get more details on the app.
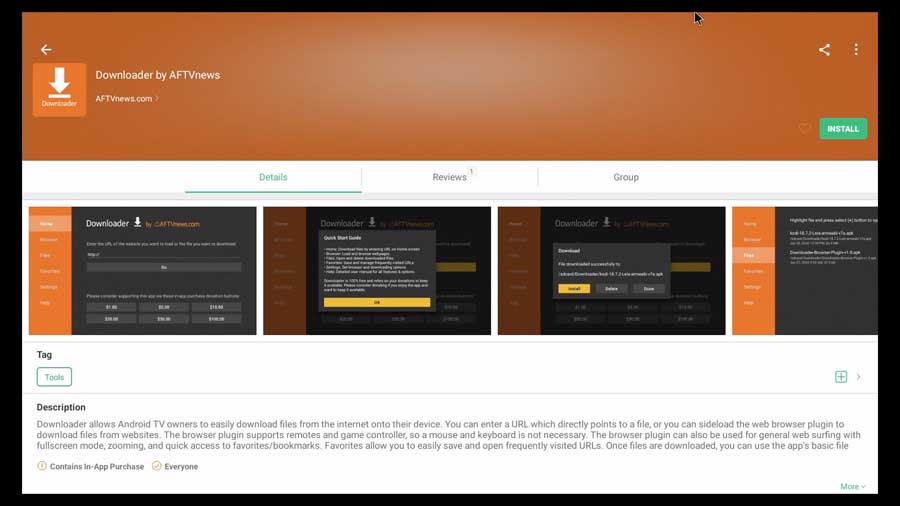
Either way, you can open the app directly from here or from the app drawer on your device’s home screen.
Allow Unknown Apps
To use Downloader, you’ll need to change the setting that allows you to install apps from places other than the Google Play Store.
In newer versions of Android, Google actually makes this easier to manage. Now, you don’t have to do this before you install the app or even before you run the app.
Immediately after launching the Downloader app, Android TV will alert you that the app doesn’t have the permissions it needs to run.
Then it’ll take you directly to the Settings menu, where you can fix it.
That’s a huge time-saver.
How to Enable Unknown Sources
Depending on your version of Android, the setting you need to change will be called Unknown Sources or Unknown Apps.
Both essentially do the same thing.
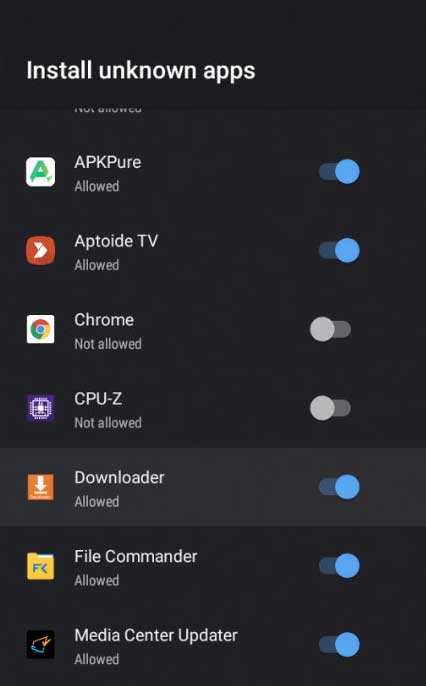
A significant change in current Android and Android TV versions lets you enable or disable this setting for each app. That means if you want to allow it for Aptoide TV but disable it for File Commander, you can do that.
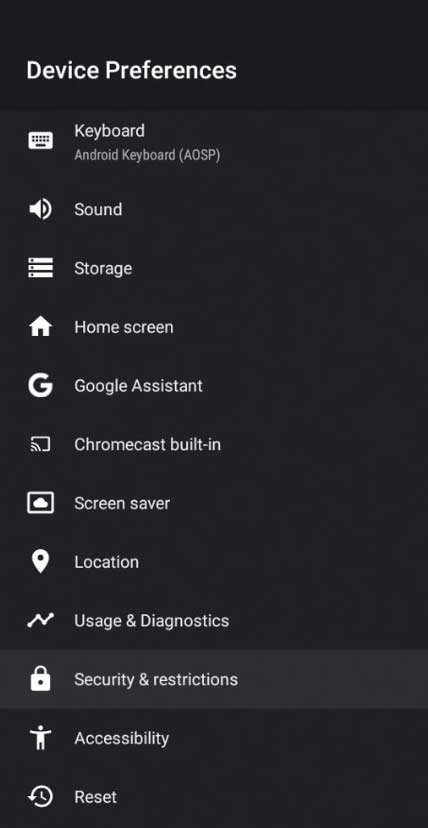
To get to that menu, click on the Settings icon to get to your Device Preferences.
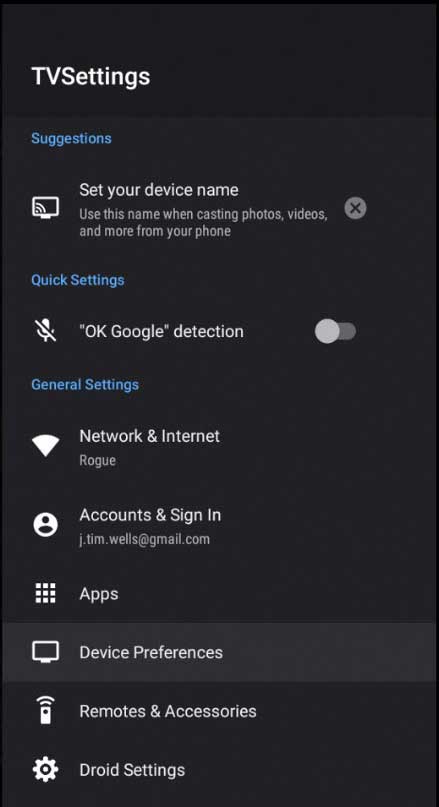
Then scroll down to the Security & Restrictions heading and click on that.
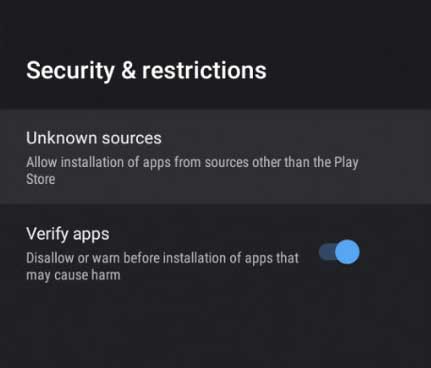
There are only two settings to change in this sub-menu: Unknown Sources and Verify Apps. Click on Unknown Sources to continue.
In this menu, you can toggle the permissions for each app individually. Flip the toggle until it changes to blue to enable it, or flip it to gray to disable it.
Current versions of Android will let you do this from within the app, and you don’t need to change this setting beforehand.
How to Use the Downloader App on Android TV & TV Box
Now that we’ve installed the Downloader app, let’s take a quick tour.
Home Screen
The first time you launch Downloader, it’ll ask for permission to access photos, media, and files on your device.
Regarding permissions, this is about as simple as you can get. It needs this permission so it can install files.
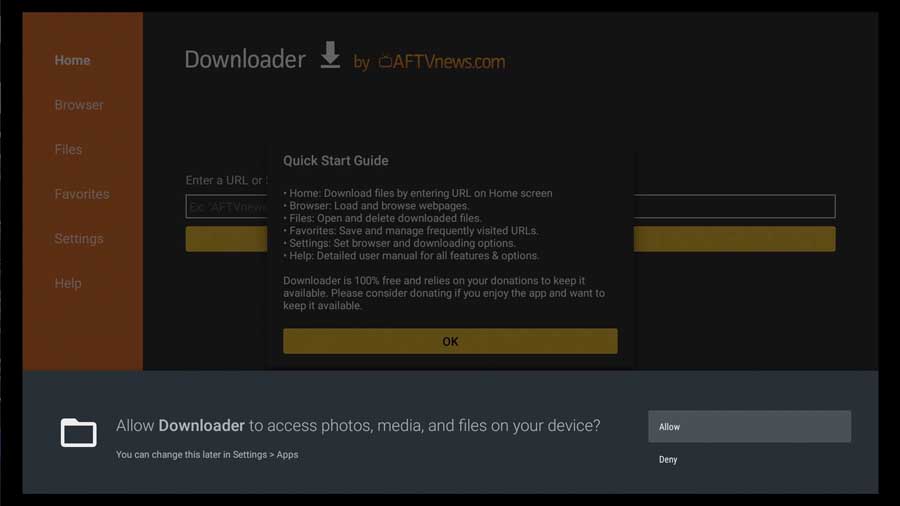
Since that’s the point of the app, go ahead and click Allow.
With that out of the way, a Quick Start Guide appears in a pop-up box.
Even though Downloader is straightforward and intuitive, it’s still nice to see Elias include some basic instructions to tell you what the different screens let you do.
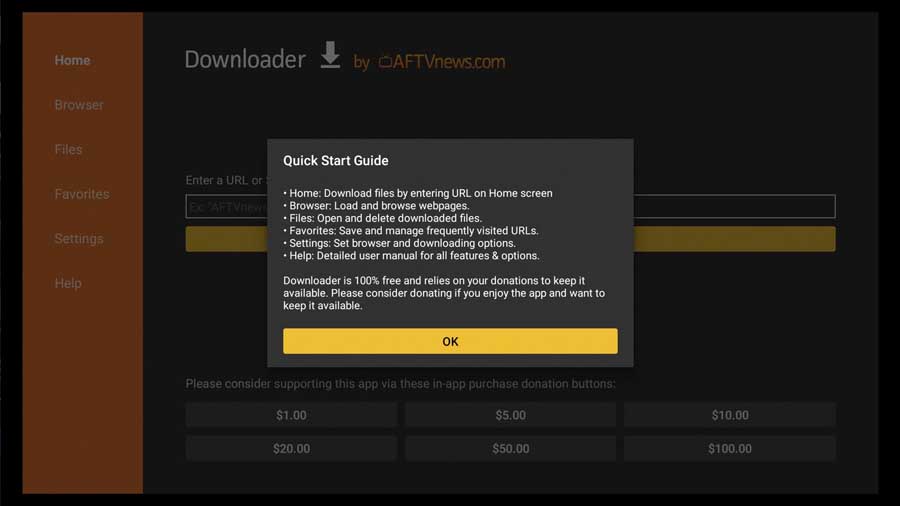
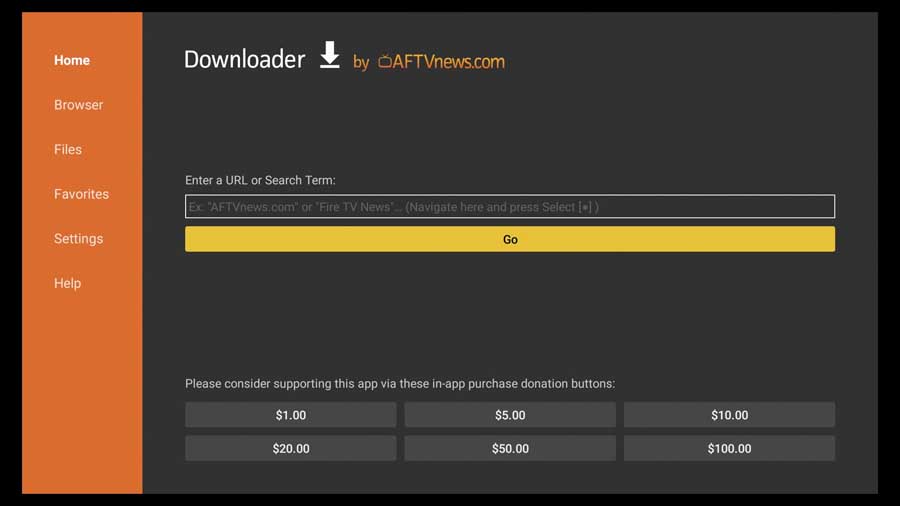
Once you click out of that box, the main Home screen is a simple search box that lets you enter a URL or search term.
Until recently, you could only enter a URL into this field.
However, in July 2020, it was integrated with Google Search, so you can actually enter a keyword to search for.
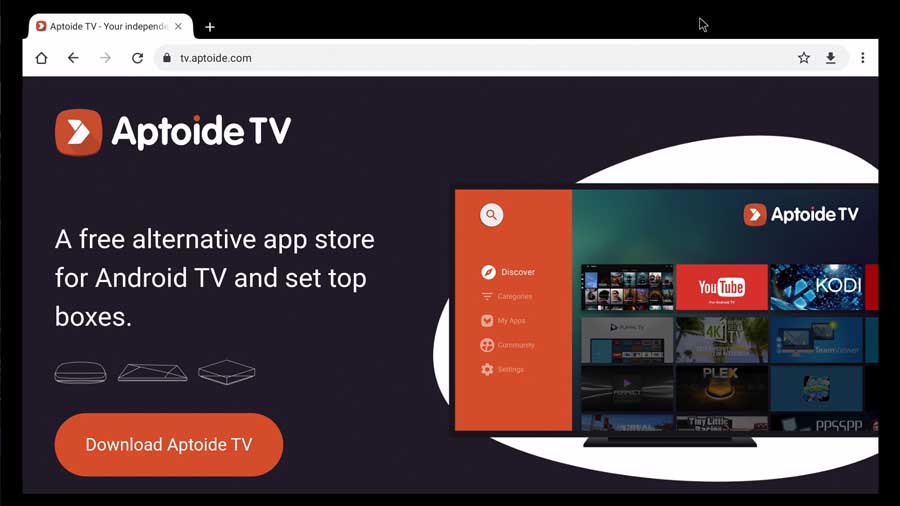
For example, searching for “Aptoide TV” in the built-in web browser will take you directly to the Google Search results for that term.
One of my biggest complaints about previous versions was that you needed to know the full URL to the page you’re looking for. Having integrated search makes it much easier to use and is a huge time saver.
Browser
When Downloader launched in 2016, it didn’t have an integrated web browser. So, when you typed in the URL on the home page, you needed the complete location of the file itself.
Obviously, that made it a lot harder to type in and very easy to make a typo.
But that was quickly fixed. In early 2017, the developers added an integrated web browser. Better still, the browser plugin supports remotes, so you don’t need an air mouse to use it.
The integrated browser is one of the killer features of this app, and it’s what puts it over the top.
Enable Browser Plugin
You’ll need to download a browser plugin to enable the feature if you have an Android TV device. Unfortunately, Google took some issues with having an integrated browser on Android TV, and this was the best workaround for that.
Fortunately, it’s only a minor inconvenience, but it makes for a great tutorial on how the Downloader app works!
The first time you go to the Browser page, you’ll get a message like the one above. It gives you instructions on downloading the browser plugin by going to browser.aftvnews.com.
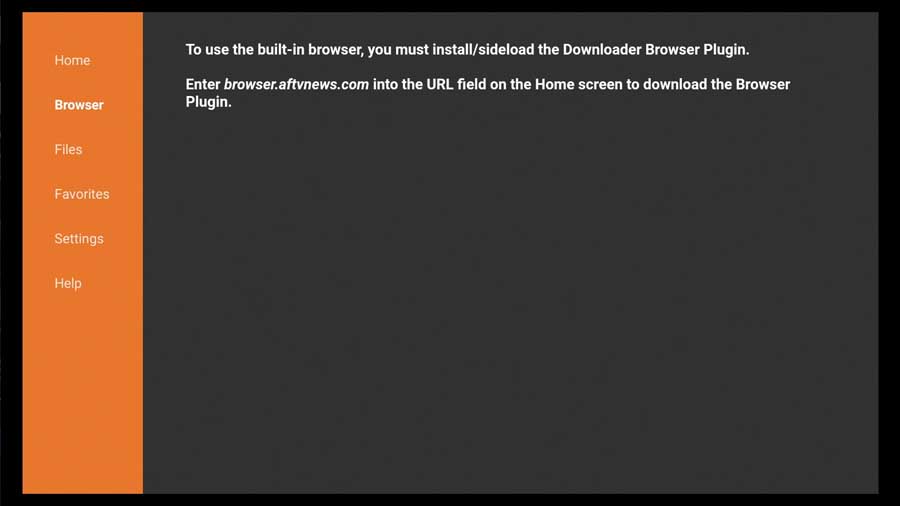
Let’s head back to the Home screen and type that in the Search field.
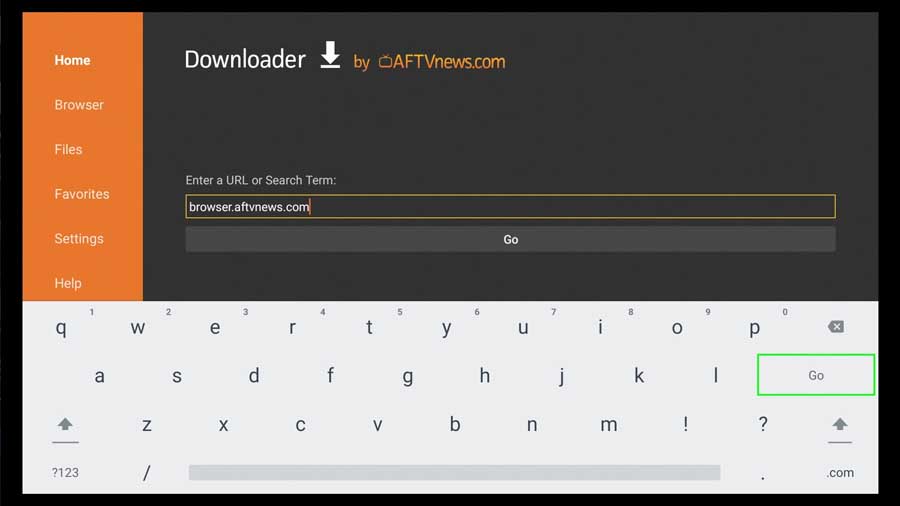
Once it is typed in correctly, click Go to start the download.
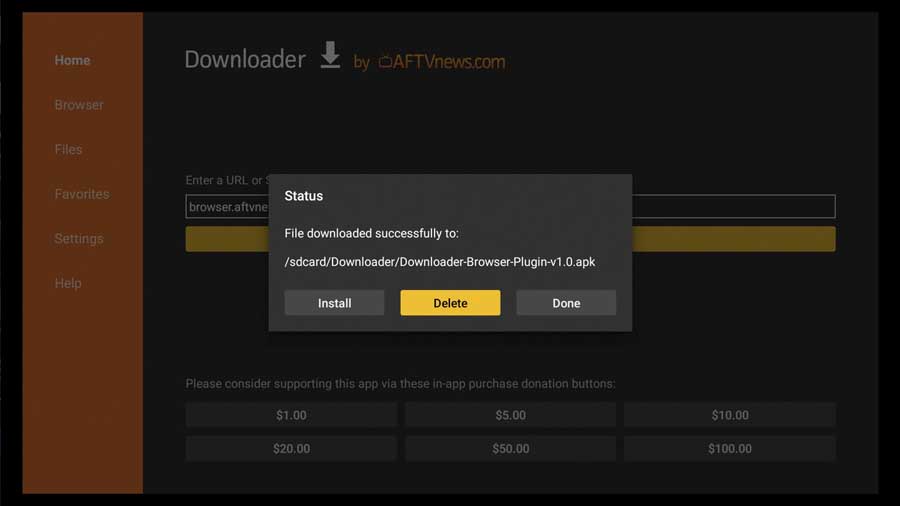
After downloading the file, you’ll get a pop-up box with three options: Install, Delete, and Done.
- Install will take you through the installation process.
- Delete will delete the installation file from your device. It’s usually a good idea to do this after you install the app to save space on your device.
- Done will close the pop-up box and take you back to the Home screen.

Click Install to continue.
Note: If you still need to change the setting to allow Downloader to install apps from unknown sources, you’ll be given that opportunity now.
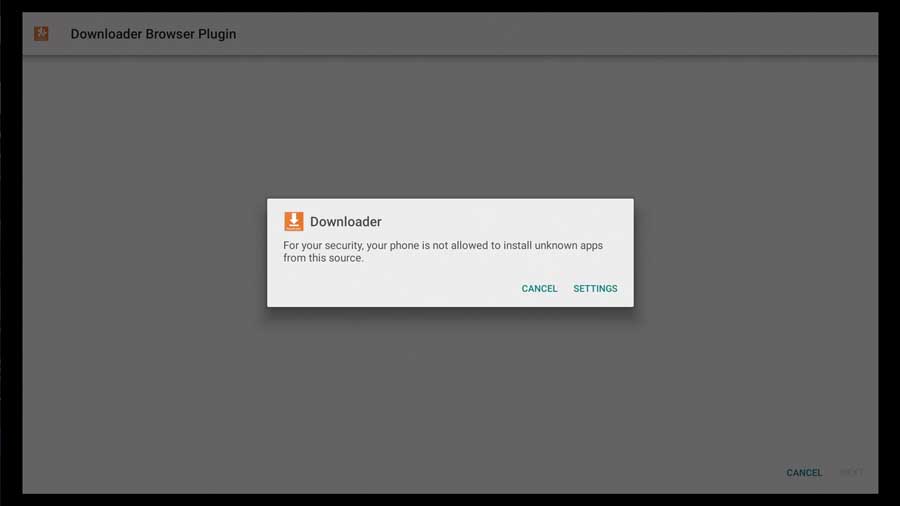
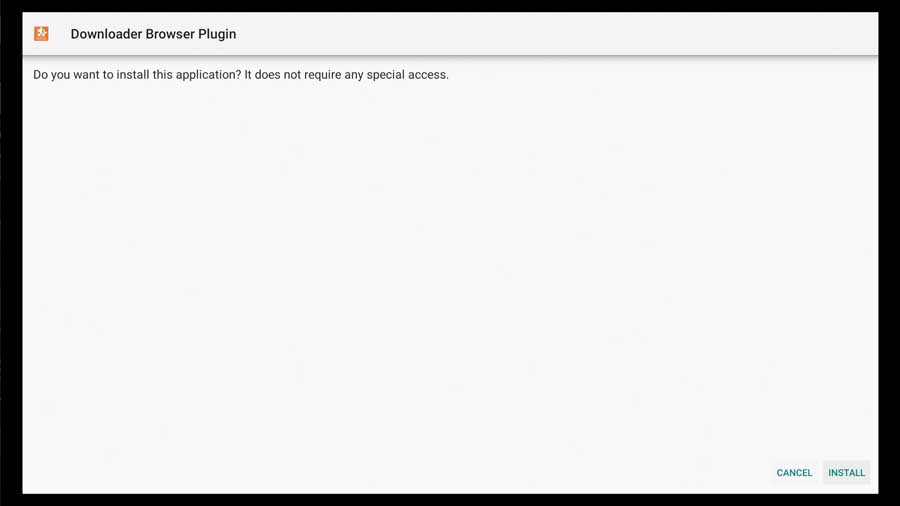
Once you’re back at the all-white installation screen, the system will verify that you want to install the plugin.
If we were installing anything requiring special permissions, we could approve or deny those here.
Since the plugin we’re installing doesn’t require anything special, go ahead and click Install in the bottom right-hand corner to continue.
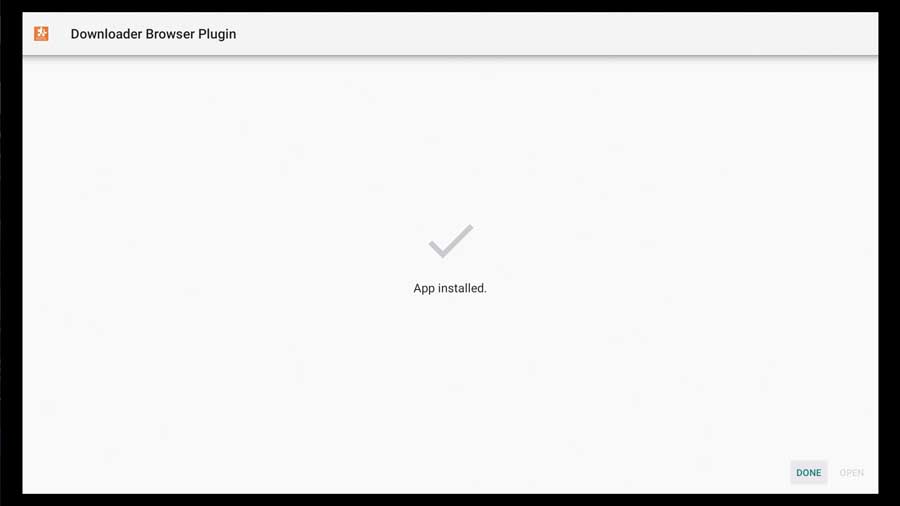
You’ll get the “App Installed” message a few seconds later. Click Done to return to the app.
Here’s the only confusing part of the entire process.
You’re returned to the very same pop-up box you left a few seconds ago, and there’s no indication that the process was completed.
Yes…I know. I literally just saw a message that told me the app was installed, but this still threw me off when I saw it the first time.
I recommend Deleting the APK file to save space on your device. However, if you want to keep it for whatever reason, click Done to return to the main menu.
Using the Integrated Browser
Once the browser plugin has been installed, Google TV & Android TV owners can use the integrated browser.
It’s basic by design since you’re only going to use it to easily download files and APKs you want to install.
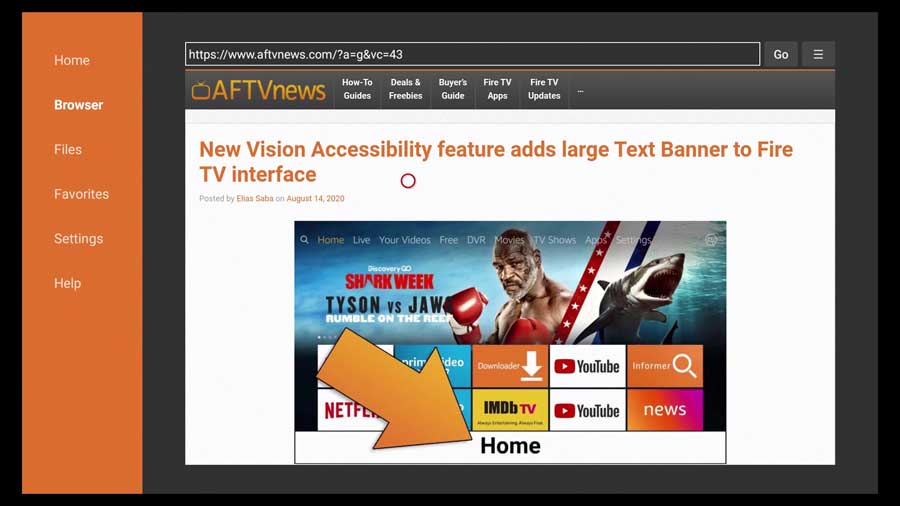
Navigating is super easy. I love that you can navigate around without needing to change your remote to air-mouse mode – if you even have an air mouse.
The red circle you can see in this image under the word Accessibility in the title is your cursor.
You can use the D-pad to navigate around the screen, up to the search bar, or to the menu in the top-right corner.
The menu options are also pretty basic. The most practical option is adding frequently visited URLs to your Favorites so you can return to it quickly.
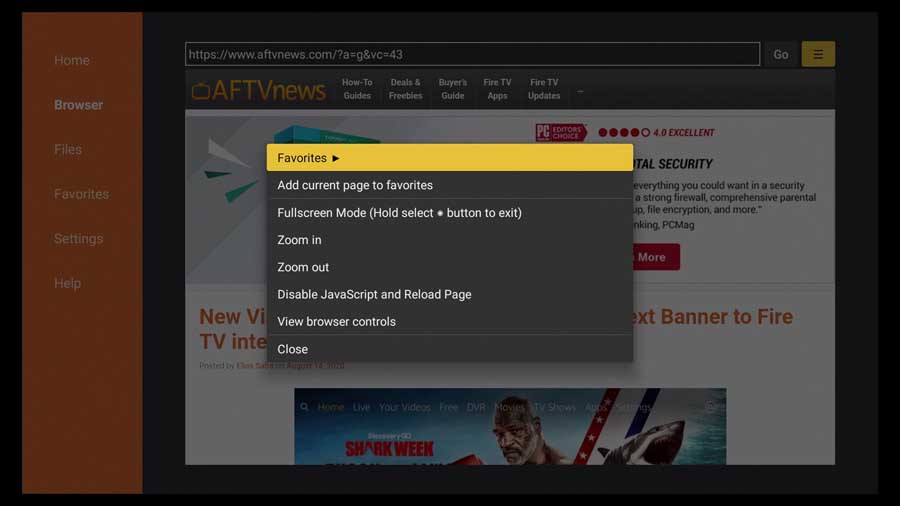
From this screen, you can zoom in or zoom out on the page or go to full-screen mode. You can also disable Javascript and reload the page you’re currently on.
That’s a great feature if you’ve got some troublesome scripts causing the page to hang.
Files Menu
In the Settings screen, you can specify the folder the Downloader app uses to save APKs that you download from the Internet.
The Files page is the app’s basic file manager, giving you instant access to these APKs without needing to go to a file explorer and manually navigate the Download folder.
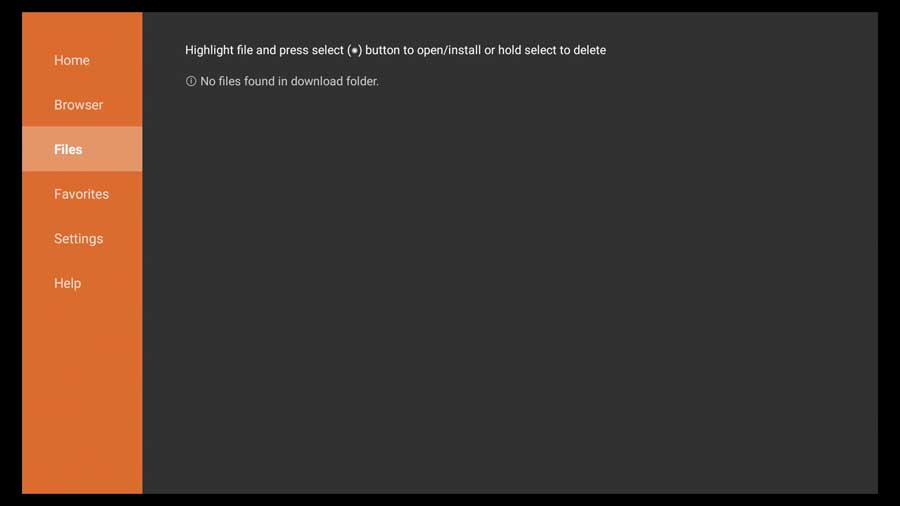
I don’t find this a great feature, but it’s handy if you want to keep all of your APKs on the system after installing them.
Favorites Menu
Unsurprisingly, the Favorites tab on the side menu takes you to a list of your web page favorites.
Because the browser is so lean, this is a great way to still give you that feature without needing to build it into the browser itself.
Again, this isn’t a feature I use often, but it’s definitely a nice-to-have.
Settings Menu
There are only four basic settings to change in the Downloader app; honestly, I’ve never found the need to change any of them.
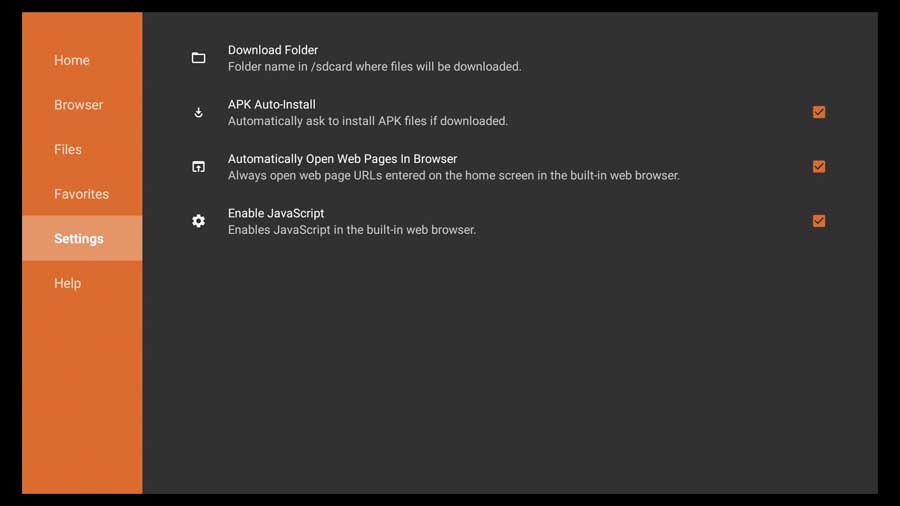
The first is the default Download Folder where you’d save any files you download through the app. You can change it here if you absolutely have to have your files saved in a specific directory.
In most cases, I’d go with the default.
Second, we have APK Auto-Install. In most cases, you’ll leave this checked to automatically ask you if you want to install the app immediately after downloading the APK.
Sometimes, you may download the APK as a backup or transfer it to another device, but that’s rare. I recommend leaving this checked as well.
Third, we can Automatically Open Web Pages in the Browser.
This will open any URLs you enter on the home page in the integrated browser. You won’t need this if you download files directly (using the long URL and file name). Keeping it checked will make the overall experience easier and more seamless.
Finally, we have the option to Enable JavaScript. Many websites use JavaScript to add additional functionality. However, because this is a streamlined, basic browser, JavaScript may cause some errors.
This allows you to disable the scripts if they’re giving you problems.
Help Menu
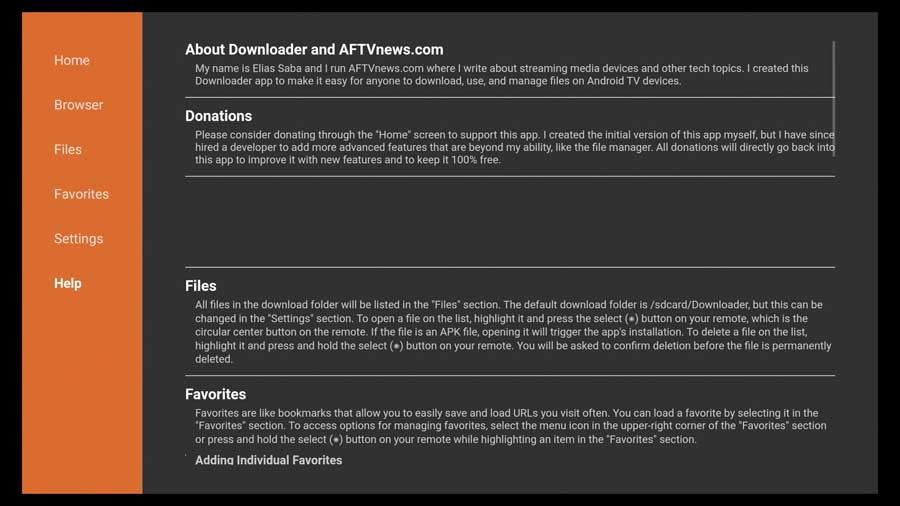
Finally, we have the Help tab. This gives you a basic rundown of the features of the app.
Wrapping It Up
I can’t say enough good things about the Downloader app.
It’s the first thing I install on a new Android TV device because it gives me access to apps that I wouldn’t be able to install otherwise.
Sideloading apps used to be a huge pain, but it’s super easy with this app.
- How to Install Kodi Diggz Xenon Plus & Free99 Build [March 2024] - March 3, 2024
- How to Enable Unknown Sources on Chromecast with Google TV [2024] - October 30, 2023
- How to Install the Seren Kodi Addon [2024] - October 29, 2023

