Last Updated on August 28, 2023 by Tim Wells
In this article, we’ll look at the Homelander Kodi addon, review it and let you know what kind of content you can watch with it. Then, we’ll cover how to install it on your NVIDIA Shield, Chromecast, FireStick, and Android TV Box.
Since the Homelander addon isn’t available in Team Kodi’s official repository, you might be wondering whether it’s safe or legal.
We’ll address these questions and more as we examine this popular live-streaming addon.
This guide offers a step-by-step tutorial with screenshots to help you through the installation process.
All screenshots are from a Chromecast with Google TV. However, the process is identical on other devices such as the Amazon Fire TV Stick, NVIDIA Shield TV, Windows PC, and smart televisions running Android TV and Google TV.
What is the Homelander Kodi Addon?
Homelander is a popular Kodi addon with a wide range of content, including movies, TV shows, and documentaries. It’s one of several great addons found in the The Crew Repository. Others include The Crew, Moria and DaddyLive.
Homelander’s main menu includes sections for Movies, TV Shows, My Movies, My TV Shows, New Movies, New Episodes, People, Tools, and Search. Users can explore their favorite movies and TV shows through various sub-folders, such as genres, years, most popular, and featured.
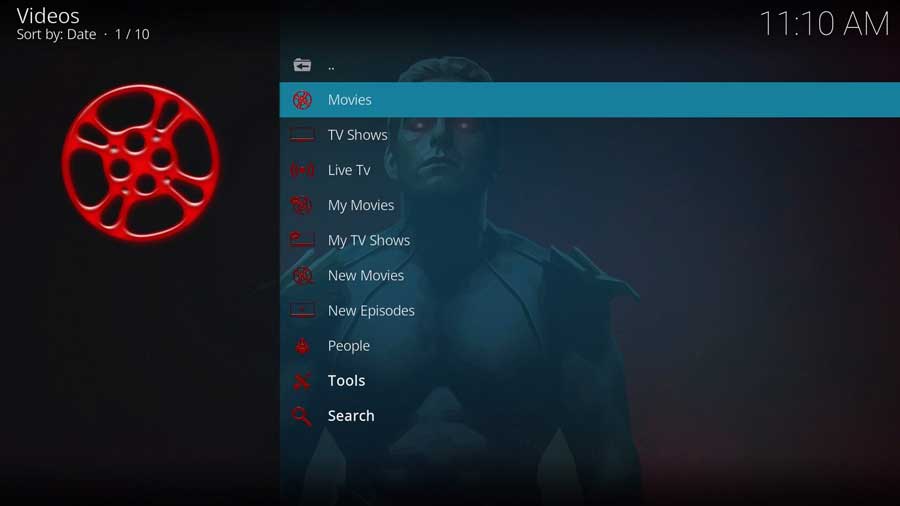
Homelander supports Trakt integration which allows users to sync their content across different devices and platforms.
Overall, Homelander is an excellent addon that works perfectly on various devices, including the Amazon Fire TV Stick 4k. \
Is the Homelander Kodi Addon Safe?
Homelander is part of The Crew’s Kodi repository. Before installing any addon, it’s a good idea to scan their repository URL to make sure there are no suspicious files or malware.
You can do that for free with a service called VirusTotal.
This screenshot of the scan results shows that VirusTotal did not find anything suspicious in The Crew’s repository URL.
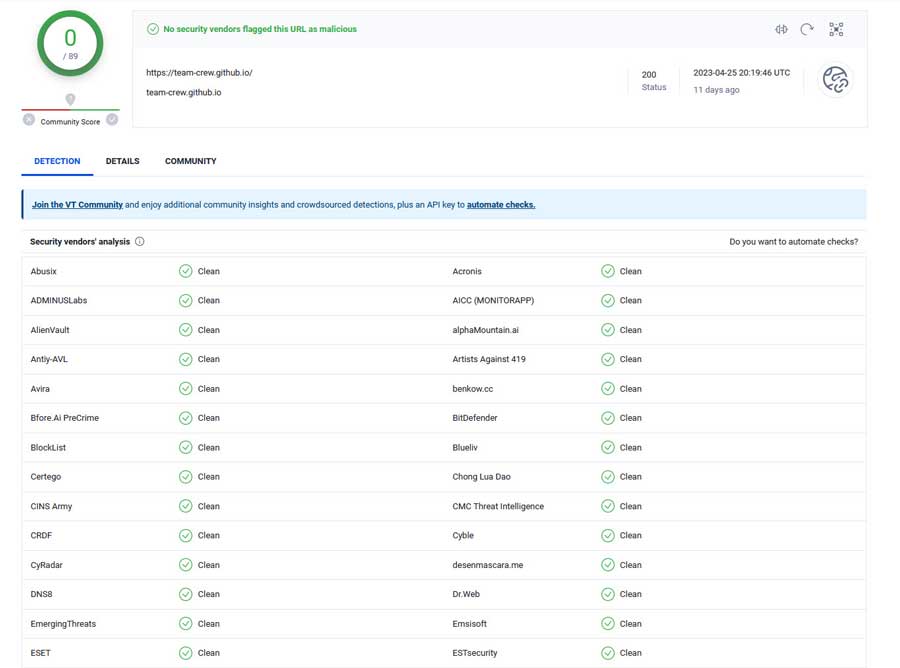
However, you should still protect yourself when streaming content from unverified third-party add-ons like Homelander.
As we saw during the “Enable Unknown Sources” part of the setup, Kodi warns users that these third-party add-ons will be given access to personal data stored on the device.
Therefore, I recommend using a VPN to protect your online activity from being tracked by your Internet Service Provider.
What Your ISP isn’t telling you…
Your ISP knows more about you than you think!
Your IP address is your online fingerprint. It logs everything you do online and is visible to your Internet Service Provider, the apps & addons you use, and even the government.
Kodi Builds & Addons offer unlimited free streaming content, but there are risks.
Stream safely with Surfshark.
The Best VPN hides your identity and bypasses geo-blocked content and government surveillance while letting you stream your favorite movies buffer-free.
I’ve tested all the major VPNs on Android TV boxes and recommend Surfshark. It’s the fastest VPN for streaming and gives you access to the most geo-blocked content!
SAVE 81% ON Surfshark!!!
Try it risk-free for 30-days on unlimited devices at the same time.
After installing a VPN, you can follow the steps to install the homelander Kodi addon through their repository.
How to Install the Homelander Kodi Addon
In this tutorial, we will start with a clean installation of Kodi 20 Nexus and install the Homelander addon.
Since this is a clean install of Kodi, I haven’t installed any other addons on this particular device or even set up my media library.
Even if this is the only thing you want to use Kodi for, follow these instructions, and you’ll be up and running with Homelander in only a few minutes.
Step 1: Enable Addons from Unknown Sources
With every new installation, Team Kodi includes its official repository. It contains hundreds of different addons to change the look & feel and add new video sources, backgrounds, or utilities like checking the Kodi log files.
It’s enough to give you a good start.
Unfortunately, many popular addons aren’t in the official Kodi repository. We first need to enable addons from unknown sources to install addons from other repositories.
First, go to the Settings menu. You can get there from the gear icon on the left-hand menu or the Add-ons tab.
Click on Settings, as shown below.
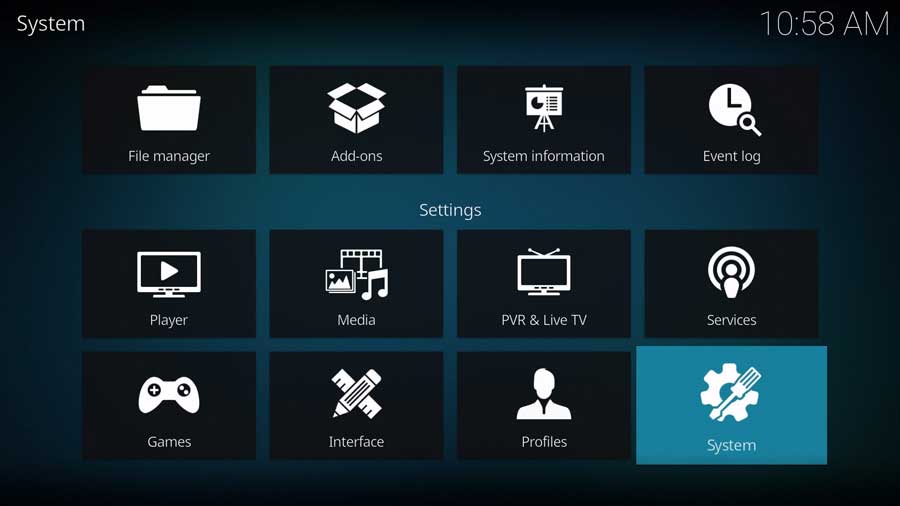
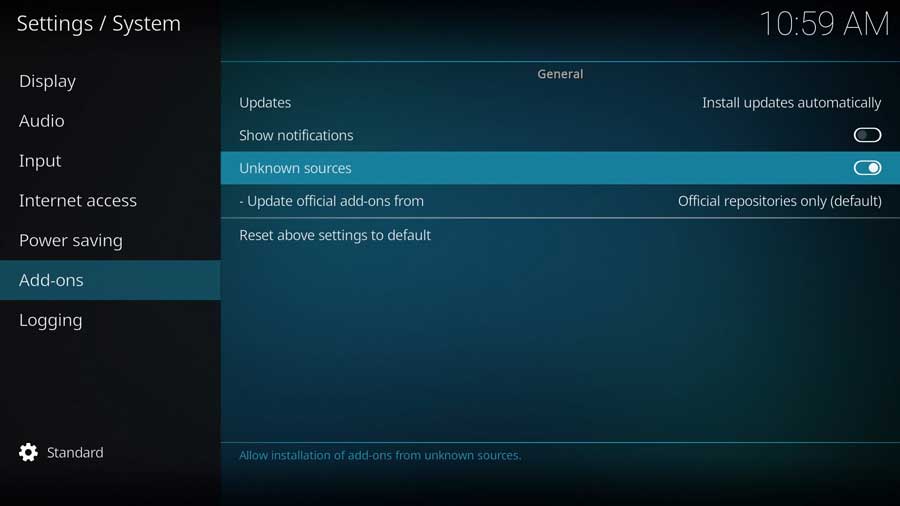
Then, on the Settings/System menu, scroll down to the Add-ons section.
I’m in the Standard menu settings, as seen in the image below. But even the Basic level of settings will allow you to enable Unknown Sources, so you don’t need to change anything.
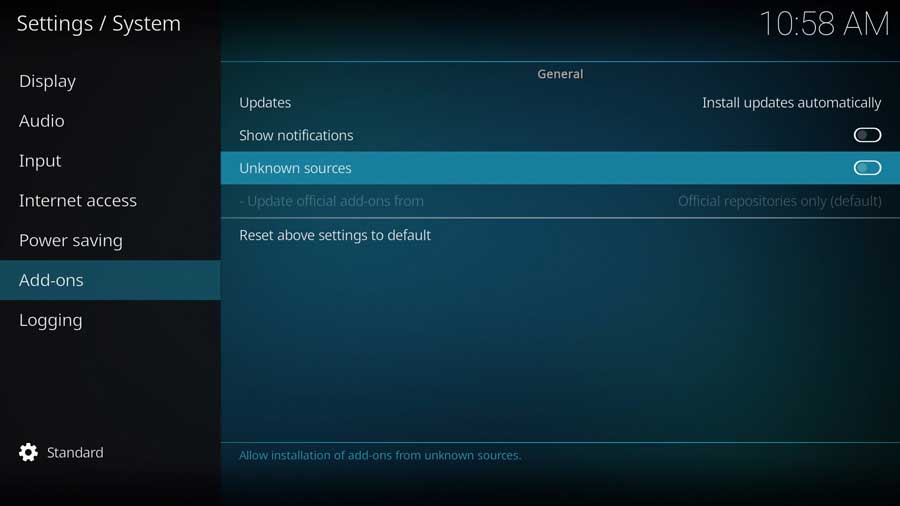
A menu box will appear as soon as you click on the Unknown Sources toggle switch.
Kodi add-ons inherit the same rights and permissions as Kodi itself. This includes access to your device’s files and network connections.
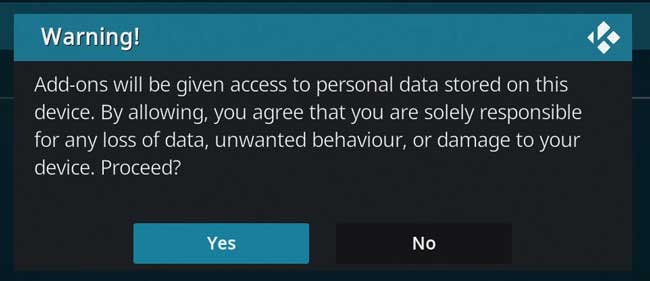
Even if you don’t store personal data on your Kodi box, never install an add-on you don’t trust.
Once you click Yes on that message box, the toggle switch turns white. Then you’re able to install The Crew addon, as well as any other unofficial Kodi addon.
Step 2: Add The Crew Repository File Source
Installing the Homelander addon is a three-part process.
As I mentioned, Homelander is part of The Crew repository. So, the first thing we need to do is add the location of The Crew’s repository file before we can install Homelander.
First, go to the Settings/System menu and click on the File Manager icon.
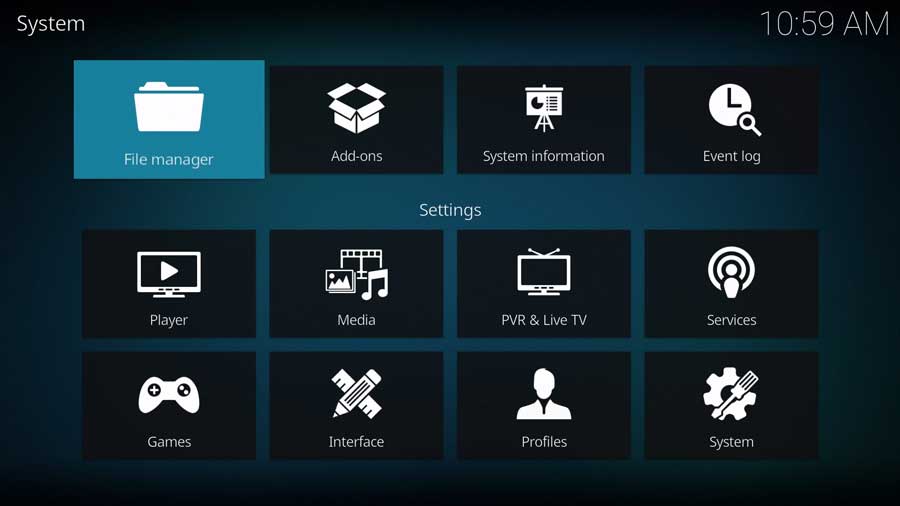
Most of the time, we use the File Manager screen to point Kodi to the locations of our media library. This time, we will tell it where the repository file is located.
Click on Add Source to continue.
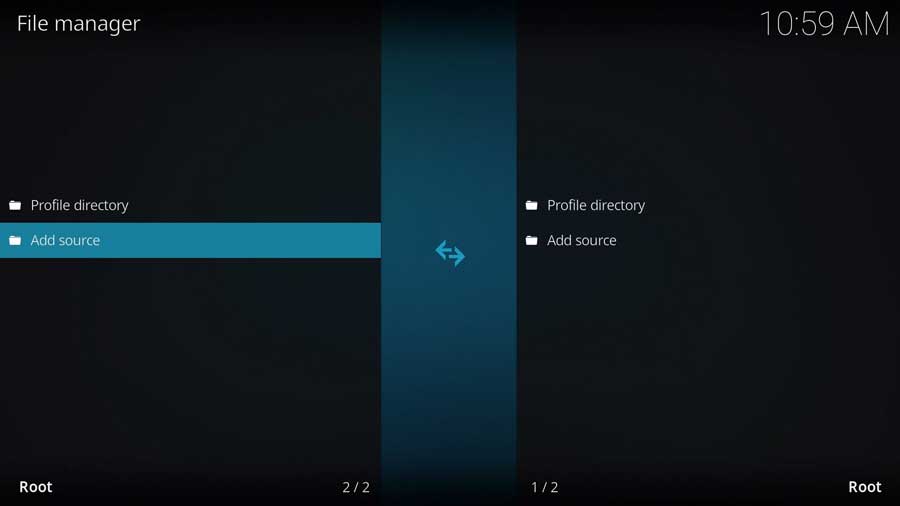
Highlight <None> and click on it to add a custom source.
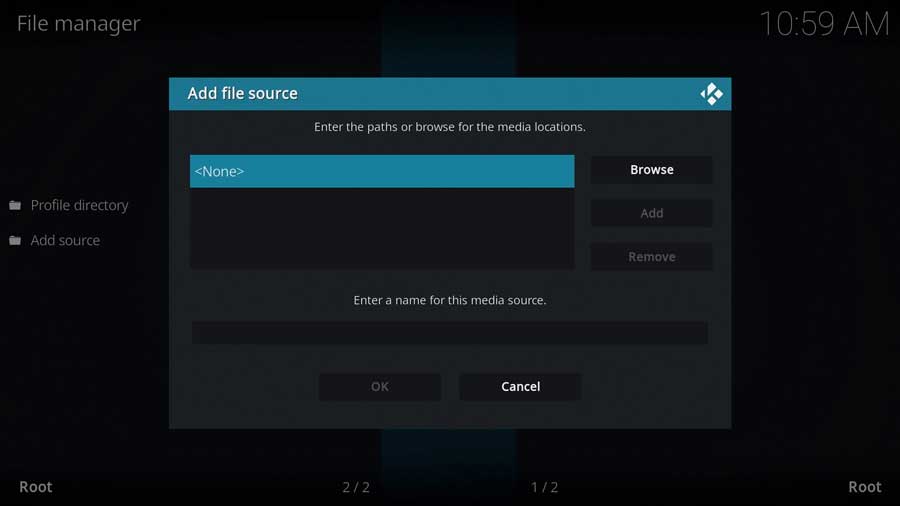
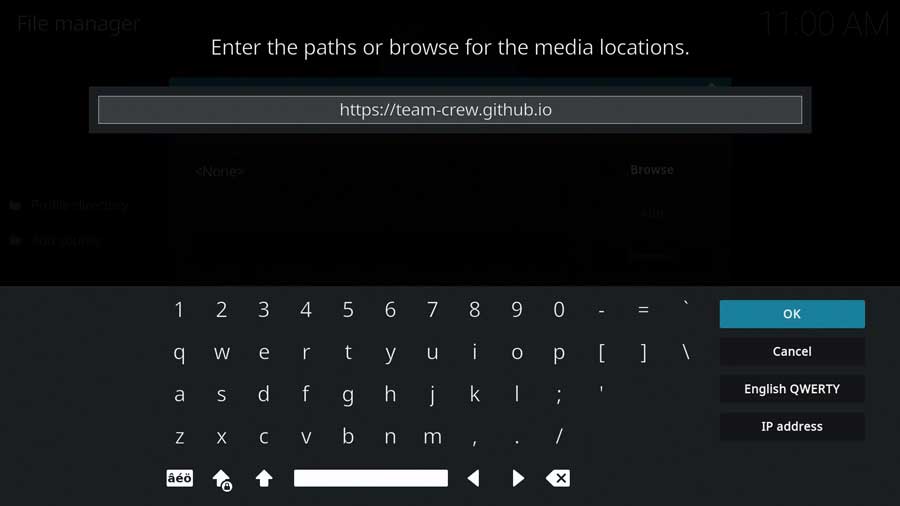
This screen lets you input a specific file path on your device or a network. We will use the network URL for The Crew’s GitHub page in this case. GitHub is a website where a team of developers can store the code they’re working on so that everyone can access the most up-to-date source code, no matter where they’re working.
Type in the following URL and click OK:
https://team-crew.github.io
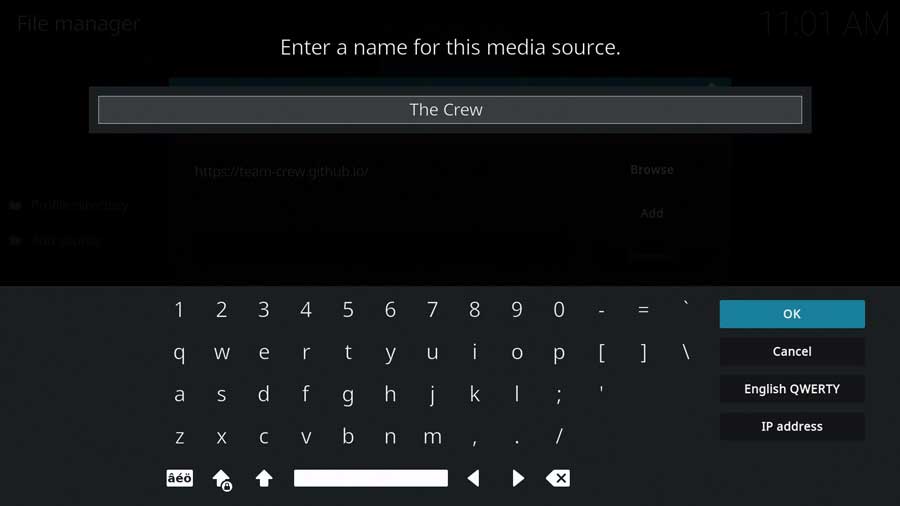
Next, create a name for this media source. This can be anything you want, so I named mine ‘The Crew.’
Click OK to continue.
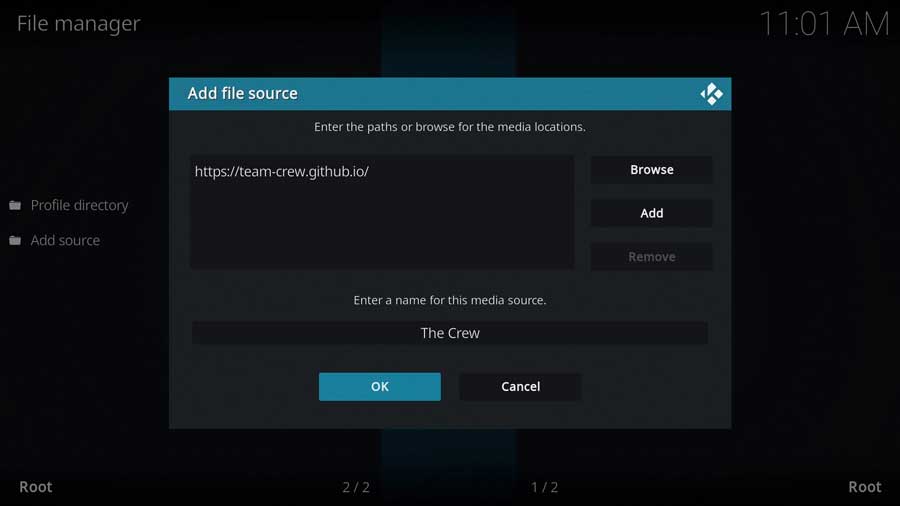
Once you type in the URL location and source name, click OK to finish this step.
Step 3: Install The Crew Repository from Zip File
In the previous section, we told Kodi where to find The Crew’s repository file.
Now let’s go ahead and install it.
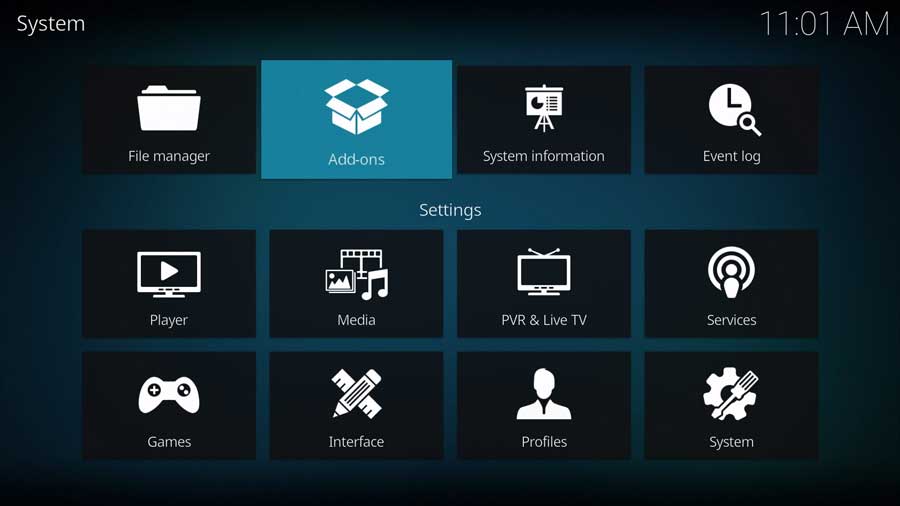
Go back to the System menu and click on the Add-ons icon.
Next, click Install From Zip File.
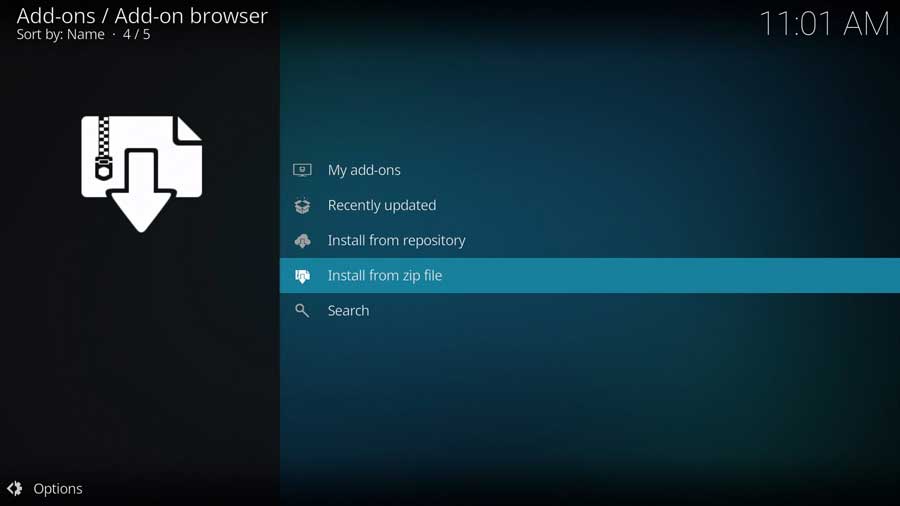
Depending on what version of Kodi you have, a popup window may appear, reminding you that any add-ons installed from a zip file will not auto-update.
This means you will need to manually update them from time to time.
Click Yes to close that popup box.
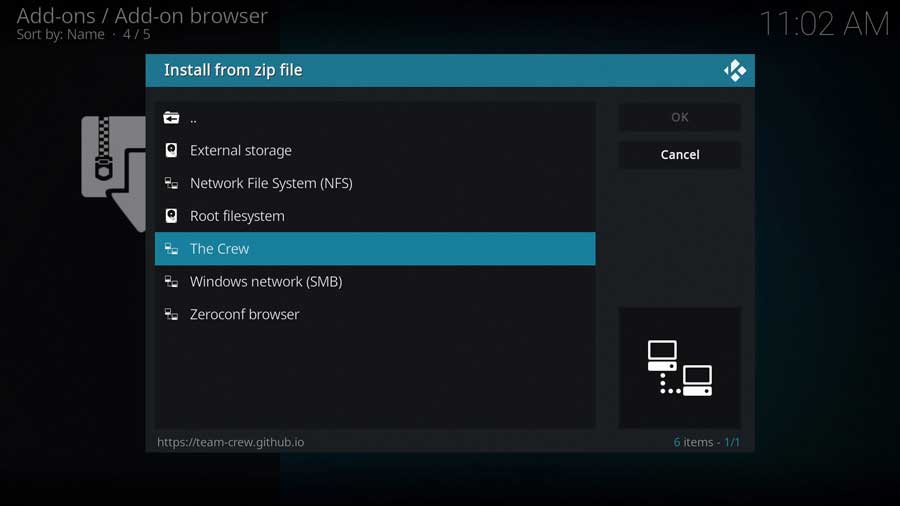
The next window shows all of the standard Kodi locations and any custom file locations you’ve specified on that particular device. For example, if you have a network file share, it will be listed here.
Scroll down until you see the source name you entered in the previous section. In my case, I named my source location ‘The Crew.’
Click on it to continue.
Then click on the repository.thecrew zip file.
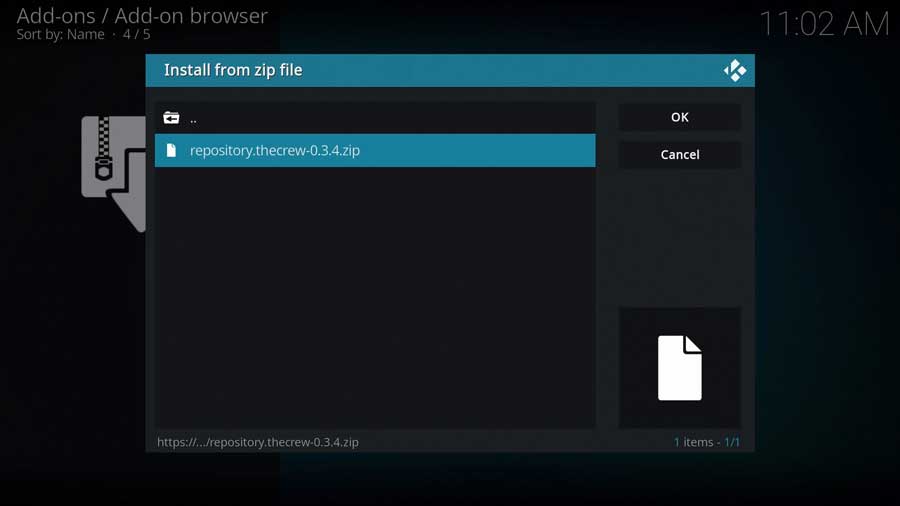
Don’t worry if the version number appears slightly different than you see below. Kodi will automatically pull the latest version from their GitHub site for you.
Kodi will take you back to the main Add-ons menu. After a few seconds, you’ll get a message box that The Crew repository has been installed.
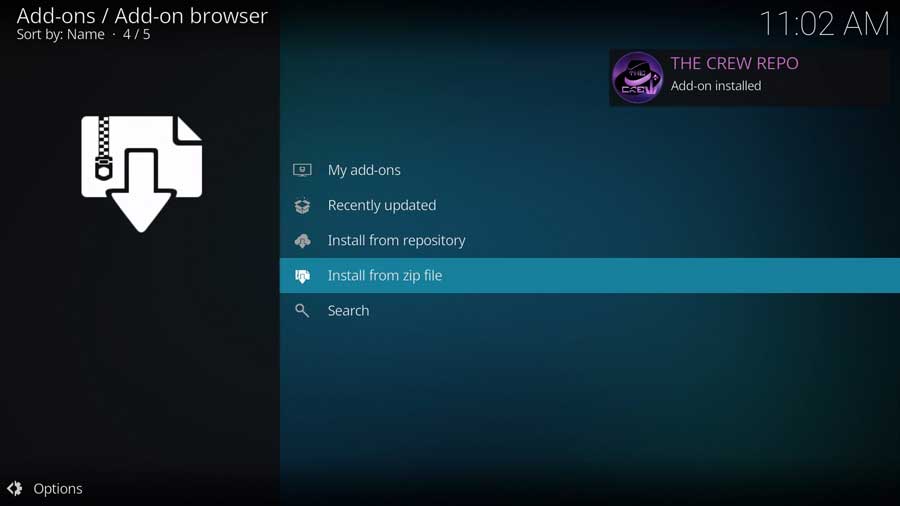
Step 4: Install the Homelander Addon from the Repository
With the repository installed, the final step is to install the Homelander addon after the repository is installed.
Click Install From Repository to continue.
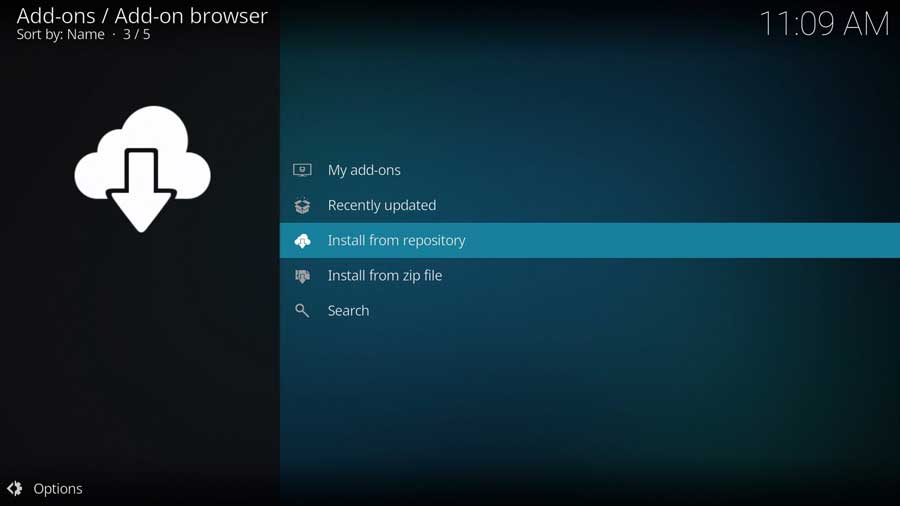
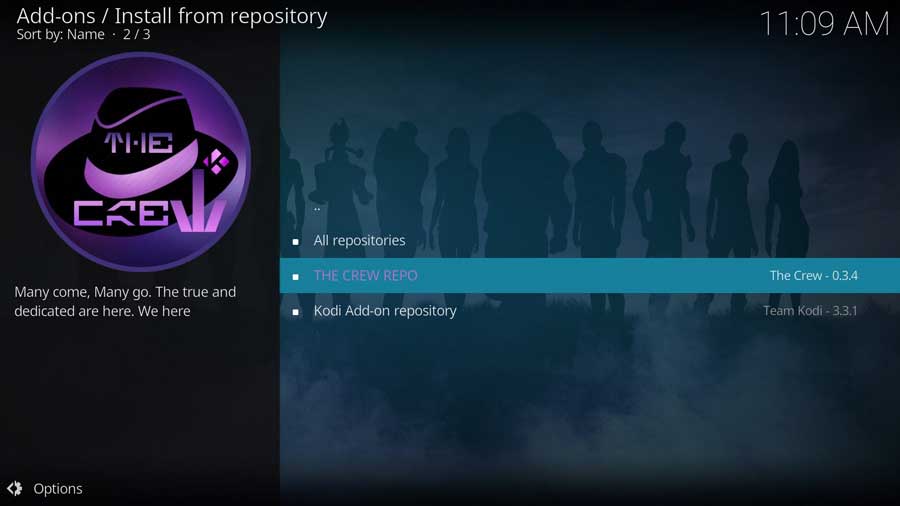
As I mentioned, I’m installing Homelander to a clean install of Kodi 20 Nexus. The only repositories I have on this device are the official Kodi repository and the one we just installed.
You may have a lot more repositories on your system.
Scroll down until you see The Crew Repo and click on it.
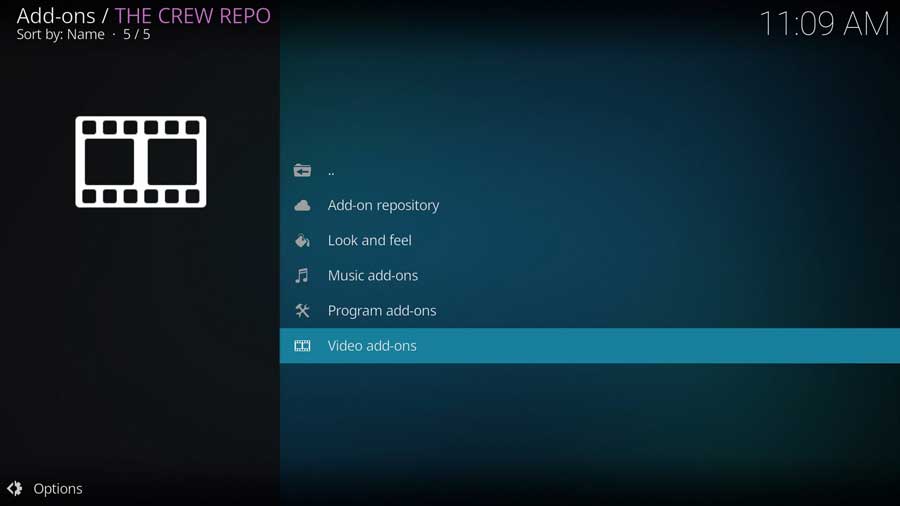
This brings you to the sub-menu that shows all of the individual add-ons included in The Crew Repo, sorted into categories.
Homelander is found in the Video Add-ons section, so click on it to continue.
Scroll down until you see Homelander, and click on it to continue.
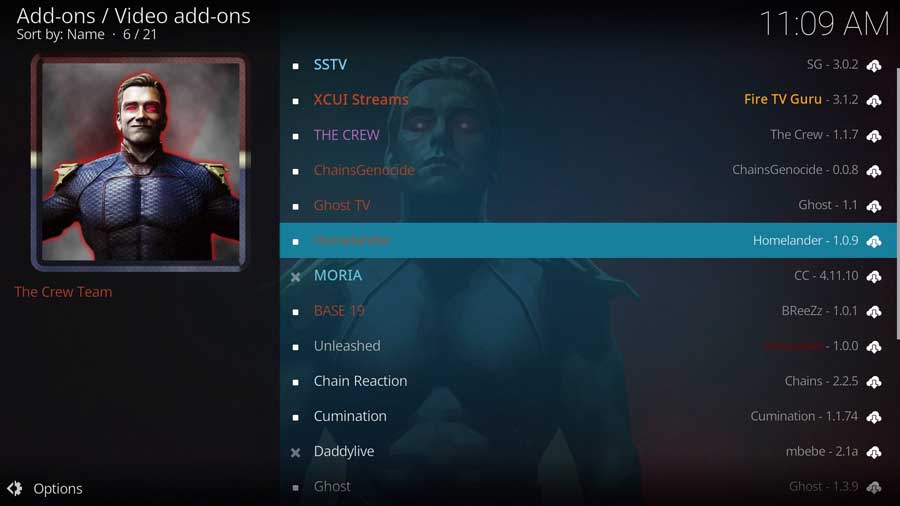
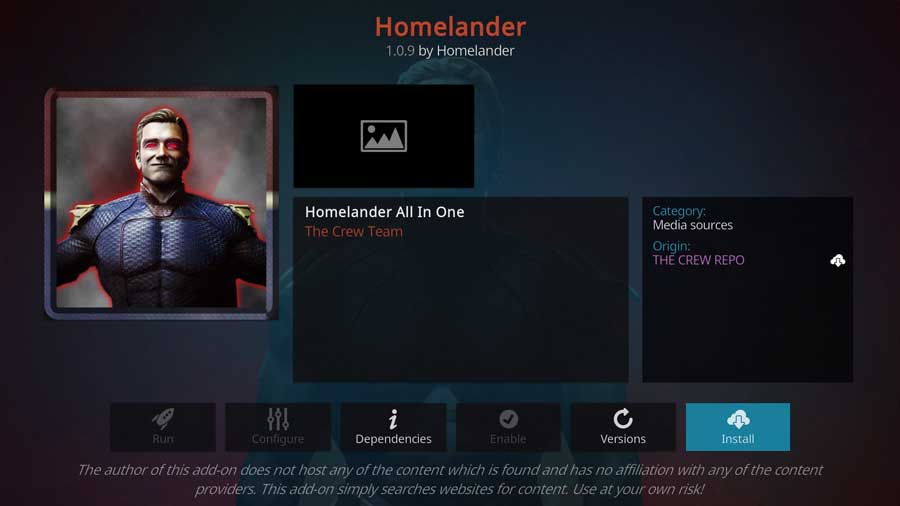
This brings you to the addon detail page, which looks like app detail pages in the Google Play Store or Aptoide TV. It shows you more details, like any different available versions of the addon and any dependencies that will be installed along with the addon.
Click Install to continue.
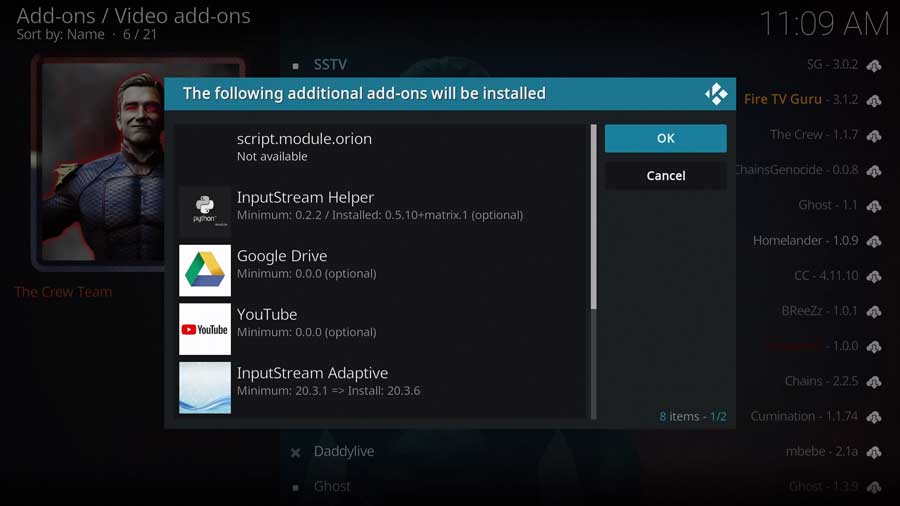
Depending on what you’ve already installed, you may have additional add-ons that need to be installed as well.
In this example, I had eight additional addons that Homelander required to run.
Click OK to continue.
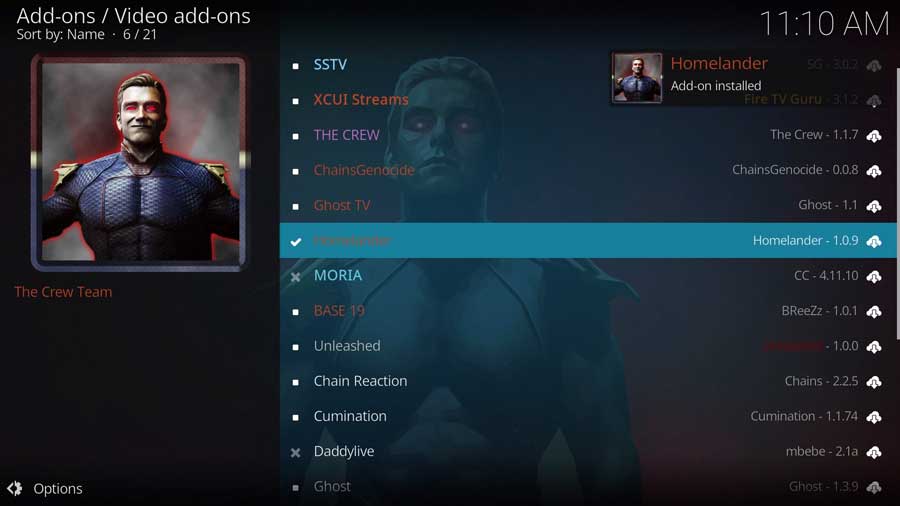
After a few seconds, you’ll see a popup message that the Homelander Add-on has been installed.
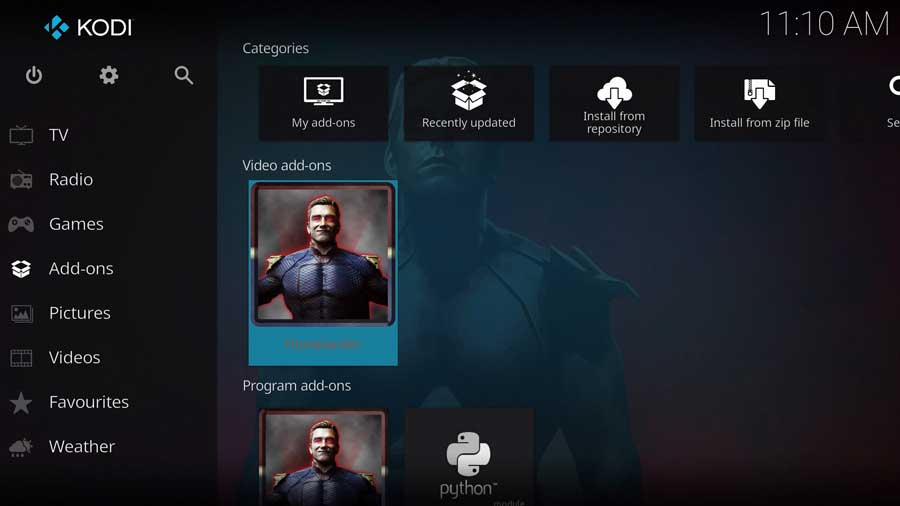
To launch Homelander, go to the Add-ons tab on the left-side menu and click on the Homelander icon.
FAQ
What is Homelander Kodi addon and what does it offer?
Homelander is a Kodi addon that provides a wide range of video content, including movies, TV shows, documentaries, and more. It offers an easy-to-use interface, fast performance, and high-quality streaming links for an enjoyable viewing experience.
What are the main sections and categories available in Homelander Kodi addon?
The main sections in Homelander Kodi addon include Movies, TV Shows, My Movies, My TV Shows, New Movies, New Episodes, People, Tools, and Search. Users can explore various sub-folders within these sections to find their favorite content.
How do I watch movies and shows with Homelander Kodi addon?
To watch movies or TV shows using Homelander Kodi addon, navigate to the Movies or TV Shows sections, and select a sub-folder, such as genres, years, or most popular. Browse the available content and select a title to start streaming.
Is Homelander Kodi addon safe and legal to use?
Using Homelander Kodi addon may be considered risky due to its unofficial nature and potential access to copyrighted content. It is essential to use a VPN and understand your local laws and regulations before using Homelander or any third-party Kodi addon.
Why do I need a VPN to stream with Homelander Kodi addon?
Using a VPN while streaming with Homelander Kodi addon helps protect your privacy, secure your connection, and avoid potential legal issues associated with accessing copyrighted content. A VPN also helps bypass geo-restrictions, enabling you to access a wider range of content.
How reliable and stable are the streams in Homelander Kodi addon?
Homelander Kodi addon is known for its reliable and stable streams, thanks to its top-notch scrapers that search for high-quality streaming links. However, the stability of streams may depend on various factors, such as internet connection and server availability.
What are some alternatives to Homelander Kodi addon for movies and shows?
Some alternative Kodi addons for movies and shows include Exodus Redux, The Magic Dragon, Venom, Covenant, Seren, and The Crew. These addons offer similar content libraries and streaming capabilities, but their features and performance may vary.
- How to Install Kodi Diggz Xenon Plus & Free99 Build [March 2024] - March 3, 2024
- How to Enable Unknown Sources on Chromecast with Google TV [2024] - October 30, 2023
- How to Install the Seren Kodi Addon [2024] - October 29, 2023

